Subscribe to this blog to get new learnings ideas, discoveries, and inspiration from the CREATE MAKE LEARN community, along with updates about our upcoming Summer Institute and Workshops.
In yesterday's March is for Making post we started to explore ways to create boxes or other 3D shapes using makerspace computer controlled tools like laser cutters and electronic cutters.
Today I'll share some great tools for creating files you can cut that can be used to create 3D Shapes
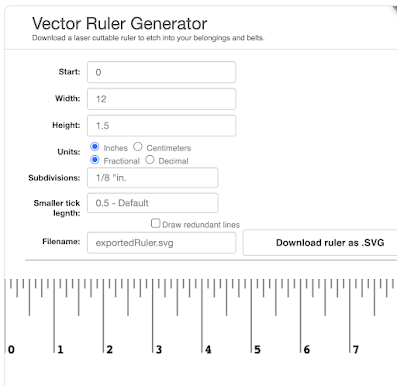
A great place to start might be to customize your own ruler then use that rule to plan your 3D shapes.
Try using this ruler generator How about importing your ruler and adding your name before cutting it using the Text feature in of your cutting software or other vector software like Gravit.
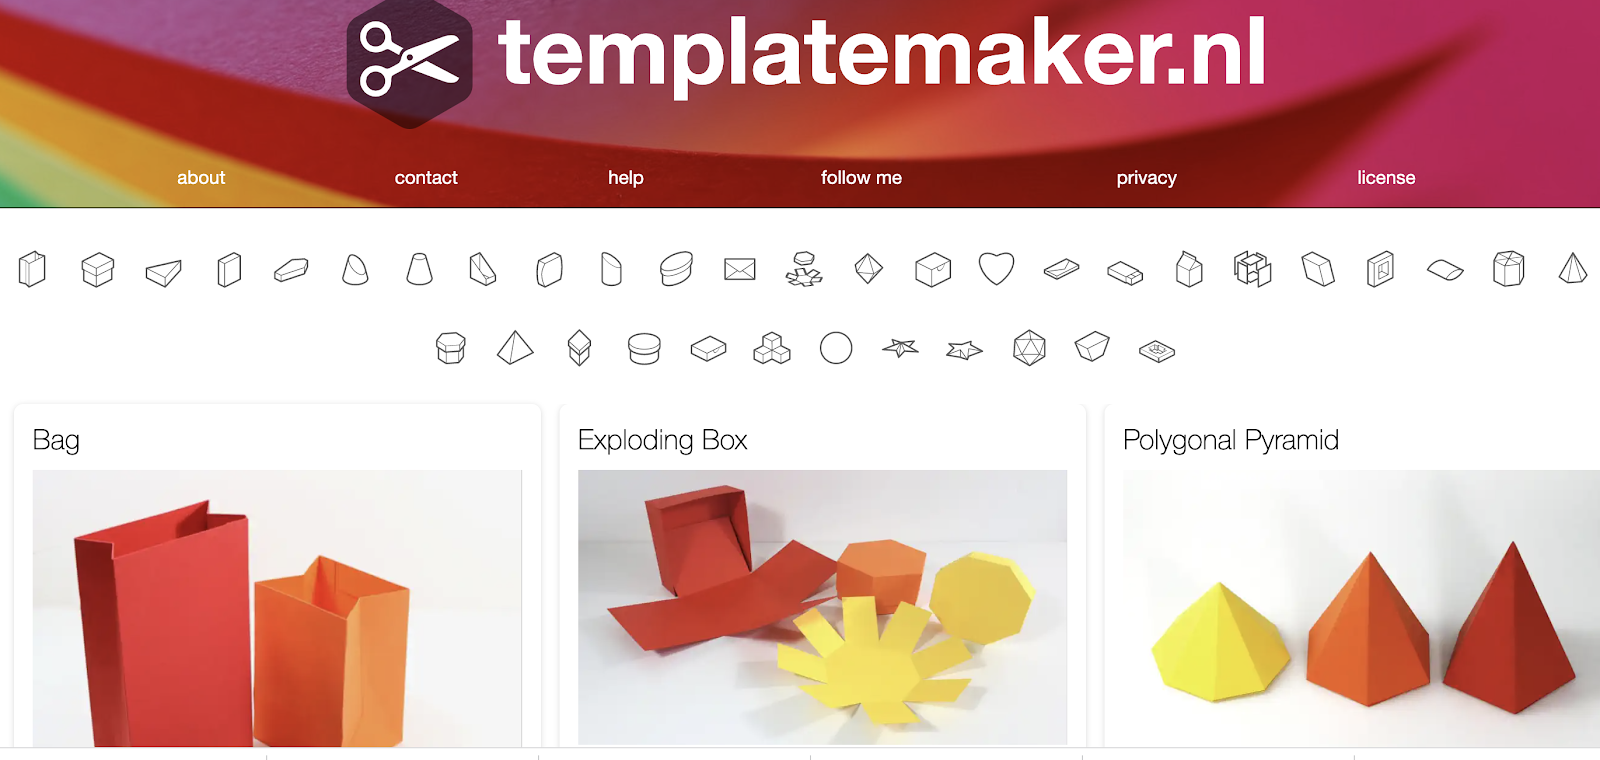
MakerCase is one of the most popular box maker is this simple to use box maker with simulation so you can visualize it before you cut it.
Another popular box maker that includes a lot of variety is Boxes. PY It's a bit more complicated but has so many variations, its worth playing with once you have completed a few more simple boxes
Laser cutters and electronic cutters are great tools for cutting a variety of fairly thin flat materials ranging from cardstock to 1/4 inch wood or acrylic. One of the first things that most people do with these is to create signs.
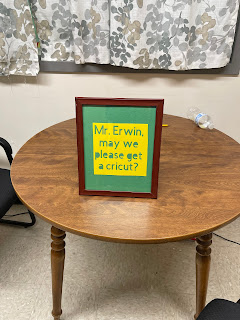
Not long after I loaned out my Cricut cutter to a small k-8 school, the principal found this sign on his desk.
St. Albans City School found themselves creating beautiful signs for their school from old chalkboards that had recently come down when the school invested in new whiteboards.
For Day 9 of my #MarchIsForMaking series, I would like to share some tools that teachers and students might use to get started creating 3D shapes with their maker space cutting tools.
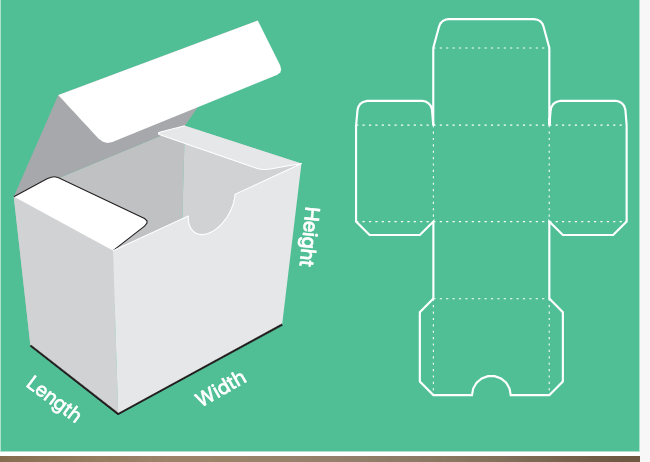
One of the first things you might want to try is to create NETS. Ask your math teacher how they use NETS in their practice, and then consider how your electronic cutter of laser cutter might be used to create these 3D shapes. The 'net' of a shape (also called a geometry net) is a term usedto describe what a 3D shape would like like if it was opened out and laid flat. A net is what a 3D shape would look like if it was unfolded. You can draw and fold nets to make 3D shapes. ~ Learn more at https://www.twinkl.com/teaching-wiki/net
You can find additional information about NETS and their use in at
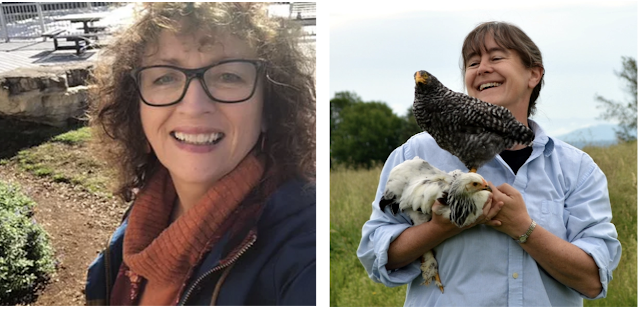
To celebrate International Women's Day, I share an interactive maker project that I created a few years ago that was inspired by two amazing women - Lauren Wooden and Sarah Rosedahl whose paintings were inspired by the Women's March.
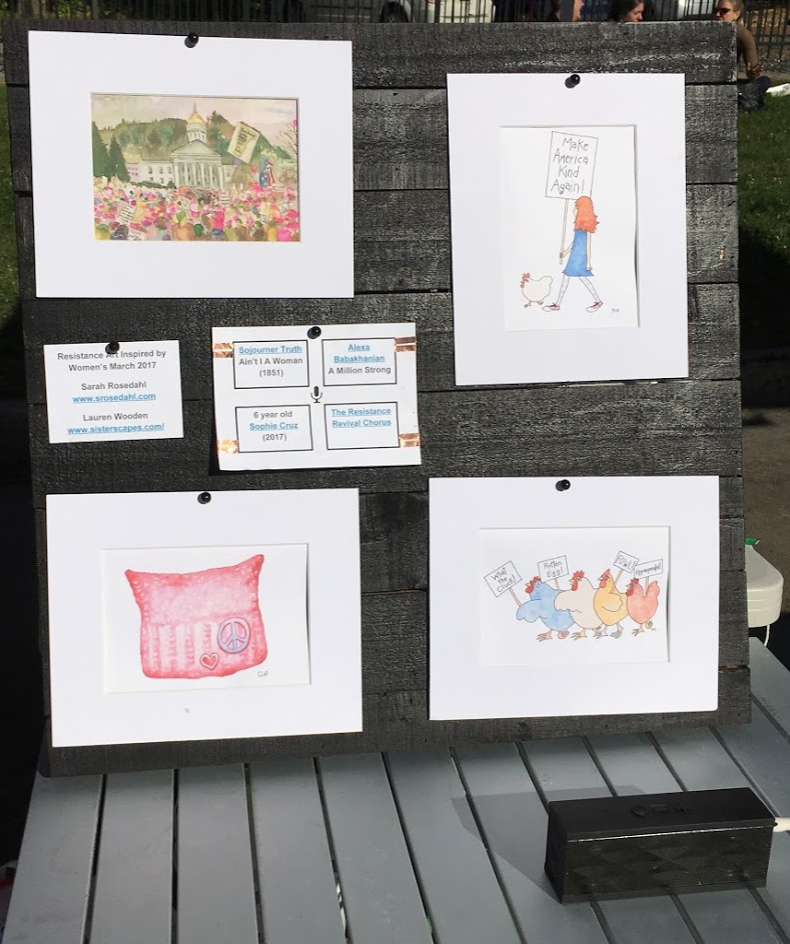
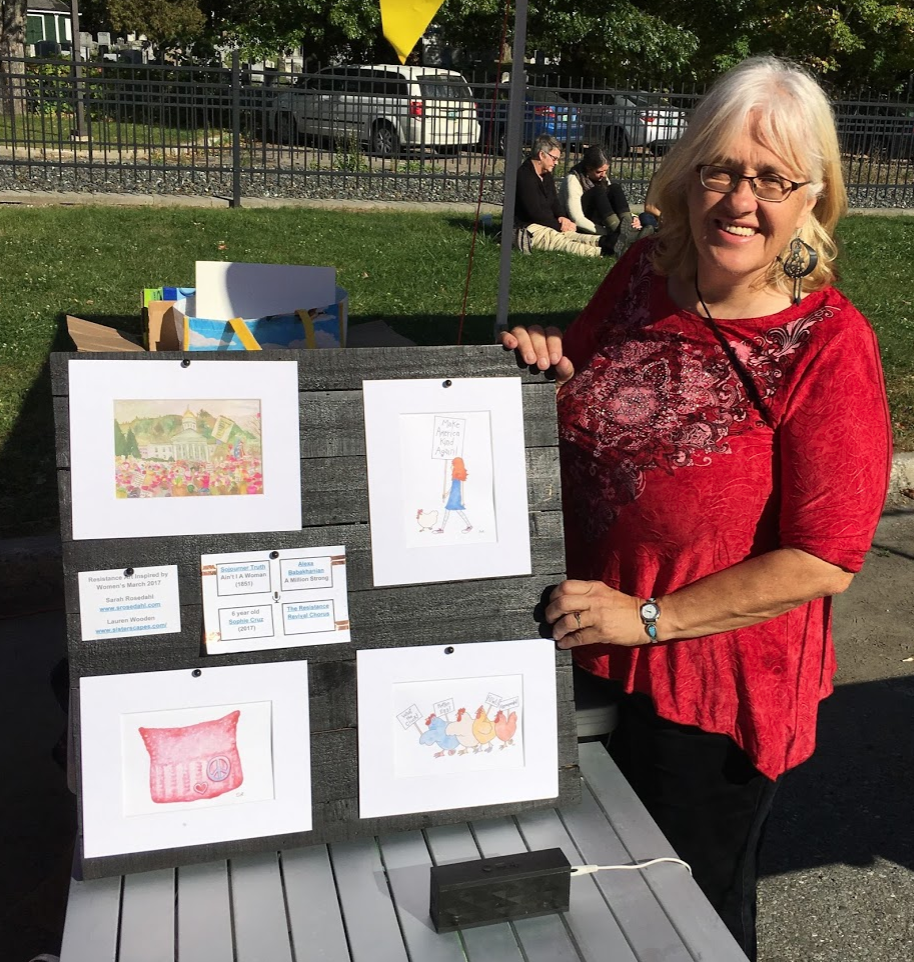
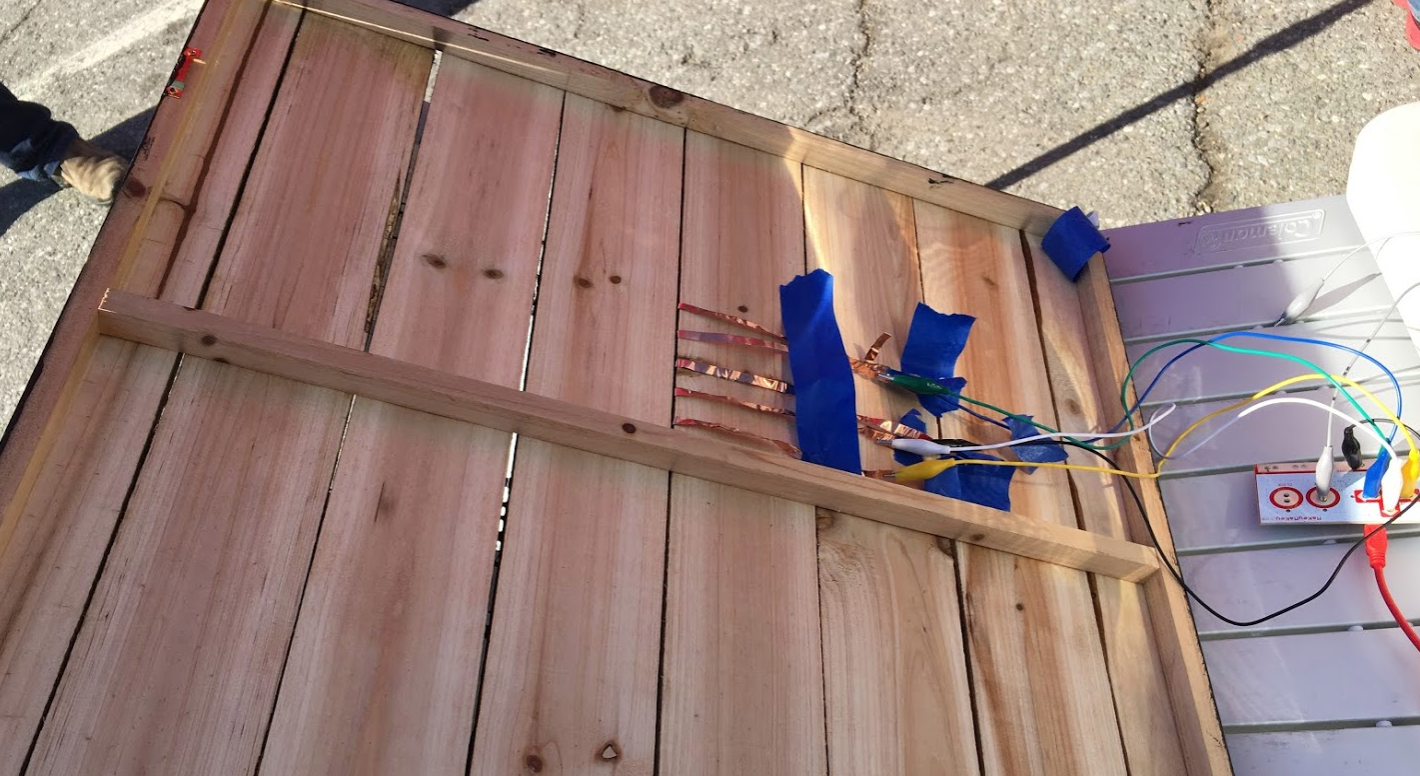
I created a black wooden backdrop to showcase the their paintings.
I used a Makey Makey, some copper tape and a few wires to create triggers that would allow the audience to be inspired listening to audio of their choice as they enjoyed the art inspired by the Women's March. The Audience can select their preferred audio piece by touching the little copper tabs next to each audio selection.
This project became very personal to me. I got to feel that maker empowerment that our students feel as they create, make, and learn. But I also remembered all the women in my life who had inspired me, including teacher - Maggie Griffith who made sure I wold become the first person in my family to attend college.
I thought of all women who have joined me in creating events that inspire girls to swim in the deep end of the pool when it comes to using technology.
I thought of all the girls who have attended Tech Savvy Girls Camp over the past 20 years who have inspired their sister campers.
Here's a sneak peak around back so you can see how the Makey Makey is connected to create triggers on the board.
To experience the Interactive Board virtually and learn how I created this project, check out the following SCRATCH PROJECT where I describe the process of creating this interactive board. The SCRATCH PROJECT also simulates the experience of interacting with the board itself.
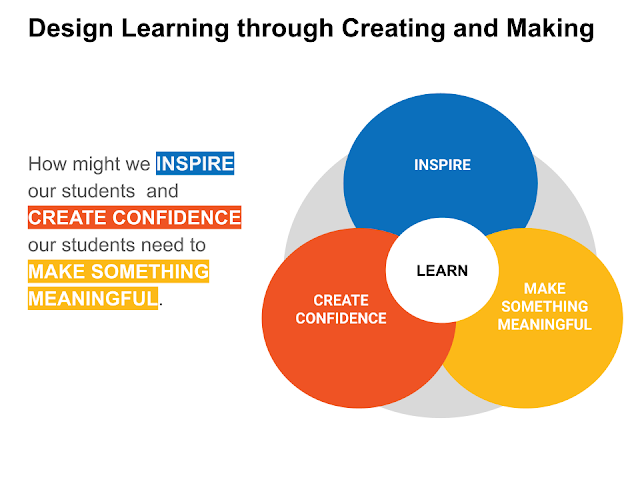
On the 2022 March is for Making Day 6 I would like to share a refresh to the Create Make Learn framework for designing LEARNING Through Creating and Making.
The INSPIRE phase is a time to explore something in a way that motivates the learner to create and make something meaningful. It is based on the belief that MOTIVATION is the foundation of all meaningful learning.
INSPIRE
Showcase some inspiring examples.
Set up some stations for learners to explore that lead to wonder and curiosity.
Consider a short activity that leaves the learner wanting more.
Once a learner is inspired, it is helpful to take some time for the learner to create confidence with new tools and processes. Short tutorials or skill building activities introduce the learner to new tools or skills. This could take the form of a smaller teacher lead project or self directed resources where the learner can practice their new skill.
Combine inspiration with a dose of confidence and your learner is ready to
Make Something Meaningful.
What does it mean to make something meaningful.
A colleague, Michael Pope, uses this criteria with his students.
Solves a problem
Helps us when we need it
Benefits others
Completes an objective that it was designed for
Reminds you of something important
Has personal meaning
Evokes emotion
Looks nice
Takes effort to make
Something you want to do
Here's what that looked like for a group of of 5th graders at Mallets Bay Elementary School.
After setting up a display of musical sunflowers for students to explore they were inspired to learn to code. I lead a 90 minute session introducing the Makey Makey circuit board and some basic coding skills using Scratch (by MIT).
During the next few weeks a group of 10 students created an interactive Fall display for their school open house during CHOICE time.
What would you or your students aspire to make as a meaningful making project? How might you inspire them and prepare them with the confidence they need to succeed?
On Day 5 of the March is for Making series, I'd like to introduce you to one of the most inclusive and accessible maker spaces I've had the pleasure of visiting (and joining).
Many of you know that Craig and I usually spend 6 months traveling in our 1983 Bluebird bus named BELLA. Last year was an exception due to COVID. During our travels across the country, we are always on the look out for creative spaces to visit or to meet other creatives. This winter we revisited Tucson's maker space - Xerocraft.
Our plan was to be in Tucson for a month right before Christmas. And since December is always a fun month for creating and making and this year I inquired as to whether I could join Xerocraft during our stay. Their website indicated that they allowed monthly membership and they welcomed me as a member. I was so excited about the possibility to access to a laser cutter for some holiday presents I hoped to make.
Yes, I got access to the laser cutter, but I also discovered an amazing maker community and made some new friends. We visit lots of maker spaces in our travels, and I have to say that Xerocraft is the friendliest, most accessible and inclusive maker space I've had the pleasure of engaging with.
The fact that they allow one month membership makes it very accessible. They don't have a lengthy tool certification process, and instead volunteer shop leads get you up to speed so you can get started quickly and safely.
Guy and Terry got me going with their laser cutter within days of my joining, and I experimented with lots of iterations for ideas I had for holiday presents. It was so handy to be able to purchase materials in house as I needed it without having to interrupt my making to go source wood.
I noticed a sewing class happening on the Wednesday night and was welcomed by Cyndi and several members working on a variety of sewing projects.
That night I discovered they had an old embroidery machine gathering dust on the bottom shelf. Since I've been looking to explore TurtleStitch as a way to explore coding, I convinced Craig to see if he could get it up and running. (We came close)
That night I also got to witness an amazing interaction between an amazing mentor and his middle school aged mentee.
I even got a potato gun demonstration in the maker spaces's 'out door' space that 'blew me away"
Just imagine the multi-generational relationship that can be developed while making your own potato gun.
The next week I attended the Tuesday night WTF hack where the maker spaces is only open to those who identify as women, trans, and femme.
My new friends from Xerocraft's WTF were eager to help me consider new possibilities for renaming my 20 year project (TechSavvyGirls) to become more inclusive. We brainstormed lots of possibilities that I will take back to Vermont. Terry even invited me to share my e-Textile skills at their holiday party and the next WTF hack night.
I decided to create an entry level project that allowed you to light up a bowtie that could be used to embellish a holiday outfit or dress up a holiday gift.
Of course these creative ladies took it in several new directions.
A few days later I brought my project to their annual Holiday party and got to meet more fun and adventuresome creatives.
Craig was a great sport and helped me out when we needed it. He also networked with some amazing creatives like this artist using irradesescent beetle wings in her crafts.
My only regret about my membership at Xerocraft was that it was only a month because I had an airplane ticket to make it back east to spend Christmas with the grandkids.
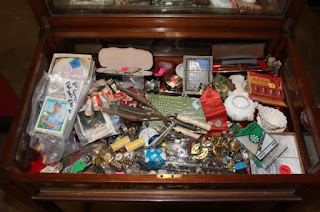
I loved reflecting on the "WHY" questions during that series. As I look for a theme for this year's March is for Making series, the following theme seems to surface - A CATCHALL DRAWER where a mishmash of useful 'things' end up until you can figure out where they should go.
During this pandemic pause two things have surfaced -
(1) The pandemic pause has given us more time to reflect - sometimes in isolation. And the thoughts that come out of that reflection don't fit into neat little containers in our brain, but they need to go somewhere.
(2) The need for flexibility and for paying attention to cues that we need to "monitor and adjust" continues to be important - even as we (hopefully) move past the Covid 19 pandemic.
So I think a CATCHALL theme fits for 2022.
On Day 4 of this 2022 March is for Making series, I got an email from a school I had recently worked with that asked
" I am new to the Cricut but I did end up purchasing a machine . . . I was just trying to figure out some supplies that we will need. I have bought some things myself but this stuff adds up fast. If you have any suggestions I would appreciate it."
After crafting a long email with ideas, I realized others might have the same question.
While I realize that the ideal sequence is to have your "WHY figured out" and to "Purchase what you need to fulfill that WHY". But there are times when things don't happen in the optimal order and you just follow your gut.
An entry level tool like an electronic cutter can be purchased for under $200 these days - Which makes it easier to pick up with some "surplus" funds or from a PTO mini grant or other funding sources.
So the first question becomes - Is an electronic cutter worth getting for your class/room or school makerspace? But we all know the cost of a RAZOR is significantly cheaper than the cost of a pack of the related consumables - Razor blades.
Of course it all depends on your WHY - but from what I've experienced, this is a worthwhile investment EVEN if it means there will be a consumables cost that follows.
But let me return to the question that was emailed to me - "What are your suggestions for supplies I might need"
Here is my answer. (Hope it is helpful to others)
Good questions...
Before I get into the 'weeds' of 'stuff' let me offer a suggestions that might not only help fund your consumable supplies, but also offer some pedagogical value.
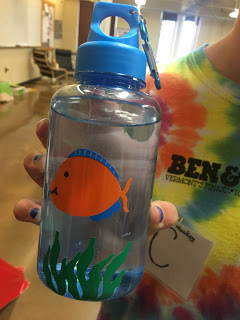
One way to get started is to start a Sustainability campaign at your school and offer to make everyone a personalized coffee /water bottle, drinking cup for $5.00 (or more for high quality ones) or so. Turn the question from "how do we find money for supplies to the problem of "How might we become a green school and reduce waste"
This type of project also adds an element of "COMMUNITY" and PURPOSE.
It can also be used with DESIGN THINKING framework. Who are you designing for? Interview them, come up with a unique design that could include their NAME (or not) and an ICON from the Noun Project.
You might have the students track the number of disposable cups discarded in a week, record the data, analyze it and compare it over time. (Credit goes to St. Albans City School for that idea) You might want to
talk to ELA teachers in your school to find some some strong ELA connections ranging from communicating with images to lessons on symbolism.
Your students can discuss the pros and cons off getting 'cheaper' water bottles and travel mugs at a Dollar Store vs higher quality ones. Lots of possibilities for economics / math lessons/ sustainability lessons and more.
All of this also meets College and Career Readiness goals.
Setting a culture of sustainability and eliminating waste will also have the kids measuring for eliminating waste when they cut vinyl which brings a lot of math in the making -- so have plenty of rulers.
I have kids cut everything on paper or card stock first to test the results. You can use recycled paper here.
But since your question was about specific supplies, here are some things to think about
Get some extra blades. They get dull.
You'll want to get a couple mats. One could be cutting while the other is being prepared. Or have one for testing out paper.
Wide Blue Tape or masking tape is helpful to clear mats of little scraps left behind.
As far as something to rub the vinyl on - A credit card type card (expired gift cards, etc) work fine - as do a variety of hard edge objects. Have the students help you look around your school or their home.
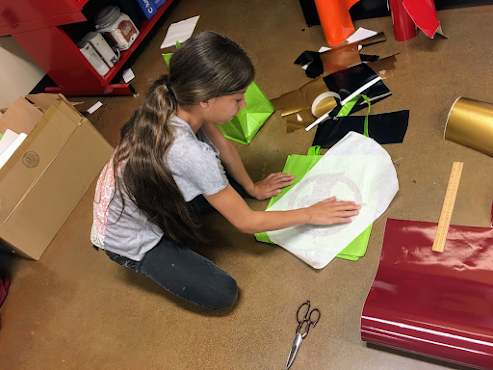
You will definitely need TRANSFER paper. I prefer clear transfer paper like this to the one we were using in this picture, because it makes it easier to align multi-color designs.
Vinyl comes in permanent, removable, and other flavors.
I would start with something simple. Stay away from glitter or holographic, etc (for now)
Less choice is sometimes better for kids. Black and white are always popular.
Do you have an iron / iron board at school? I bet someone would donate one.
Irons can be dangerous, so eventually you might want a heat press. But with supervision you can use an iron and ironing board.
Remember that LESS is more sometimes. Constraint is good. Too much choice can lead to decision paralysis.
Your next consideration will be workflow and the design process. Have the kids help you brainstorm the workflow. I can send some things that have worked well for me, if you would like.
There is "something magical about being able to interact with an object that started out as lines or blocks of code on your computer." ~ @CeMoCreates
Personally, I'm a big fan of physical computing.
In a nutshell, physical computing is taking code and having it merge and then interact with the physical environment.
If you build a robot, this is a form of physical computing. It could be something like a water level, temperature sensor, that interacts with the environment.
According to Wikipedia, Physical computing means building interactive physical systems by the use of software and hardware that can sense and respond to the analog world.
I'm an even bigger fan of something you CREATE from CODE.
Imagine eating a cookie that started as lines of code.
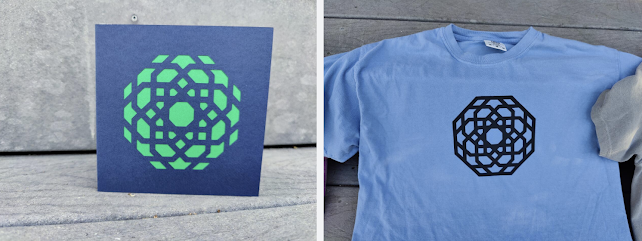
By using the Codeblock feature of TinkerCad you can start a project with a few lines of code and soon find yourself with a unique design that you 3D print into a pendant, keychain, or even a mold for a cookie cutter.
Or perhaps you would like to WEAR your CODED designs on a T-shirt or use it in a design for your prom dress. Then export the design you coded in Tinkercad as an SVG file and use your Cricut or other electronic cutter to cut it out of heat press vinyl and apply it to your T-shirt. Or perhaps cut it out of of fabric that becomes part of a quilt or even a prom dress.
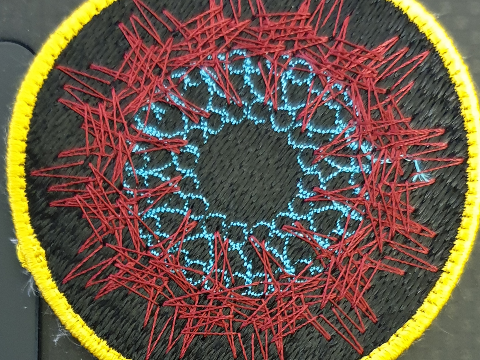
Since we are on the topic of fabric, what about coding an embroidered patch for your own line of skateboard clothing -- or your book bag?
When I first saw that TurtleStitch would allow you to do just that, I went out and bought an entry level embroidery machine. I need to get it back from my teenage skateboarder grandson, soon, so I can play.
These are just a few of the ways students can integrate computer science into physical objects. What's your favorite way? Or what do you want to try? Perhaps we can start a collaborative inquiry!