Showing posts with label design-thinking. Show all posts

Friday, January 26, 2024

Middle School Students Develop Identity & Confidence in a Makerspace Residency

 This month I had the pleasure of being part of the 2024 International Fab Educator Summit.


Session Description

How might students gain self-awareness, experience the creative process, and create confidence using various tools and materials found in the school maker space? 

Come find out as we share a maker residency example that encouraged students to think about their own self-identity through various prompts and hands on activities resulting in the creation of a physical product that included design elements to expresses an evolving sense of self. One of the goals of the project was to provide and opportunity for teachers and students to develop relationships and engage with their school community through hands-on experiences. Not only did the products students designed and created reveal their personal interest and identity, but the process allowed students and their teachers to discover skills and strengths that are not often revealed through traditional academic learning. 


Doing this in 20 minutes was tricky even though we francophones naturally talk fast.   The session recordings will be shared after the event.  The following are my slides for today's session. 


Here is more information about this residency,  including links and details that we didn't have time to go over in the short 20 minute session. 


First and foremost,  I must thank the amazing Hyde Park Middle School Students and Staff  and the Vermont Arts Council for collaborating with me on this  week long Maker Residency focused on IDENTITY.  

 
This  short video captures the spirit of the residency and gives you a feel for how engaged students  were during the hands on experience as they created a sense of sense and confidence with the tools in their maker space. 


My process for planning a residency makes use of the stages of  Design Thinking from the Stanford D School. 


The EMPATHIZE Stage is KEY to planning a successful residency.


During this stage, I meet with different members of the staff, ask questions, make observations and gather information about the school culture, logistics such as curriculum demands and schedule, and, of course, the goals for the residency.   It is important to understand  the feelings and needs of different members of the staff, including teachers, coaches, school leaders, and students.


The DEFINE Stage allows us to identify specific goals for the residency. 


I always use a  “How Might We” prefix and work with key members of the staff and student leaders  to create a   design problem sentence reflecting  the goals of the residency based on the needs identified during the Empathy stage.  We include the tools or processes we will use to meet the identified need.  We also include constraints and limitations we are working with.  Here was our  problem statement for this residency.


The IDEATE Stage allows us to expand our thinking  about what's possible. 


We start by using wild brainstorming techniques.  Teachers often come in with a specific idea of what they want to do.  Those ideas are often limited to more traditional teaching practices and limitations.  The old adages "you don't know what you don't know" comes into play here.  I try to use my makerspace experience to help everyone see more possibilities. I watch carefully to see which ideas lights a fire in their belly.  It's important that I have an open mind about ideas I had not considered and watch for the  passion and interest of members of the school to become part of the ideas we generate.


The PROTOTYPING stage is where we start building a tangible product that the user can engage with.


This is where we get to the heart of planning the residency activities and schedule.  I use Google Slides as building blocks. The slide format allows us to collaborate, add, remove, and rearrange ideas.  One of the hardest things is for teachers to imagine how to build the vision within the constraints of their schedule. Time and schedules are barriers that often encourage teachers to try new ideas.  I ask for their schedule on paper and work with a school leader to create a residency schedule that works for everyone.  Using the concept of 'inhouse field trips" often works (but not always).  With creative and flexible thinking, we break down the schedule barrier and then start to imagine activities that will help us reach the goals  identified in the problem statement. 

The TEST stage  is where we go live. 

Now's the time to  test to see if the schedule and activities work as we intended.  This was the heart of the activities throughout the week long residency. It's important to watch carefully to see how the 'solution' we created performs under unexpected conditions. 

We debrief frequently and pivot as necessary.  With the whole staff feeling empowered to suggest changes along the way, we ended up with a successful residency.  During this time we look for evidence of what's working and what needs tweeking. 

For example, in this residency plan the icebreaker went a lot longer because students were very engaged in it.  We had to tweak the prompt a bit to make sure that the alter-ego superpowers were being used for "GOOD".  During the Journal making stage, we found we had to simplify the journal and let go of our ambition to include circuits, quotes, and a button clasp.  We noticed that some students were amazing at grasping the technical logistics and they quickly became leaders that helped absent students catch up.  We leaned in on their strengths to improve the workflow.  Quite often these are not the same students that shine during more traditional learning activities.

Here are two short videos of what this phase looked like during our residency.


The REFLECT and CELEBRATE  stage is a step I added to the Design Thinking process.


Although I'm listing this stage last, we built in lots of opportunity for reflection and capturing evidence of learning throughout the residency.  We created a student handout  with prompts and places for students to reflect on their learning.  Not only was this an instrument that contributed to deeper learning, but it also helped with logistics when there was back log at one of the maker tools.  Taking lots of pictures and  short video clips provided a powerful reflection tool for both teachers and students.  We uploaded these into a Google Photo Album for students to review and  use to add multi-media evidence to their reflection journal.  

It was also important to provide time for educators to debrief and reflect  and consider how this experience could impact their practice.  It was rewarding to hear teachers request that they have access to the tools and materials after the residency as they started to plan for both in school and after school activities that they could lead  in the makerspace. 


This maker residency reframed my understanding of residencies and what's possible when design thinking guides the planning process. I am  committed to designing residencies that strive for deeper learning  where students are fully engaged with a new learning experiences.  The experience must inspire them to learn new skills. As they create confidence with new tools and processes, students are ready to take on meaningful making challenge.  

The residency should provide teachers with the opportunity to receive embedded professional development as they co-teach an experience that they helped to design.  The strive for the experience to be a low risk way for all teachers to  create confidence with new tools and processes that model Project Based Learning pedagogy.  I have seen teachers become inspired watching the engagement of their students during the residency. With newfound confidence in using new tools and processed, teachers leave  the residency experience ready to design instruction that includes meaningful making projects. 


If you would like to bring a Maker Residency to your school, 

contact Lucie at ldelabruere@gmail.com


Sunday, November 15, 2020

Mathematical Mindset during Design Thinking

 This week, I continue working on improving my STEM/STEAM facilitation skills through the MMSA ACRES program.  Our current assignment asks us to reflect on how to add more opportunities for students to develop a mathematical mindset using purposeful questions.  I chose to review some photos and video clips from a maker experience I lead last year with a small team of students where we used Design Thinking to design wind tunnels. 


The design thinking framework from the Stanford d.school is the problem solving process I most frequently use in maker activities that I plan and lead.  When using design thinking students spend quite a bit of time thinking about WHO they are designing for and DEFINING the problem specifically to meet the needs of WHO they are designing for.  After some wild brainstorming during the IDEATE phase, they build a PROTOTYPE to communicate one of their ideas and TEST it. 


During today's reflection I spent quite a bit of time digging deeper into my understanding of the Common Core mathematical practices 


I proceeded to take a close look at the photos and videos I had collected during our design thinking maker experience and consider which purposeful questions would have created more opportunity for these students to develop a mathematical mindset. 

Here's a 9 minute video demonstrating how mathematical practices could be strengthened  during this design thinking maker event using more purposeful questions. 


Saturday, March 17, 2018

March 17 - Acrylic Bending + Design Thinking = new Phone Stands


Yesterday's post in our March is for Making Series (30 post in 30 days to inspire you to keep on making from our #makered community) showed you how to make an acrylic bender for your classroom.  In today's post we take look in a classroom where this new maker tool was put to use.

Caty Wolfe (Pre-Tech teacher at Center for Technology in Essex, Vermont)  was eager to put her new acrylic bender to use.   In today's post, Caty shares the lesson she designed for her students!

During this lesson her students experienced the stages of design thinking,  built new skills with design tools,  and had a opportunity to document proficiencies in math and communication.

From  @WolfCatVT


Sunday, March 4, 2018

March 4 - Meaningful Making


Meaningful Making -  Our 4th post in March is for Making Series (30 post in 30 days of inspiration from our #makered community)


Last year I had the pleasure of visiting Michael Pope's classroom at Barre Town Middle & Elementary School and left  in awe!   BTMES scored big time when they recruited Michael Pope back to his home school.   After completing his Masters degree in Learning, Design, and Technology at Stanford and spending a few years working in the design industry,  Michael came back home to the classroom he had spent his middle school years in.  He  used his experience and his strong belief in student directed learning to design a program and space that is worthy of its name - THE DESIGN LAB!


After spending an hour in The Design Lab, it was easy to see the different ways both the space and the program were purposedly designed to support its three main goals.

  1. DESIGN = PROCESS: Enable students to understand and explore design as a universally applicable problem solving process and way of thinking
  2. LEARNING THROUGH FAILURE: Allow students to embrace risk & failure as learning mechanisms
  3. MEANINGFUL MAKING: Facilitate student engagement with meaningful challenges


Considering Michael's time at  Stanford, it is no surprise that he uses design thinking to guide students through the  process for problem solving as they create and make.  He "does not expect them to leave his program as master carpenters, draftsmen, engineers, or artist, but he does expect them to leave as better thinkers. "
Michael does not consider himself the leader in the class.  He does not want to lead everyone through a series of projects that he has designed.  He, instead, sees himself as a facilitator, cheerleaders, and a resources for student directed learning.     

"By choosing their own projects, students explore the topics that they find most meaningful.  When students direct their own projects, they learn through their failures and their triumphs."


Although students get to select their own projects,  Michael guides that process to ensure that students select a meaningful project.  

Michael describes a meaningful project as one that 
  • Solves a problem
  • Helps us when we need it
  • Benefits others
  • Completes an objective that it was designed for
  • Reminds you of something important
  • Has personal meaning
  • Evokes emotion
  • Looks nice
  • Takes effort to make
  • Is something you want to do
  • Help with daily problems

The projects can be personal projects or public projects.   

  • Personal projects might be a skill based project where a student focuses on acquiring a new skill or master an existing skill.    
  • Personal projects might also be  message based projects that allow a student to express a specific message
  • Public projects are usually projects that solve a need or provide a service. 

As part of their project selection process,  students are asked to consider several elements that will guide them through the meaningful making journey ahead. 


The space and tools in the Design Lab provide students with the a wide variety of resources they might need in their meaningful making journey. 

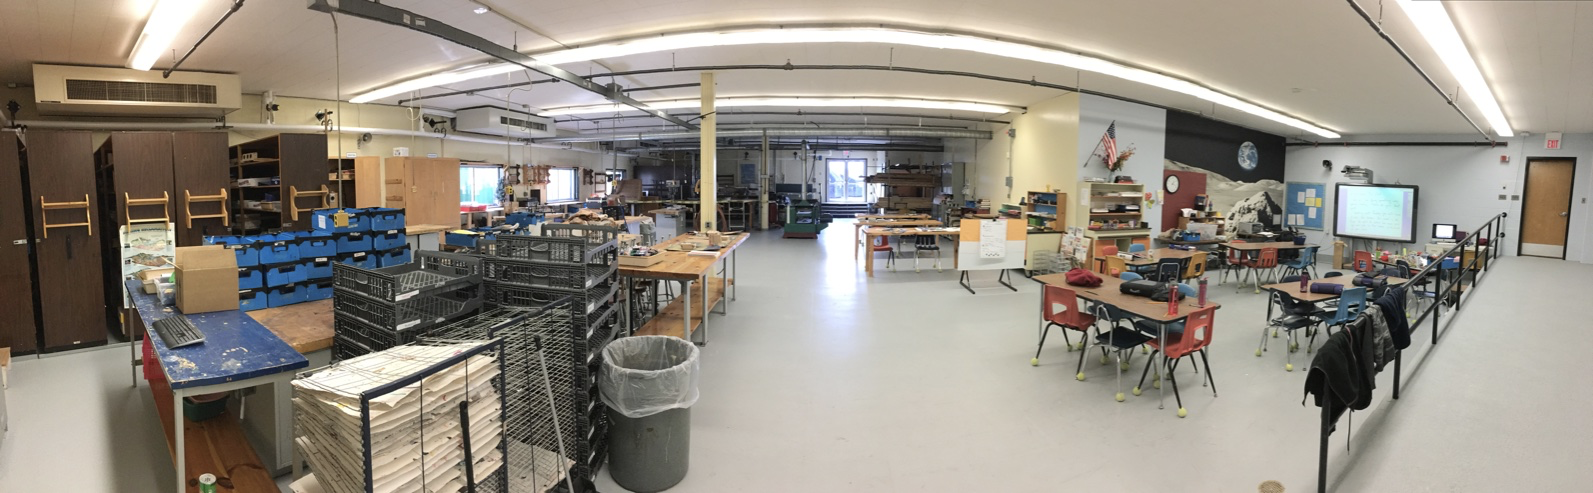
It's obvious that the BTMES Design Lab is a great space. 


Although I must say that both times I've visited the Design Lab,   I've have to navigate my way around so many projects in progress that I didn't even realize the floor was white! 

Micheal's Design Lab program  inherited the wood shop tools that he had used as a student in his days as a student. 


Michael has  expanded the toolset to include some affordable and accessible tools such as sewing machines and a vinyl/paper cutter. 


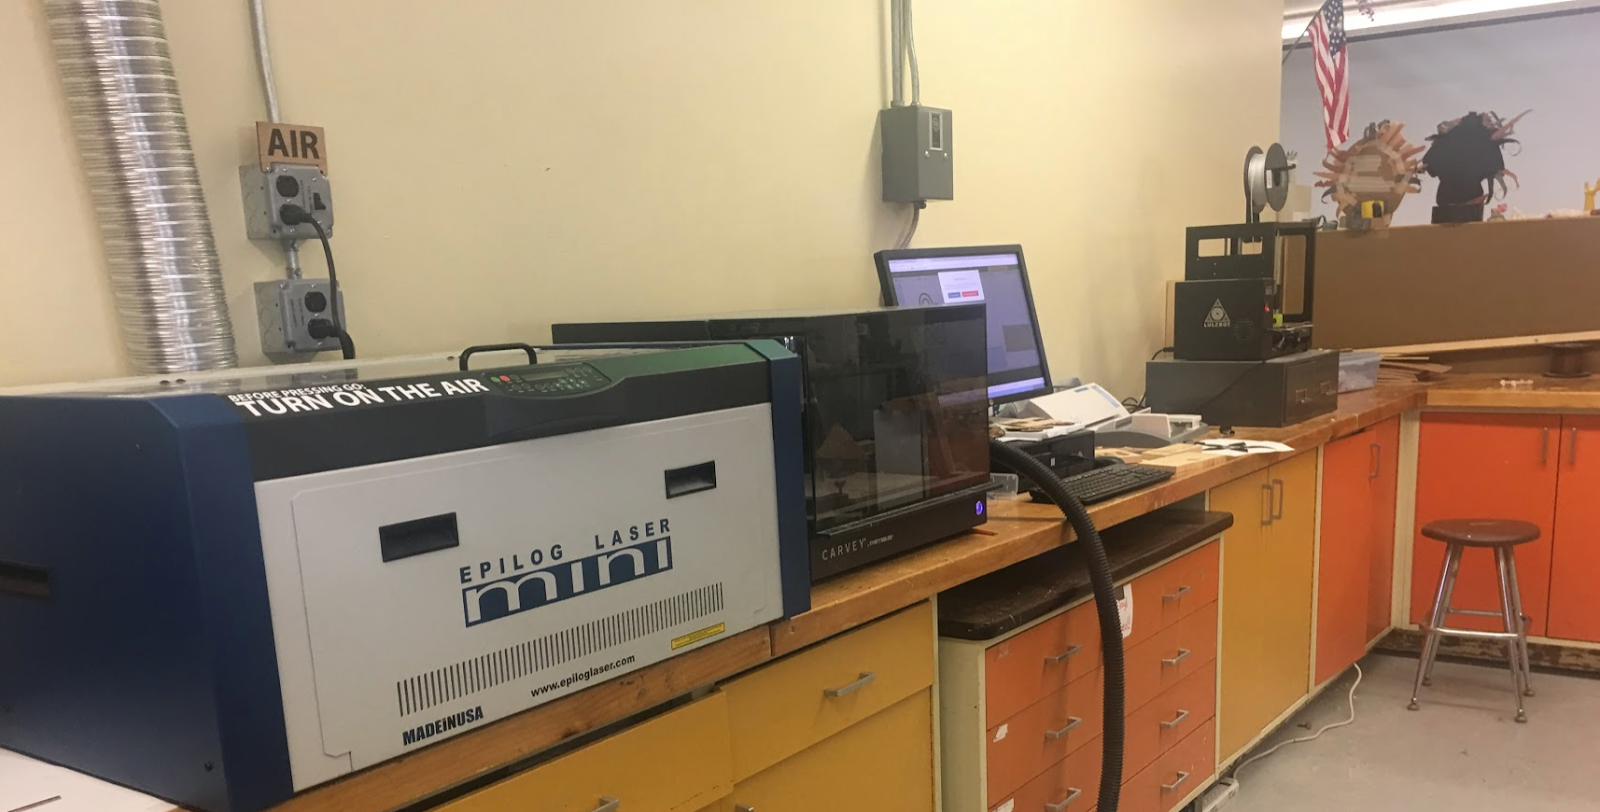
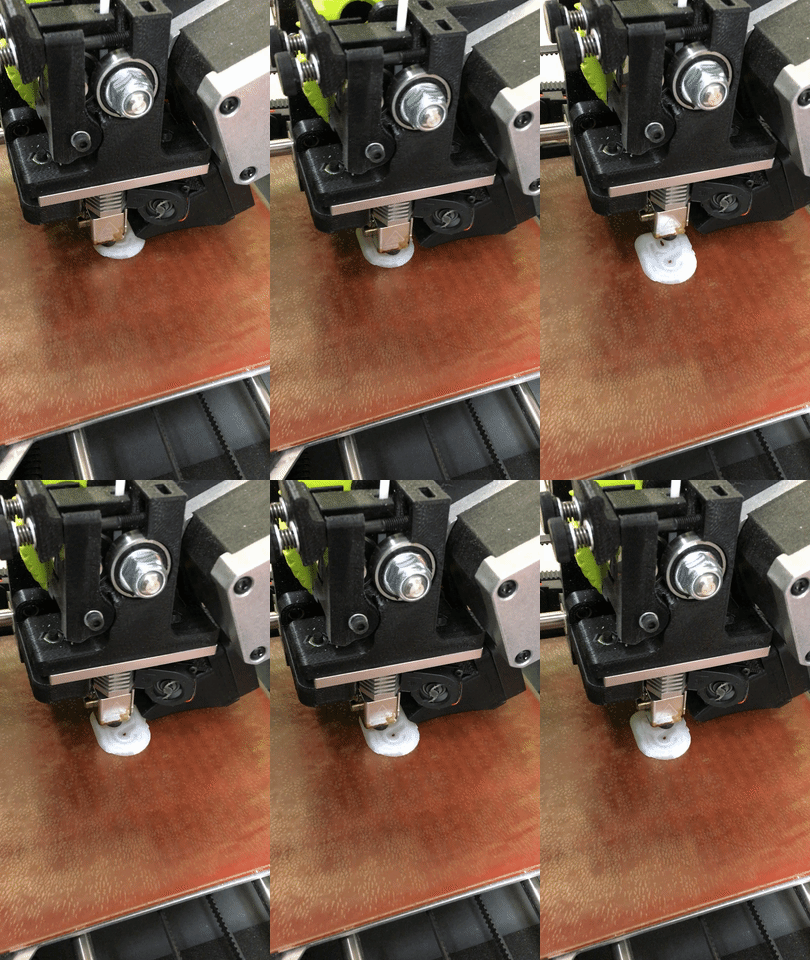
And with funds secured from forward thinking school leaders, he was able to add some design and  prototyping tools including an Epilog laser cutter, Lulzbot 3D printer, and the  Carvey CNC mill.


 giphy.gif giphy.gif giphy.gif


But probably the tool that most impressed me was the project board he used to help his students manage the process of their learning  through meaningful making of their individually selected projects. 


As Micheal describes how his students use the board, it is easy to see that the thoughtful design of a masterful teacher is at work in this space! 


The shift from a series of projects designed by the teacher to help students master proficiency to one where student meet standards and  proficiencies over time by designing and making their own projects is one that requires thoughtful and strategic planning.  Michael is continuously working on and tweaking the process and has provided such a helpful model for the #vted and  #makered community on how to design meaningful making experiences.


It's easy to understand why so many students frequently  find their way back to this space to  work on their Design Lab projects as well as projects for other classes.   

The students at  Barre Town Middle and Elementary are so fortunate to have the Design Lab  (a program and a space) that puts them at the center of their learning.  Thank you, Micheal Pope for sharing your practice and resources with us and for the role you play in your students' lives.