Whatever holiday you are gearing up to celebrate this December, I bet it includes LIGHT in some way. So why not jazz up your outfit or presents with a light up e-textile project.
A light up bow is a simple project that can introduce you to the basics of e-textiles. Give it a try, and soon you'll start imagining all types of ways that conductive thread and sewable LEDs.
What is e-textile? They are basically any project that integrates electronics and fabrics. They often involve creating circuits with conductive thread and sewable lights. More complex e-textiles might involve sensors or tiny sewable. microprocessors. The Santa hat above is a more complex project that several lights and a micro-processor that plays music when you tilt the pom pom a certain way.
Meanwhile the light up bow is the perfect starter project to build foundational skills necessary for more complex projects.
To get started - gather up some traditional sewing supplies
Of course you'll need some fabric to make your bow from. I found that felt works well for starter projects. I chose red for the bow and black for the ribbon. I happened to have a red piece of 100% wool felt, which made the bow a little more elegant than craft felt.
When selecting a needle, you'll want to select a needle that is not too large to make it through the tiny holes of some sewable battery holders. (Size 5 or 7 work well) Test your needle ahead of time. Self threading needles can be very convenient. Otherwise a few needle threaders will work just fine. Have more than one on hand, because they break very easily-- especially with thicker conductive thread.
To make sewable circuits, you'll need to source a few unique materials.
There are several places to get etextile supplies, but my favorite place is
THE IMAGINATION TOOLBOX - a small independent teacher owned online store who creates custom orders for classrooms or group functions like this
classroom e-textile kit. She has lots of great supplies for creative making that are not on her website (including the Sparkfun and Adafruit products) You can email her at caty@theimaginationtoolbox.com and tell her what your goal is and she'll put together something just right for your needs.
Here are a few tips to help you source the right materials and supplies.
Coin cell batteries such as CR2032 work well for beginner projects. It is possible to pick these up at your local drugstore or hardware store, but they will be a lot more expensive. With some advanced planning you can
order these for less than 50 cents each. Sewable battery holders can be very helpful when creating e-textile projects. There are some DIY tutorials online for creating your own battery holders - but I advise starting with a sewable battery holder. Using sewable battery holders will give beginners more creative confidence than trying to make your own battery holder in beginner projects. Once you have the basics of e-textiles down, you might explore some of the DIY tutorials for making your own battery holders.
This white plastic sewable battery holder is quite common. One disadvantage it has is that it does not have an on/off switch. Another disadvantage is that the sewable holes are quite tiny and require a smaller needle.
Battery holders like the ones below manufactured by
Sparkfun and
Lectrify have bigger sewable holes and an off/on switch.
The secret to e-textile is to use
conductive thread to connect your battery to your lights. This thread is usually made of stainless steel. As your projects get more complex you will find yourself seeking out many other conductive materials ranging from conductive yarn, conductive tape, to conductive velcro.
Beginner e-textile projects usually use small LED's that light up in a variety of colors.
Small sewable LED sequins like these are easy to sew and have built in resistors. The resistors prevent them from being easily burnt out from too much battery party - they also allow you to mix and match colors more easily. (More on that later).
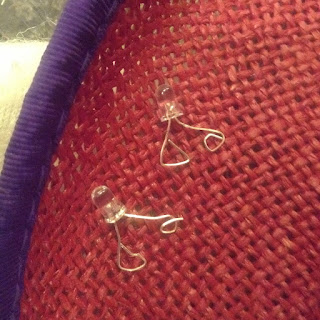
Traditional 3mm and 5mm LED's can also be made sewable simply by shaping the legs with a pair of needle nose pliers. Tip: Shape both legs into different shapes to make it easier to remember which leg is positive (long leg) and which leg is negative (shorter leg)
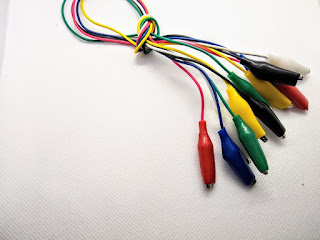
Alligator clips also come in handy when prototyping projects and testing led's.
These snaps can be used to create on off switches as well as fastening.
How do I get started creating my first etextile project?
There are some great tutorials out there to get you started with the basics.
The key to e-textile projects is to pick a simple beginner project to learn the basics. Once you understand how to work with conductive thread, where to position your batteries and lights, and how you create a sewable on/off switch, you will have the creative confidence you need to design more advanced projects.
This festive bowtie is the perfect beginner project. It teaches all the basic skills and can be completed in about 30 minutes.
Cut a piece of fabric or felt in a rectangle for the bow, and a contrasting piece of felt for the light up band to wrap around your bow.
Use a glue gun or some traditional thread to shape your bow.
Play around with the position of your battery, lights, and snap on your wrap-around band.
Use conductive thread to attach these to your wrap around band in a way that creates a complete circuit.
(video tutorial coming)
Voila
Use your new light up bow to dress up a holiday garment or present.


No comments:
Post a Comment