Subscribe to this blog to get new learnings ideas, discoveries, and inspiration from the CREATE MAKE LEARN community, along with updates about our upcoming Summer Institute and Workshops.
When I started to look around for what type of projects people are making to cut their teeth with #CNC in school makerspace, I was not surprised to find the Fidget Spinners were trending!
Why not!
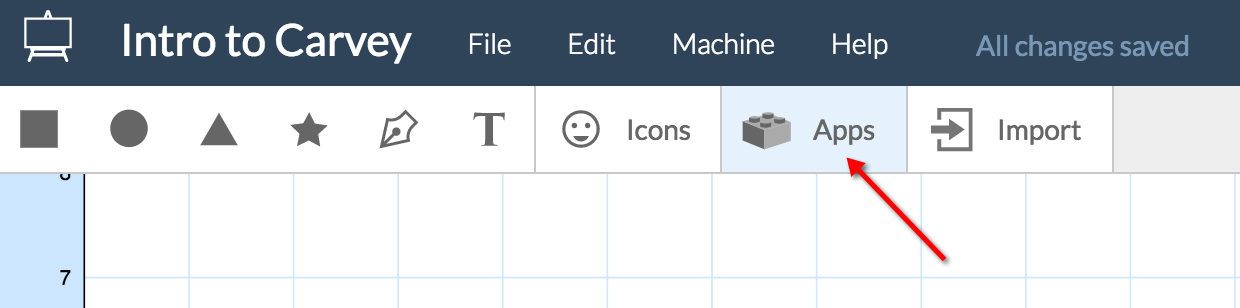
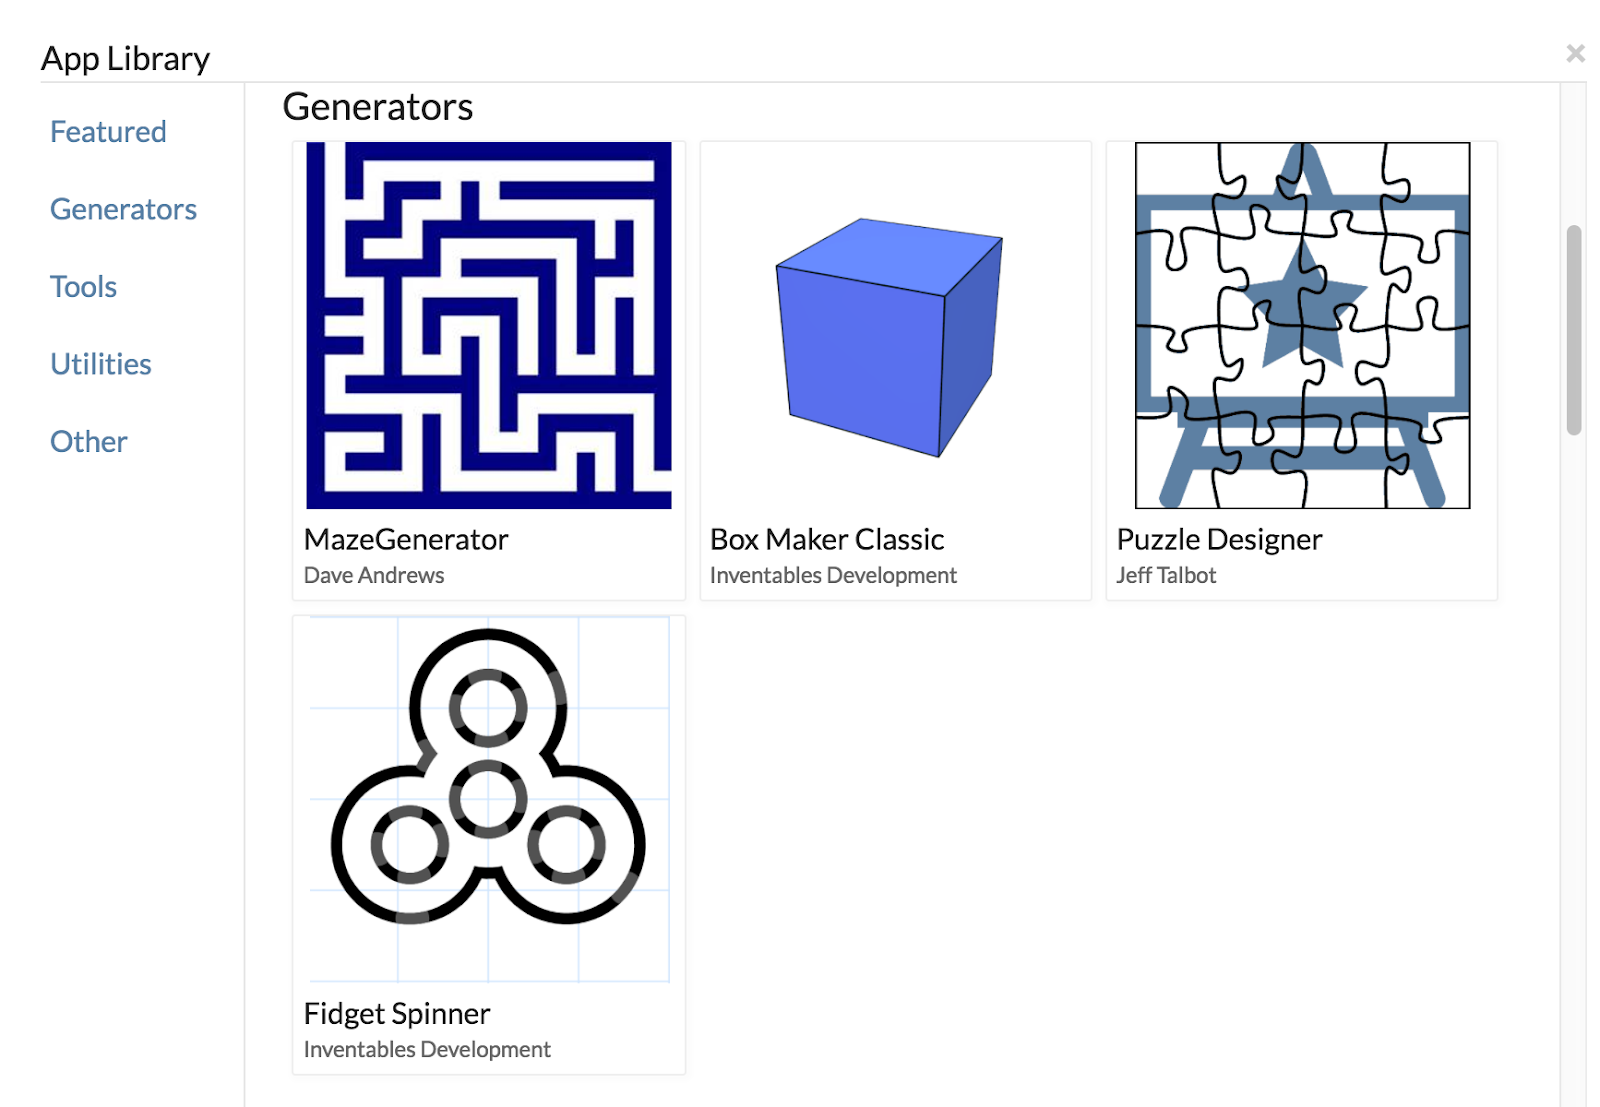
I was surprised to discover that Easel (the recommended software for Carvey) has a feature called APPs filled with templates to get you started for newbies like me!
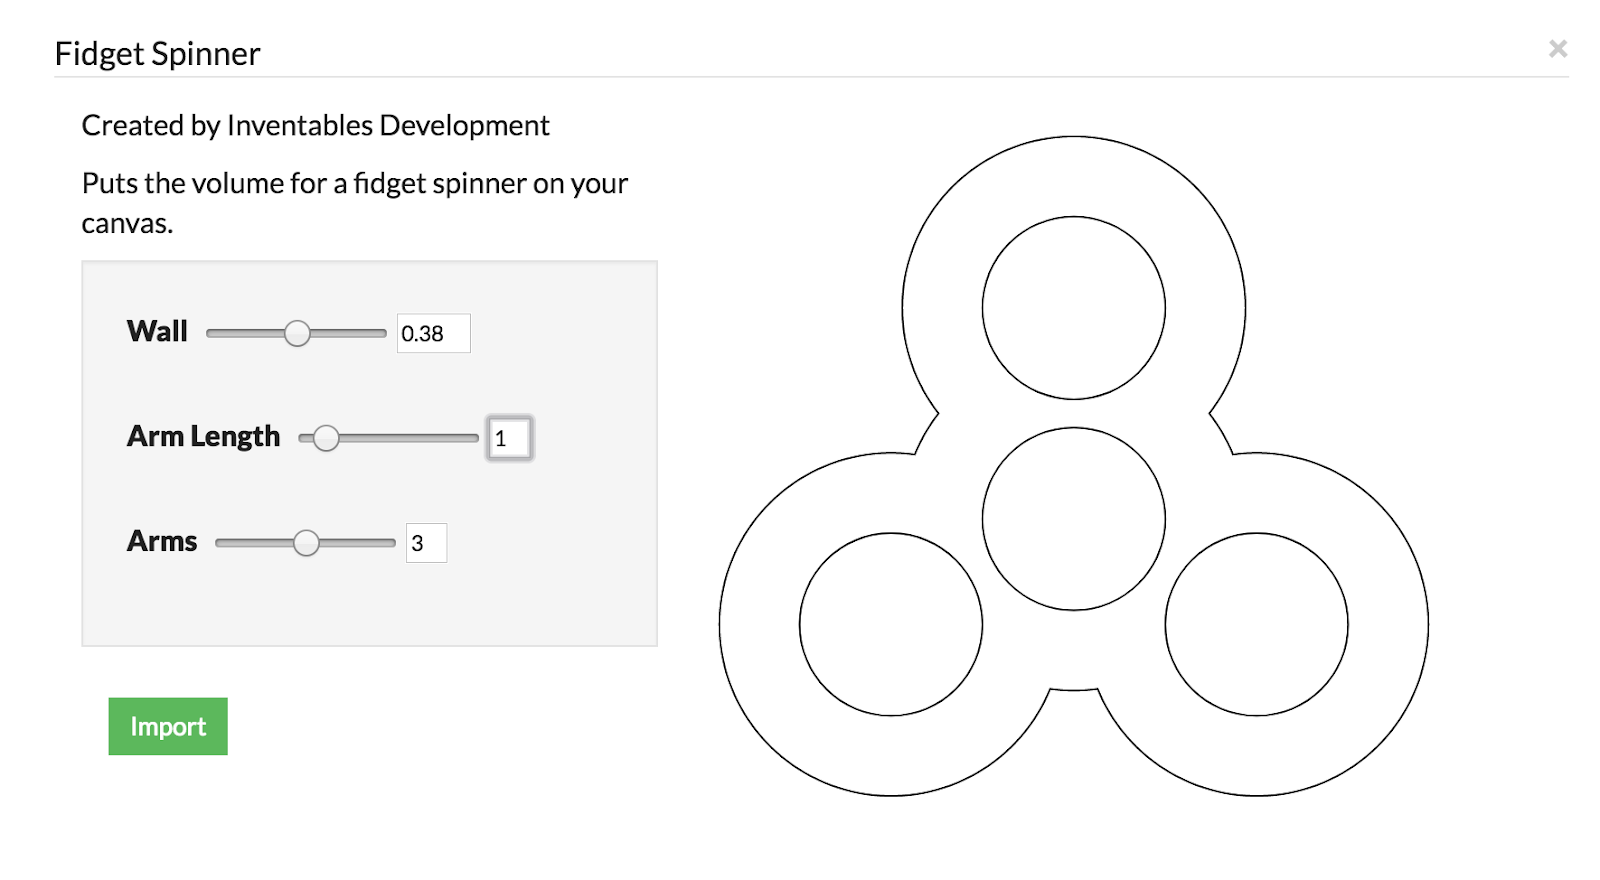
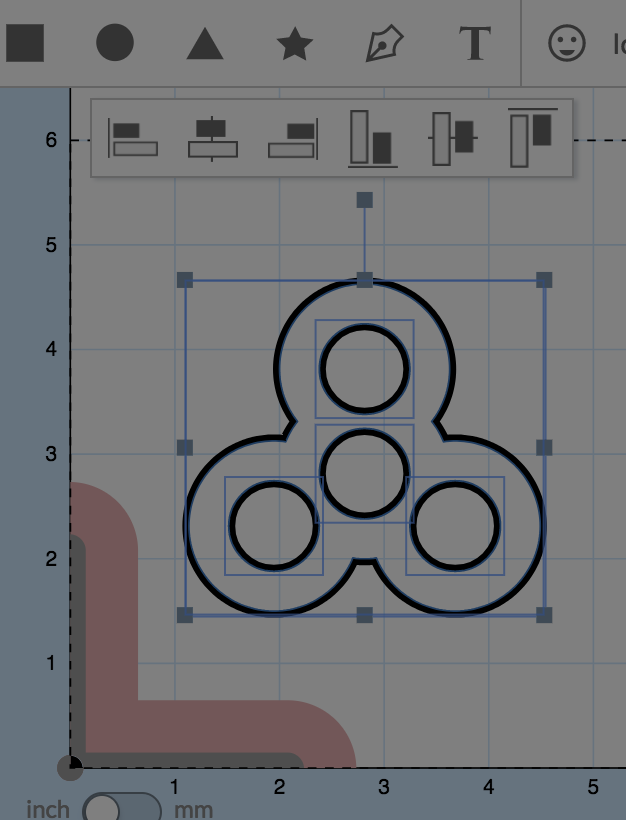
Of course - I chose the ever trendy Fidget Spinner as my first project.
And set the number of arms, arm length, and wall size
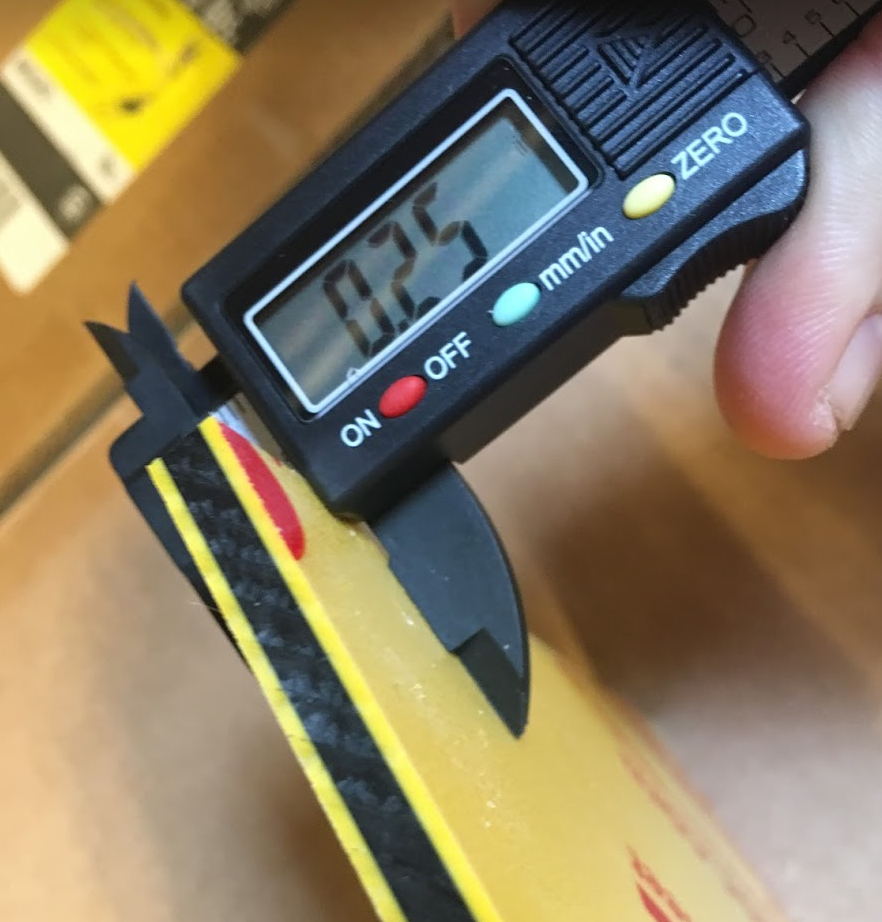
I then picked a colorful piece of HDPE and used the digital calipers that Inventables shipped with my Carvey to find the thickness of my material.
The next step was to click on the Material Tab and select the correct material, and the thickness of my material into the setting for the Z axis. Be especially careful to include the correct thickness here. If you enter an amount greater than the thickness of your material, your bit will cut into your WASTE Board. You should also check to see if your BIT size matches the size of the BIT that you have inserted into your CARVEY.
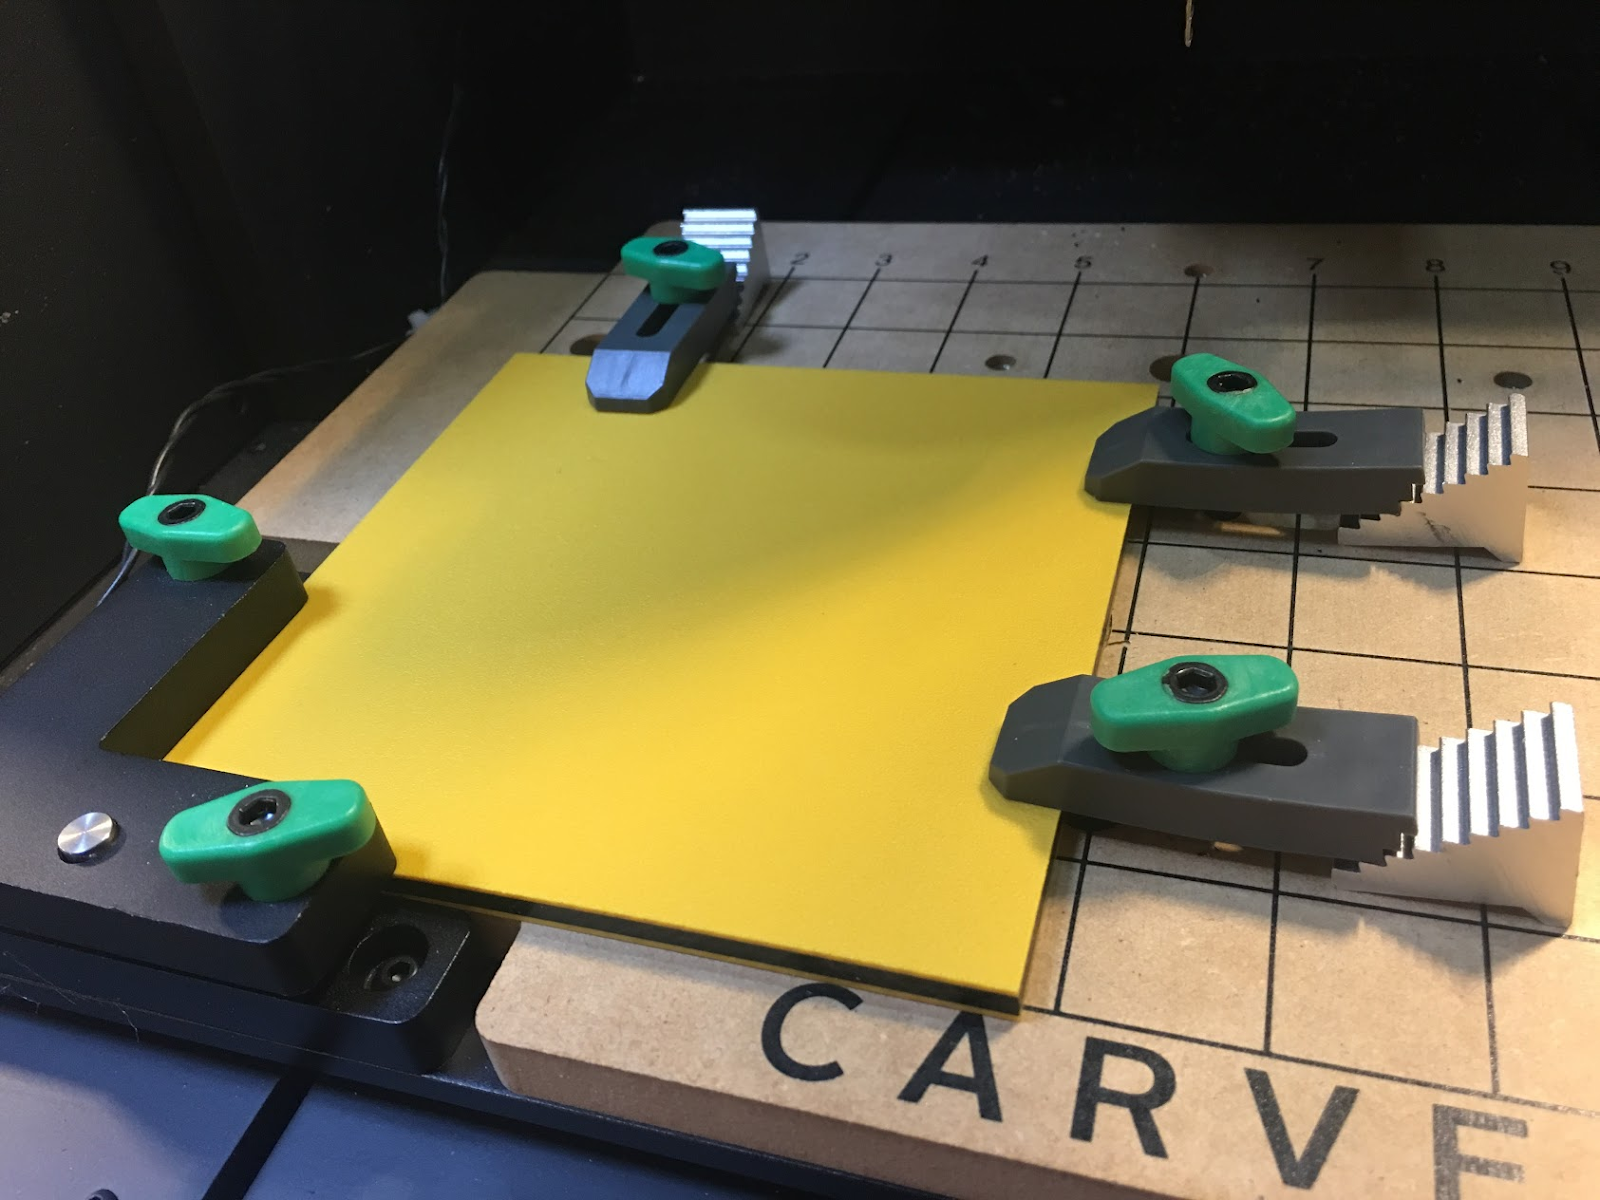
Now, grab the material you want to cut, and insert it securely in the bottom left corner of the wasteboard. Use additional clamps to secure the material to the ‘board’, making sure to tighten the clamps. Carvey provides extra aluminon support for the back side of your clamps in different sizes.
Don’t forget to compare the cuts outlined in your software to the location of your materials to make sure that the clamps are clear of where your CNC will cut!
When you are feeling confident that your design settings are correct, CHECK them again!
Then click on the CARVE button. Yes - this makes me nervous! I can still hear my CNC instructor, Matt Flego warn us that a CNC machine can eat itself and that we should keep our finger on the 'emergency stop' button when setting the CNC in motion.
Easel PROMPTs us to check each setting one additional time.
Double check these very carefully. You don’t want the bit to chisel away at your clamps or down through your wasteboard.
In my case, the Easel software did some quick checks and warned me that my object was too big for the Carvey.
Somehow I missed a decimal point and it thought my material was 25 inches high instead of .25 inches hight! YIKES!
After making the necessary corrections and checking everything again, I once again pressed CARVE and sent the job in motion!
Within minutes my fidget spinner was cut and I was vacuuming out the mess - which was nicely contained within the machine!
Time to shop for a shop vac and go pick up some bearing!
Note to self: Buy some Sealed Bearing - 8mm x 22mm x 7mm
Admittedly this project didn't take a lot of design skill, but it was a good for me to learn the basic workflow of a #CNC job using Easel with my Carvey. Now that I've gained a bit more confidence with the tool, I'm looking forward to leveling up when choosing my next project.
Oh, And for those who are wondering "What's the deal with Fidget Spinners?"
UPS delivered my box from Inventables over a week ago -- right in the middle of grades being due
for the online class I teach at UVM. I knew if I opened up the box that contained my Carvey, my grad students would NOT get the attention they deserved on their final feedback. SO I refrained from breaking the box open.
As it sat in my makerspace studio, Generator members walked by wondering when I was going to break into the huge INVENTABLES box sitting on the floor.
Finally yesterday, I couldn't wait any longer.
Here are just a couple notes from my first meeting with CARVEY.
and a short video of the unboxing.
I was up and running fairly quickly with only a couple of challenges.
1) Make sure you have someone else around! It's a two person unbox. It even comes with a special strap and instructions on how TWO people can use the special strap to remove the Carvey from the box. I managed to cut open the box, tilt it enough to drag Carvey out of the box by myself - but was not able to lift it onto a table by myself.
That worked great until it came time to put in the BIT. Thankfully my husband arrived with the computer I had left at home just in time to help me lift it onto a table so I could actually see what I was doing.
2) The EASEL software is not totally cloud based! It requires a driver download which did not go well on my Windows 7 laptop. But thankfully it was seamless on my MAC. Need to do more work on my Windows machine and also see if Chromebooks are even a possibility.
3) Now I'm thinking about how I will transport Carvey when I want to use it as part of EMMA - my mobile studio for Creating and Making that goes to schools and community events. Will need to design a way to transport safely.
But for now.. I'm eagerly looking forward to deciding on my first entry level project!
All ideas welcomed!
Here's a blog post describing my journey to selecting Carvey as my first CNC maker tool.
In my search for the right entry point to CNC for EMMA - my mobile studio for creating and making, I ended up considering 5 different tools and am finally ready to purchase my first CNC mill! (note that I said my FIRST, because I'm already contemplating what the second purchase might be) Thank you to everyone who so willingly contributed to this learning journey! The #makered community is the BEST ever at “making community”!
When I adopted EMMA, my goal was bring the experience of creating and making to underrepresented populations. The idea for the mobile studio (E)veryone (M)ay (M)ake (A)nywhere, came from understanding some of the challenges of living and learning in rural communities and the challenges that come from the experience gap that women and girls face in engaging in high tech courses and careers.
EMMA has visited several schools and been part of several community events. Each of these events has pushed EMMA and I along an incredible learning journey! This winter I decided that the next step in our learning journey, was to add a mobile entry-level CNC mill to EMMA!
I had limited experience with CNC, but was ready to dive deeper. I made my first cut on a CNC machine in 2014 at SxSw in Austin Texas an a Shapeko 2.
A year later, I bumped into the Shapeko again as Craig and I joined the community build of the Generator's Shapeko. This was my first communal build at the Generator - our community makerspace.
And then the Shapeko and I had a 3rd date during my CNC certification class at the Generator. I, also, got introduced to the rest of the CNC tools at the Generator, which honestly were a little intimidating. I knew that I was far away from needing to carve into full sheets of plywood! However Matt Flego’s introduction inspired me to want to learn more, helped me understand the workflow, and drilled home the role of GCode in the CNC workflow! Here's a quick time lapse movie of our CNC certification class.
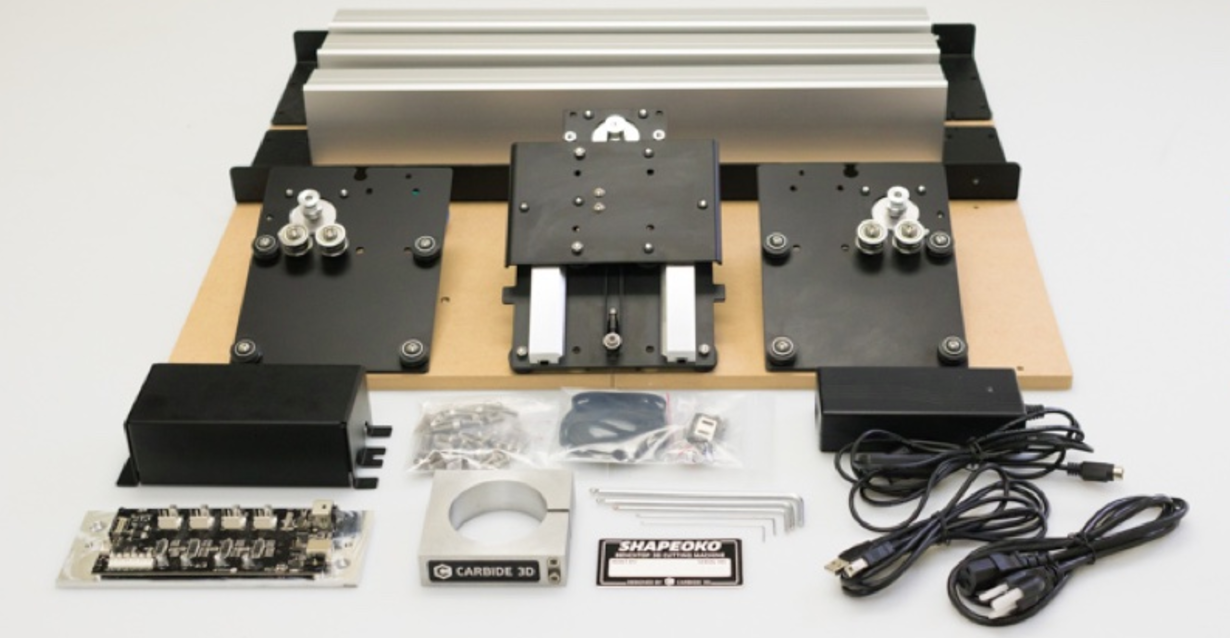
The Shapeoko was probably the first contender in my search for a mobile, user friendly CNC tool that would be right for EMMA.
The cost was right! You can purchase the Shapeko kit from Carbide 3D and Sparkfun for about $1000.
Also, building a tool is a good way to make sure you understand the tool and can maintain it!
My friends and colleagues, Dan Tolle and Eric Hall, at Mount Mansfield Union High School seemed to really like their Shapeoko for their high school students.
If I were to use it in a K-8 environment, I would want to build some type of enclosure for it. The Easel software seemed like it could work for the entry level use I envisioned. But in the end, I feared that the Shapeko might not be survive the bumpy back roads that EMMA might find herself on (I’ve already lost two hub caps!
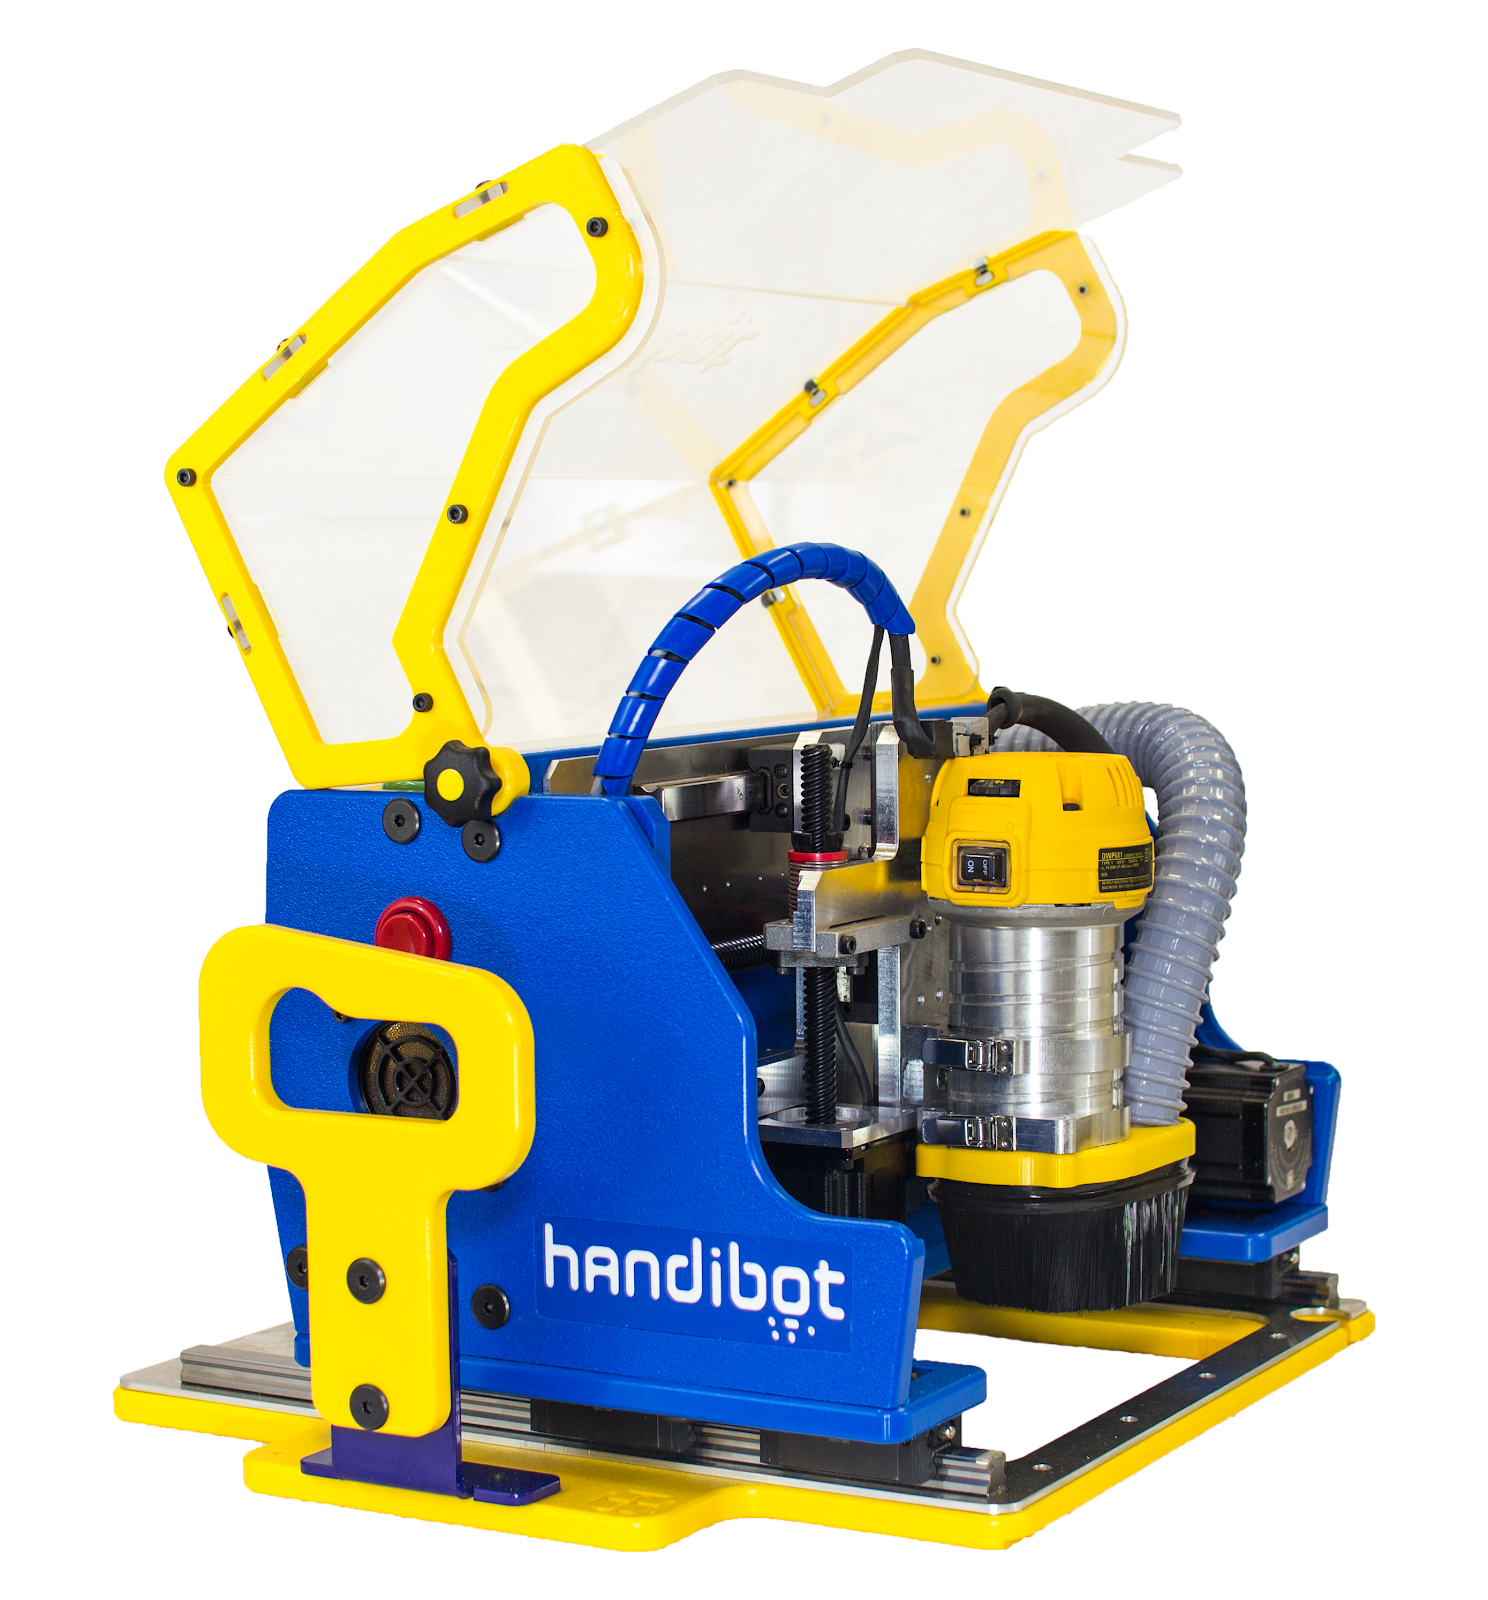
The next CNC tool that caught my eye was the Handibot which I had also seen at SxSw the same year.
In my research this winter, I spotted a Handibot during my visit to a makerspace in Boulder, and got a demo of one in a Tucson makerspace. The $3000 price point seemed in line with my budget. I was intrigued by the mobile nature of the tool. You could use it in many positions to carve walls, ceilings, and even move it along big pieces of wood. But after handling the Handibot, I quickly realized this was a SERIOUSLY heavy tool and not as mobile as it first appeared. The folks at the Tucson Makerspace had created a serious rolling enclosure for it, and also created a Jig to allow them to move it in a way that they could cut into bigger pieces. The Aspire software they were using seemed a bit cumbersome and not entry level. Overall, I decided that although this tool would probably be a good match for a more experienced CNC user, it was not the best entry level tool, and probably not well suited for some of the younger learners/makers I hoped to introduce CNC to. It was just a little too serious of a machine for EMMA at this current state in her journey.
The next CNC tool I got to see in action was the XCarve.
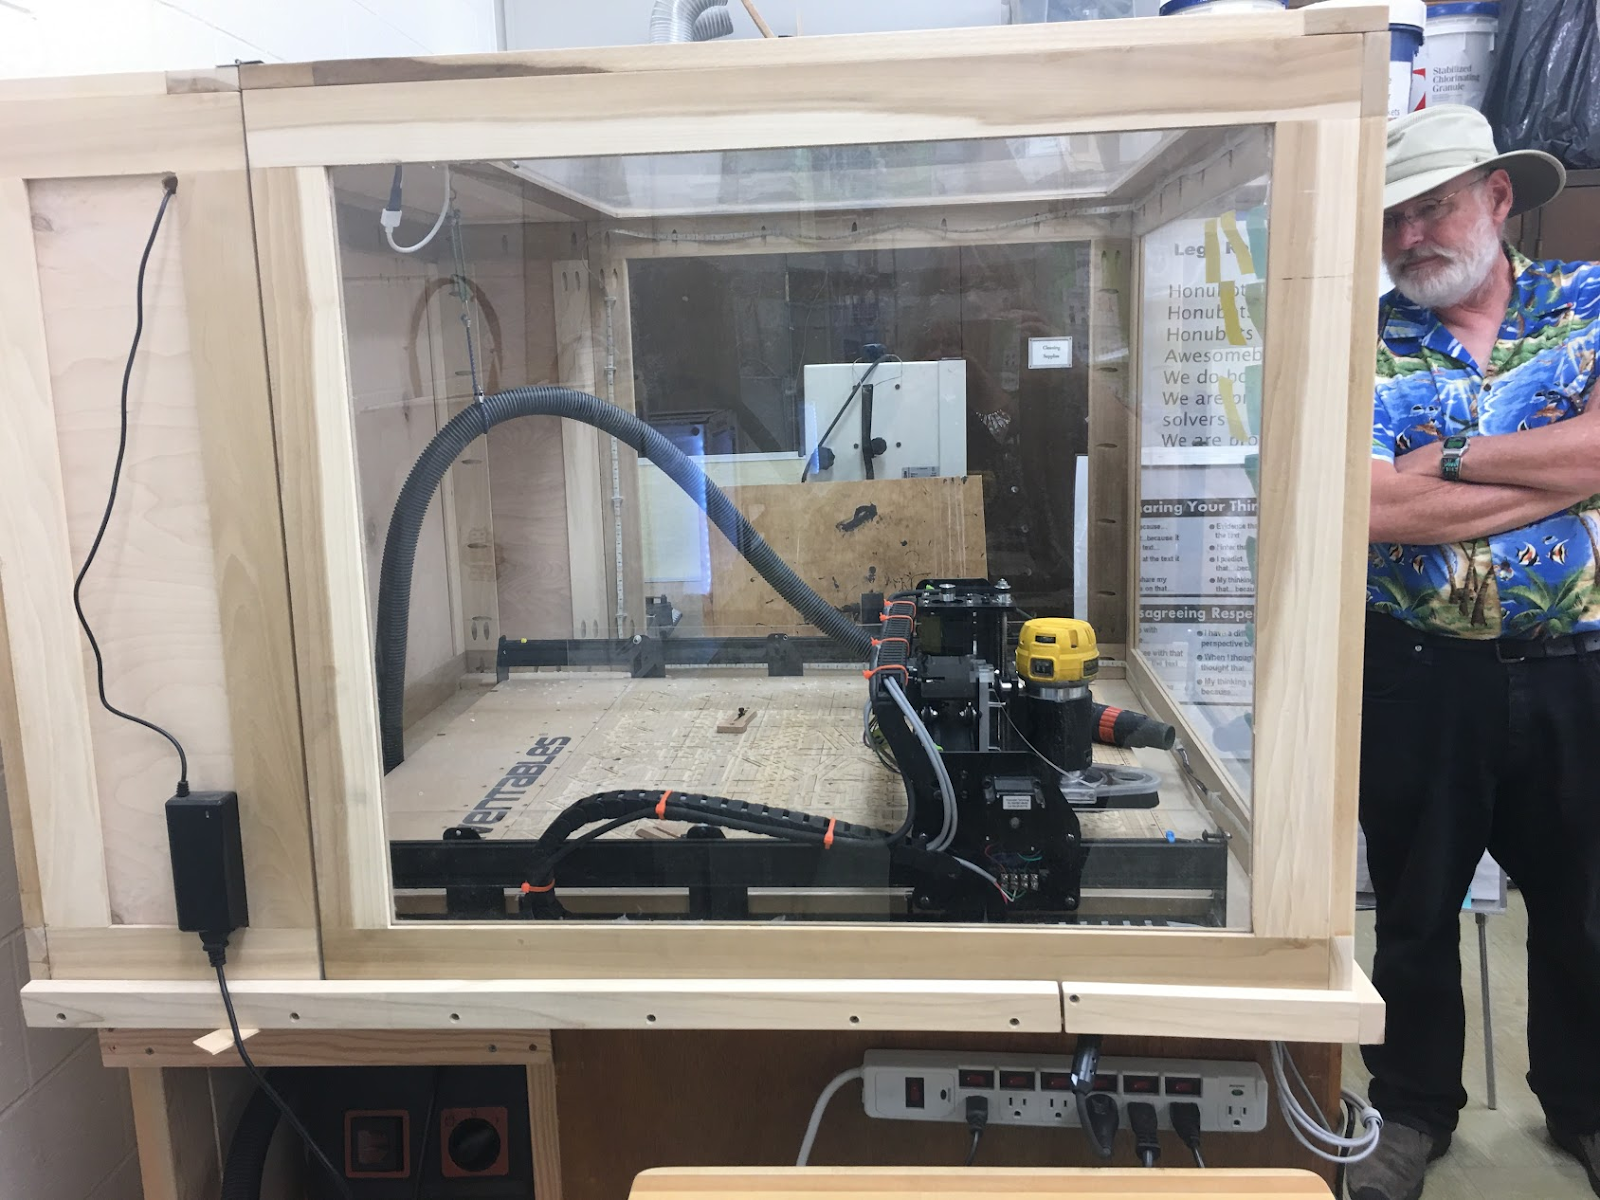
Probably one of the reasons I warmed right up to the XCarve as that I got to see it in action in a K-6 makerspace at Kailua Elementary School run by an amazing educator, Greg Kent.
Greg had created an enclosure for it and added a shop vac to the enclosure. Greg was very enthusiastic about the way the XCarve fit into his “ELEMAKERY”.
Check out the artifacts he and his students created for their School’s Garden project .
Although the XCarve with its $1600 price would have certainly been a contender if I had my own classroom, it was too big a unit and not mobile enough for EMMA.
Eventually the top two contenders in my search for an entry level CNC tool for my mobile studio for creating and making ended up being The Other Mill and Carvey. Honestly, I want BOTH of these for very different reasons and might end up with both eventually!
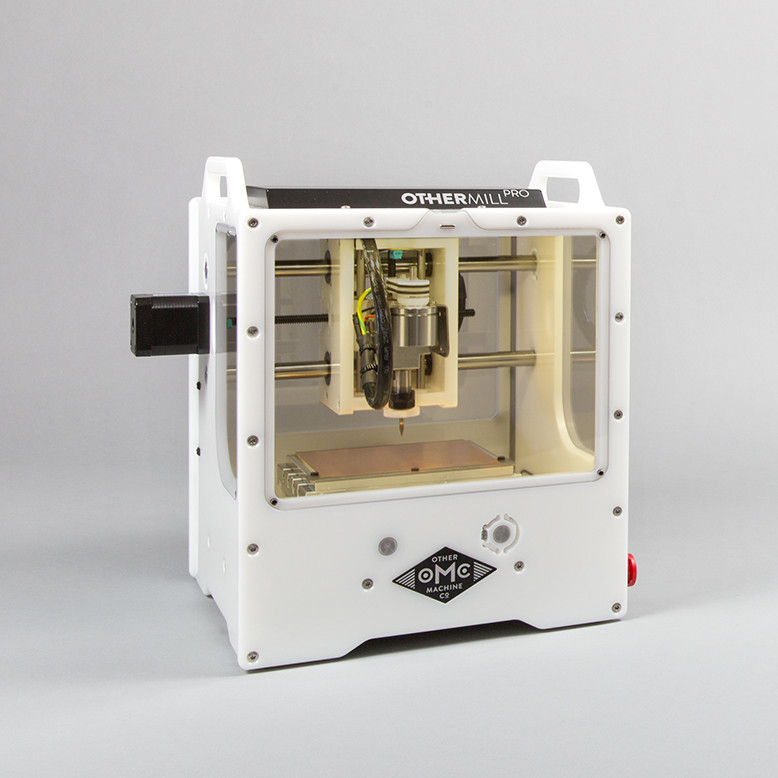
I got my hands on an OtherMillwhile visiting Matt Dillon K-6 Maker Lab at Iolani School in Hawaii. Matt's use of the tool were so right on pedagogically, it was easy to picture this tool in an elementary or high school makerspace.
I loved how very LIGHT and PORTABLE the OTHERMill was. The EAGLE software seemed very user friendly. The $3200 - $4000 price was still within my budget. Matt’s middle school students were using it to create Circuit boards. It could also be used for other small wood objects and with other materials (i.e. wax).
If my goal were to start with circuit boards, the OtherMill would be my first choice. It’s the perfect size for circuit boards and it has the right precision necessary for circuit board design.
Along with wood and acrylic, the Other Mill can also cut aluminium, brass and copper.
But in the end, the 5.5 inch X 4.5 X 1.6 inches working area was what made me table the Other Mill as my second choice for a mobile CNC mill.
In some ways, I think the constraint could be a good thing, in that we could focus on small projects, thus being able to cut more projects and waste less material. But I feared that student creativity would quickly bring them to a point where they would want to prototype ideas that needed a little more working area.
The mobility of the OTHER MILL, almost won me over! It is so easy to pack and move!
But since I can’t really learn two tools at a time, my first CNC tool for EMMA will be the Carvey.
The $2500 - $3000 price works within my budget. The Easel software seemed like a great way for younger or less experienced learners to enter the world of CNC.
The size of the machine allows for a greater work area. However, the Carvey did end up a bit heavier than I had hoped for a mobile unit -- I'll need a cart to move it!
Machine Footprint
Width: 21.7 inches (55 cm)
Height: 16.6 inches (42 cm)
Depth: 20.5 inches (52 cm)
Weight: 70 lbs (32 kg)
Work Area
Width (X-axis): 11.6 inches (29 cm) -
Depth (Y-axis): 8 inches (20 cm)
Height (Z-axis): 2.75 inches (7 cm)
The material options rang from from aluminum and corian, to acrylics and wood.
They say it can also do circuit boards.
I was also inspired by Maker Educator Jim Tiffin’s work with younger learners.
Jim shared with me everything he loved about the Carvey as a making tool for his students:
Simple contained system that is easy to clean and prevents dust from filling your workshop
Auto homing feature to help identify the top of the material
Software - Easel - is extremely easy to use. It is part of my students’ first lap with computer aided modelling, and they quickly pick up on what all the handles do for resizing, rotating, etc. We begin at grade 1 using the Carvey.
There are lots of apps that people create and add-on to Easel to increase functionality, like jigsaw layouts and stamp carving
Troubleshooting guide is immediately accessible if something goes wrong, and the Inventables’ Tech Support crew is top notch
Software is super easy for students to teach other students - My grade 3 and grade 4 students are self taught, and are now teaching their classmates how to use the machine during their free time.
PC and Mac compatible
Jim confirmed that the build area would probably be one students will outgrow. His students are “hungry to make bigger projects”. He also confirmed that the machine was HEAVY!