Subscribe to this blog to get new learnings ideas, discoveries, and inspiration from the CREATE MAKE LEARN community, along with updates about our upcoming Summer Institute and Workshops.
This Valentine's Day provided another opportunity for me to grow confidence with a new maker tool (Cuttle.xyz) and to create a project prototype that could help teaches and students grow their confidence with circuits.
A few months ago I discovered Cuttle.xyz as a design tool that is accessible and affordable for students to create vector graphics that can be cut on laser cutters or electronic cutters (such as the Cricut or Silhouette Cutters). Not only does it work on Chrome books, but the company has also signed Student Data Privacy agreements with schools in Vermont and other states. This is a huge step towards and a commitment to increased equity in providing all students access to learning through creating and making. I've been searching for a vector tool that met those requirements for a long time.
The Cuttle Name SnowFlake Generator inspired me to make snowflake themed ornaments for people I love this Christmas. This month their beautiful heart shaped box template inspired me to keep playing. Since I did not have access to my laser cutter this month, I used my Cricut Maker to experiment further with Cuttle.xyz and used Valentines Day as an opportunity for create something for people I love and perhaps even fall in love with this new maker tool due to their commitment to education.
In this post, I'll share a simple project in hopes that it could help teachers and students grow confidence with
circuits and switches
designing and cutting out vector graphic software
I'll explain why I think Cuttle.xyz is a must have tool for schools and why creating simple but beautiful projects with circuits and switches meets our UDL (Universal Design for Learning) goals as educators.
Here are the supplies you'll need to get started to create a light up Valentines Day Card.
coin cell battery
LED lights
copper tape
Brass Brad
Scotch Tape
Cardboard
Cardstock
Cutting tool (scissor or exacto knife)
pen/pencil
glue
This card can certainly be made by manually cutting out a colored heart out of card stock.
Since my goal was to gain confidence with Cuttle.xyz as a vector design tool, I spent some time playing with different heart designs. Check out this video or the steps next below to see some features of Cuttle.xyz features I explored during this project.
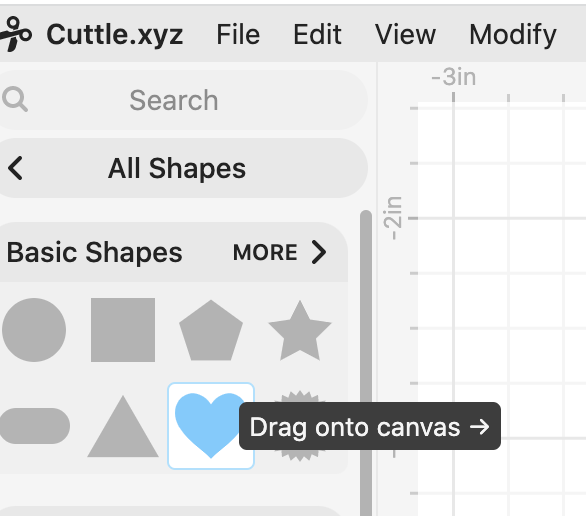
I started designing my Valentine by by dragging out one of Cuttle's Built in Vector shapes.
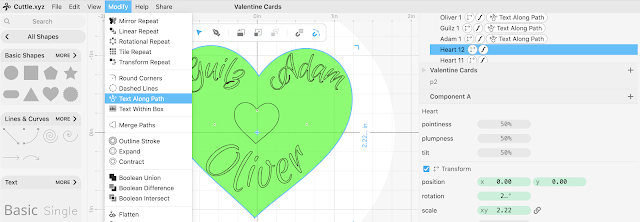
I used Cuttle.xyz's Text Along Path Modifier to create different designs. I wanted to add the names of my grandchild (Julian) and his two parents (Matt and Molly).
To use this feature, simply Select a Shape on your Canvas then Click on Modify and choose the Text Along Path modifier.
The shape will disappear and be replaced by the Words Text Along Path of your Shape
The shape will reappear when you hover over the image/shape A box of parameters will appear along the right side of your screen for you to play with experiment with.
Explore the options in the right panel of the Text Along Path modifier. Start by replacing the TEXT to the words you want and Changing the Font and Size of the font. I loved that there are so many STENCIL fonts - which are mostly safe for cutting out text. And Cuttle.xyz has some very fun one - Like this CODYSTAR option - which I settled on for my first design.
You'll want to experiment with all the different parameters.
Experiment with the ALIGN feature and the Vertical ALIGN features, along with the FLIP checkbox.
The ALIGN tool will move. your TEXT around your Shape, while the Vertical Align will move your text to the outside, inside, or middle of the outline of your shape.
The Flip checkmark will change the way the letters of your text are facing.
I would also suggest playing with The Vertical Offset and Letter Spacing. You can also try adding spaces before or after your text to get a desired affect.
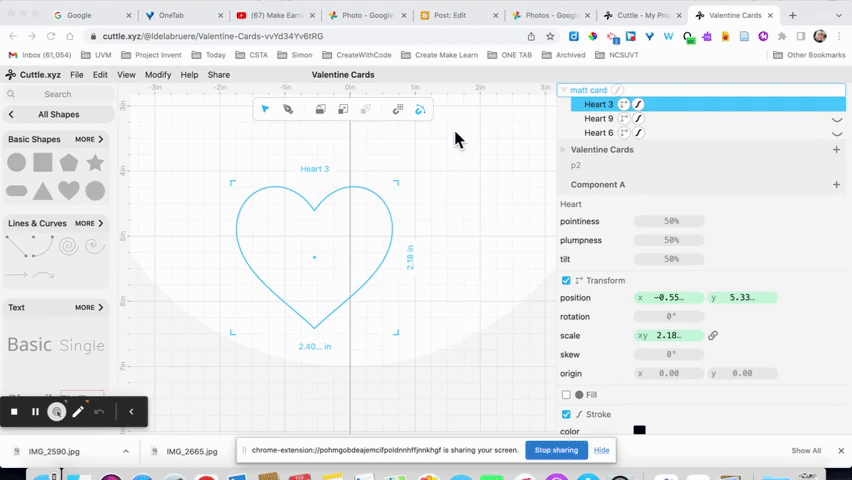
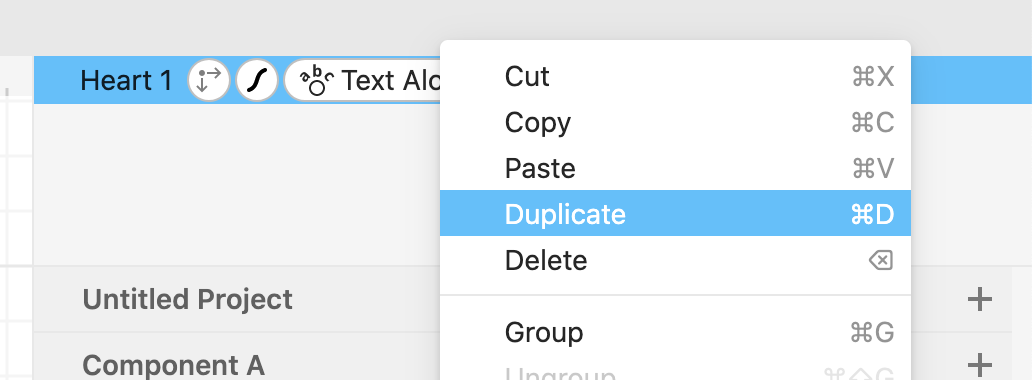
Since I wanted to add 3 different names to my heart, I simply right clicked on MY Heart in the right panel and chose duplicate 3 times.
I removed the Text Along Path Modifier from one of the Hearts to make it the part of the design that actually cuts out.
I played around with the different parameters of each of my HEARTS until I ended up with this design that included the names of my grandson and his parents.
I also duplicated the outside heart and changed the size of it to end up with a cutout of a smaller heart inside my design. This would make a great place for a light to shine though.
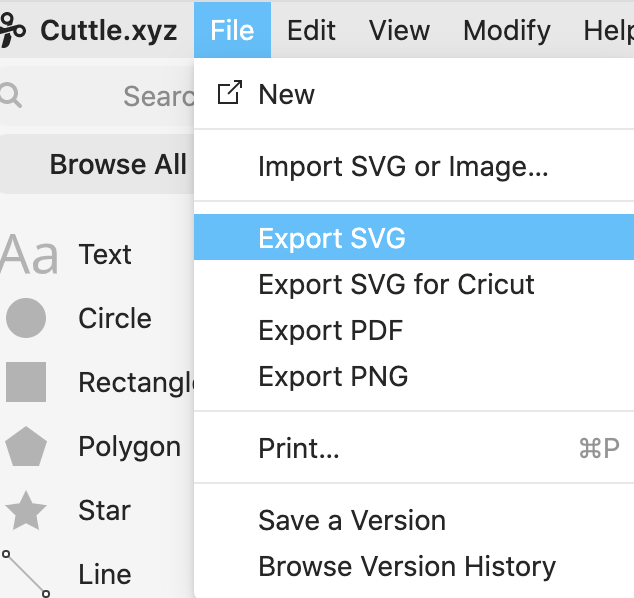
After I had the design just the way I wanted it, I exported it as an SVG. Cuttle.xyz has two different export features. I did not experiment with the Export SVG for Cricut at this time.
I soon found myself playing with new fonts and new designs for other family members.
There is just something about making for people you love that makes learning new skills so much fun.
I imported the SVG files into my Cricut Design Space. (If I had access to my laser cutter, I could have used that tool to play)
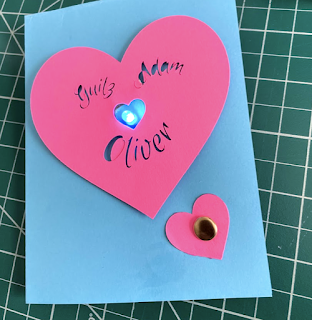
I, then cut out some fun Valentines designs for my grandchildren and their parents.
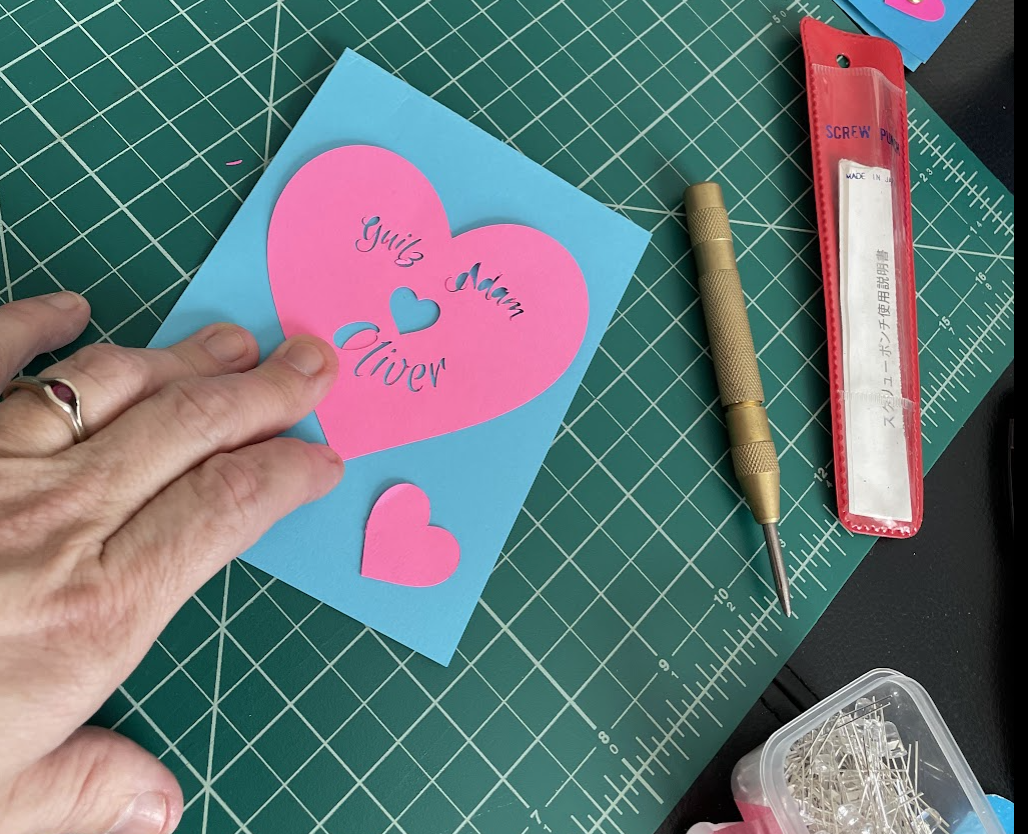
These cutouts were perfect for creating a paper circuit Valentine.
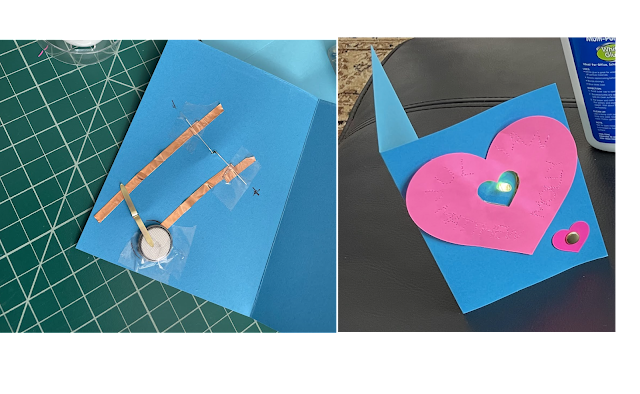
I start by cutting a contrasting piece of card stock in half and folding each piece in half.
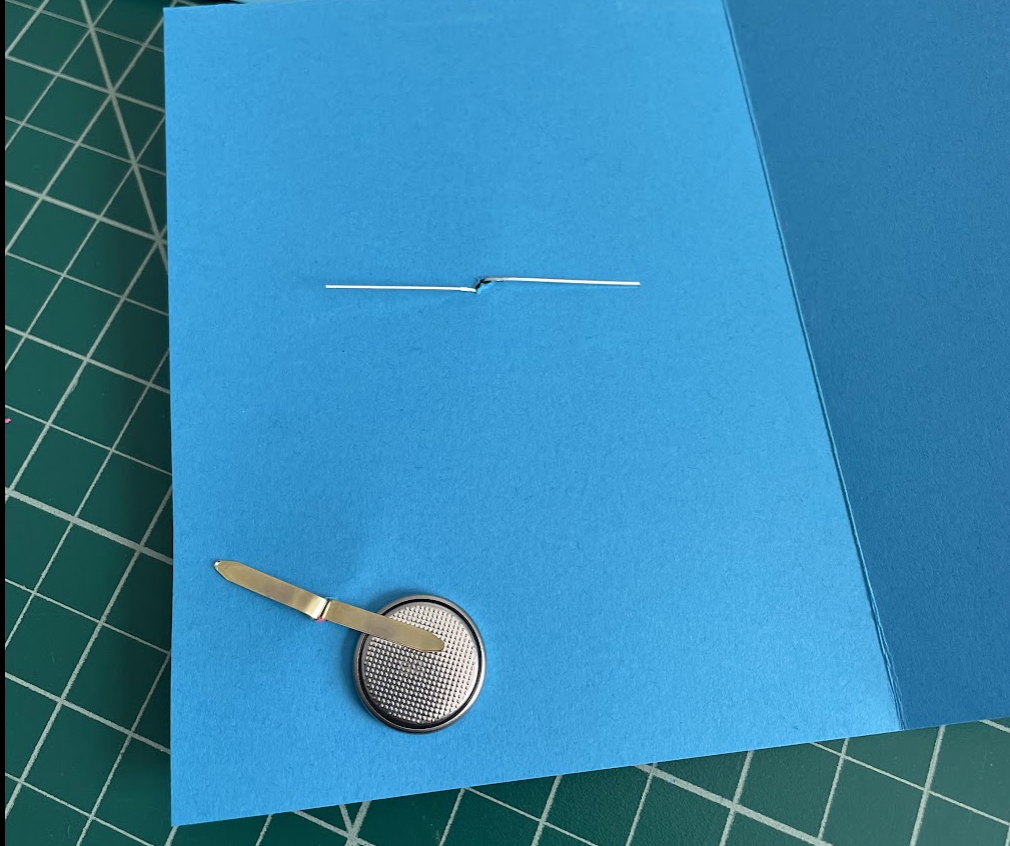
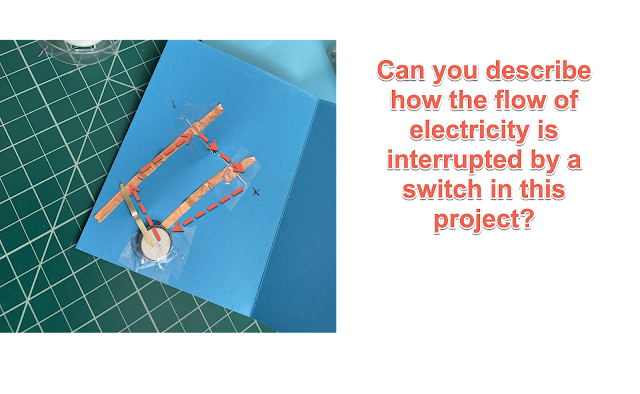
Then I layout the design and with a sharp object like the a Japanese Screw punch I poked a hole where the LED light should go and where the BRAD that will serve as a Switch will poke through.
(You can use a thumb tack, needle, or other sharp object. If working with younger students, you could use a golf tee)
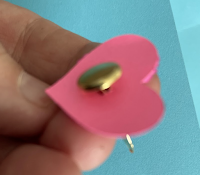
Take the the small inner heart cutout and poke a metal brad through it.
This will become our on/off switch.
Insert a fun colored LED into the card where you'd like the light. I happened to have some flickering multicolor LED's handy. Insert the Brass Brad through the card where you'd like the switch.
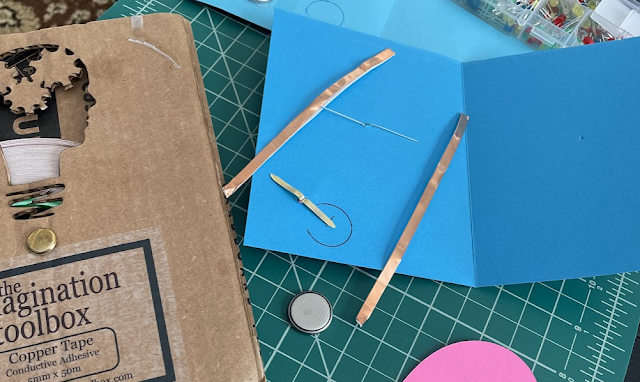
Turn the card over.
Spread the legs of the LED open. I pointed the Longer LED leg towards the inside of the card so I could easily keep track of which leg was positive and which was negative.
Spread the legs of the Brass Brad open.
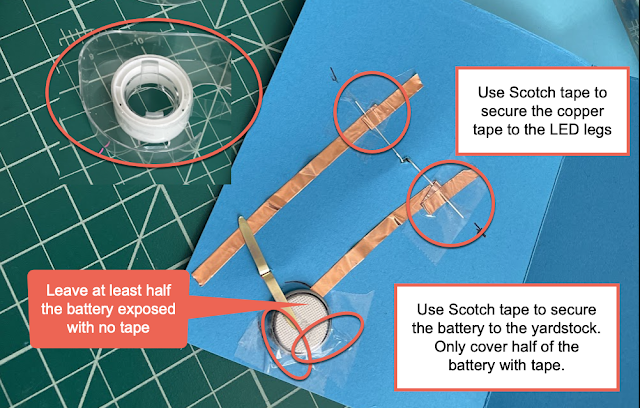
Place a coin cell battery face down under the leg of the LED towards the center of the card.
Trace around the battery.
Mark the circle with a + sign to remind yourself that the battery will be placed + side down.
Cut two pieces of copper tape long enough to slide under the LED leg and reach under the BRAD Legs. Leave a little extra copper tape towards the top of the card.
You will use that to double wrap the copper tape around the LED leg.
Remove the backing of the copper tape and lay down the copper tape on the cardstock. Make sure the copper tape shiny side makes as much contact with the LED legs as possible by running it under the legs and coming back down over the leg and then back up. This is not absolutely necessary, but it's my way to add extra points of contact. Paper Circuits sometimes lose their contact.
Secure the LED legs to the cardstock and copper tape with Scotch Tape. Secure the battery with Scotch Tape, but only cover half the battery with tape. The other half must remained exposed so the Brad legs can make contact with the battery directly.
Voila. Your Paper Circuit is ready.
To turn off the the LED, simply turn the Little Heart with the Brass Brad slightly so that the end of the Brads lay over the TAPED part of the battery. The Tape acts as insulation and interrupts the circuit. . If the Brad falls off the battery simply manually put it back on.
What I love about this Simple Project is that it can engage students to create beautiful work and create for people they love. Students are motivated to learn and demonstrate their understanding of circuit beyond traditional methods. Universal design for learning strategies are important in education. Using this project we are offering multiple modes of representation, expression, and engagement for students learning about the flow of electricity.
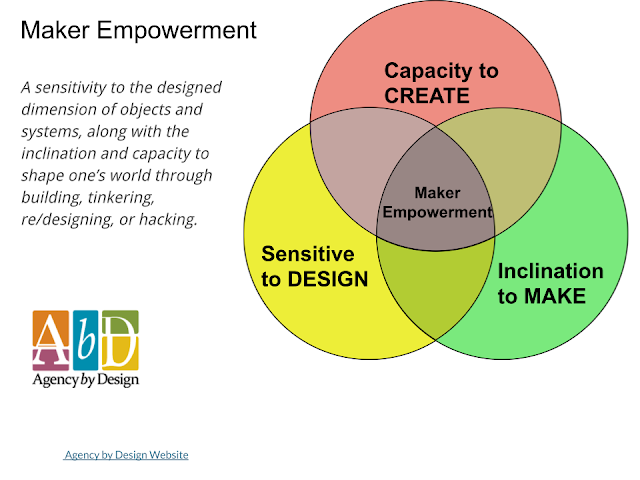
Students also leave with increased confidence in creating vector graphics which can be used in so many future endeavors. Agency by Design offers this description of the type of Maker Empowerment I've seen in students after completing projects like this.
If you get inspired by this post to create and make something fun, please share them with me. Twitter @techsavvygirl