Wednesday, November 23, 2022

Gratitude Boards at Charleston School


What happens when you take a creative, enthusiastic, risk-taking librarian, and a group of middle school students and a Makey Makey inventor kit and bring them together for a weekly CHOICE session during November? Read on and find out how Charleston Elementary School used the PBIS November theme of GRATITUDE to create an interactive way for students and staff to express their gratitude.


After a brief meeting with Charleston Elementary School's librarian about possible collaborations, we decided to use the  Makey Makey as a way to introduce the idea of Code You Can Touch.  

After sharing  one way to introduce coding to students using  the Makey Makey, Ms. Bolton and her students explored the  Makey Makey and alligator clips along with Scratch.  

Soon they were ready for more, so we decided to give the students a challenge that connected to the school's  PBIS November theme of GRATITUDE.   


We organized students in groups of three and provided each with post-it notes and the following prompt. 


Come up with AT LEAST 10 things 
you can't imagine the world without.  

The prompt worked better than we had expected and some groups had more than two dozen stick notes 


After thinking through different ways to teach students collaboration skills, we asked each group of three to assign one of the following roles to their members.


ARTIST

ENGINEER

CODER

Ms. Bolton and I lead skill building activities with each group and helped them understand their role in the project.


The ARTIST would use Google Slides to design the center piece for the gratitude board.


The CODER would work with Scratch to write the code that played recorded sound clips from 10 of their gratitude sticky notes.


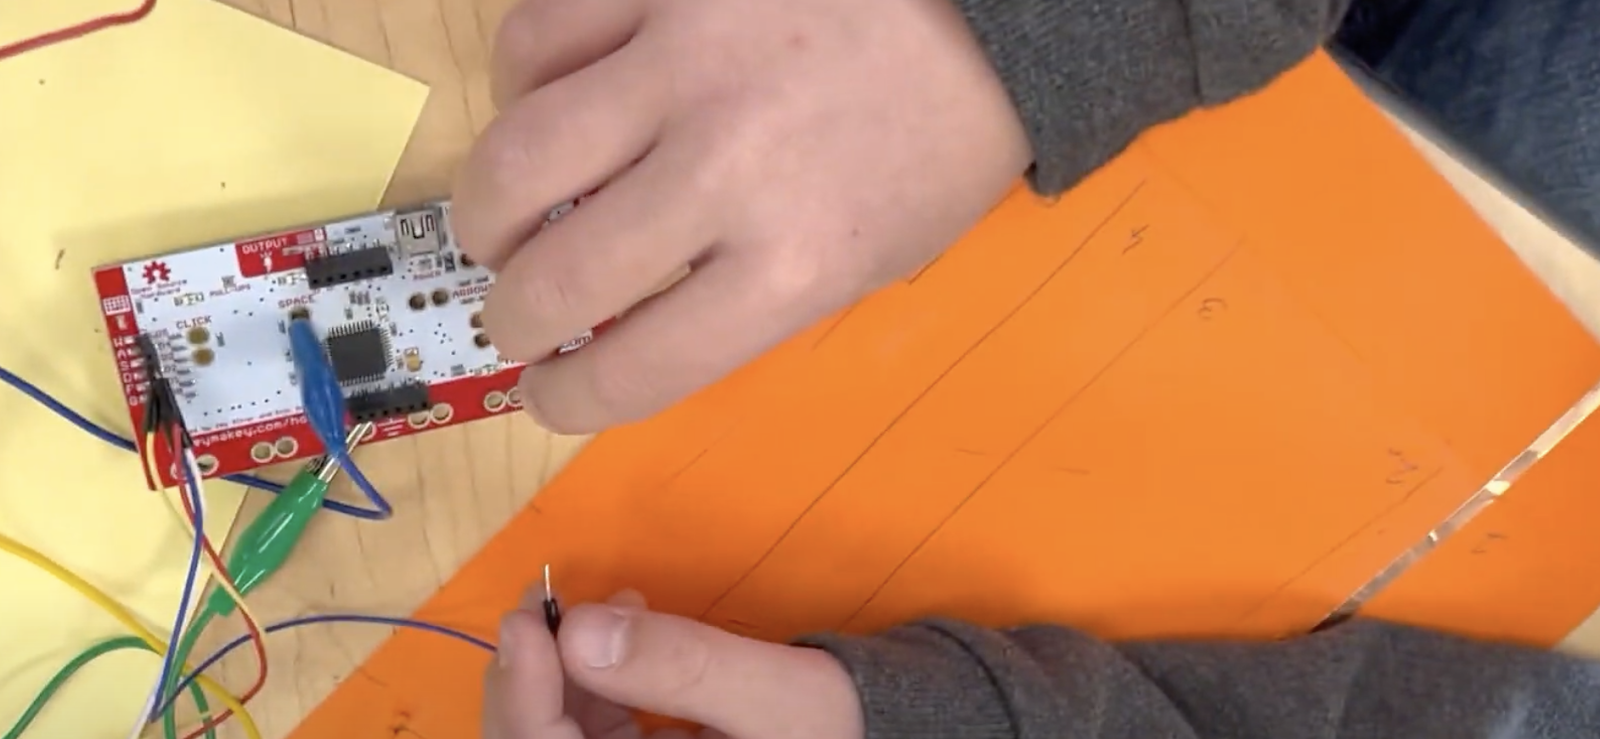
The ENGINEER would use copper tape and cardstock to create switches that closed circuits that  could be connected to the Makey Makey to  trigger the code to play the recorded sounds. 


The session went by quickly and we looked forward to meeting again.

Unfortunately we learned that a school event would pull out many of our students for the next session, so we modified our original plan. Instead of every team of 3 designing their own gratitude board, we worked on creating an interactive way to engage anyone in the school who wanted to express their gratitude.


Some students continued to work on a physical gratitude board that would use the Makey Makey to play 10 sound clips expressing gratitude.  


Some students worked on recording and coding sound clips using Scratch.


Some students worked on a creating a digital gratitude board that all grades could contribute to using Padlet.


Some students worked on creating an instructional video tutorial on how to contribute to the digital gratitude board using WeVideo.


Some students worked on creating a poster that invited others to share their expressions of gratitude. 


On our last day together before the Thanksgiving break, the students were scheduled to  finish the project. Unfortunately most the students were gone to get fitted for ski rentals that day, and a handful of students helped pull the project together.  

We regrouped and considered how we might persevere to complete the project before Thanksgiving break.

One students used the   *Digital Gratitude Board using Padlet  for our school community to record expressions for gratitude.  He came back from is journey around the school with over a dozen recordings. 

They also sent out an email to the whole staff encouraging  their classes to participate.  A few students  even made a  *We.Video tutorial  that shows how to add text or audio to help newbies  understand how to record on their Padlet (Digital Gratitude) 


The addition of Padlet as a Digital Gratitude Board helped the students quickly collect expressions of gratitude from anyone who wanted to contribute to the project.


By setting up the posts to require moderation, we were modeling digital citizenship to our students. We even invited students to work with us as we approved the posts. 

Meanwhile it was time to finish putting the physical Gratitude Board together. 

The middle of the board was created using a discarded  corrugated plastic yard sign.  We scored the board to fold it in half and glued colorful paper as background.   This automatically created a place to hide the wires and Makey Makey


We used WORD ART in Google Draw to create a design with fun fonts for the words - which we then downloaded as an SVG.  The SVG file type can be easily cut out using the Cricut Maker. (no need to purchase fancy fonts from Cricut)


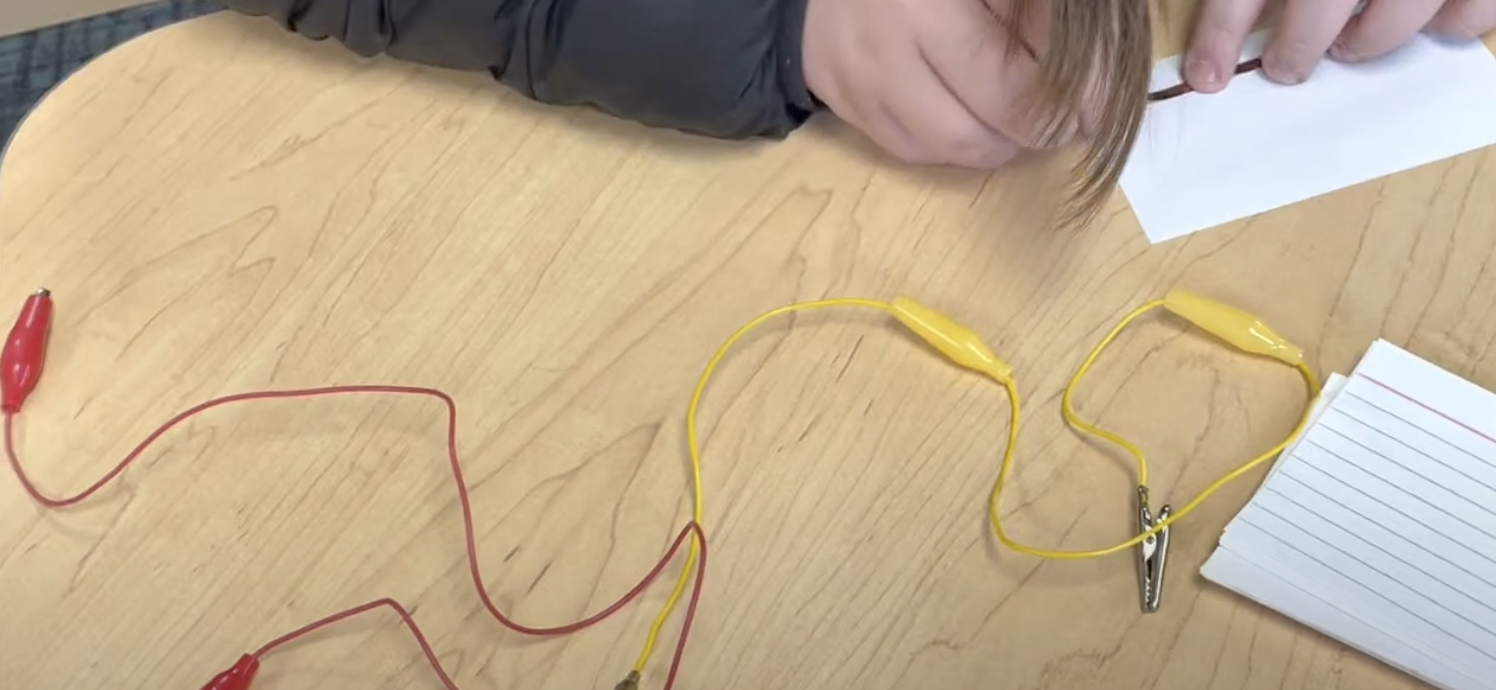
With a combination of alligator clips and jumper cables we could create a board with at least 10 trigger switches. 


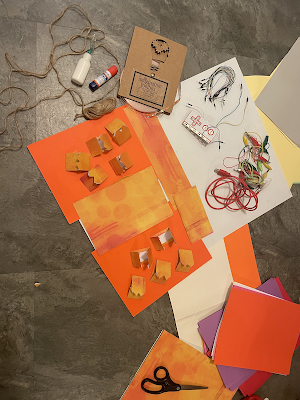
Two students used copper table design and card stock to create 5 switches  that would trigger our Makey Makey and Scratch to play a sound. 


Two different students worked on another 5 switches, but they wanted their tape to weave along the back so it was less visible.  Their design quickly ran into a problem, when it became obvious that the copper tape would cross and short circuit.  It was a great opportunity to do a mini lesson on insulators and how they are used.  A roll of Scotch tape helped us create an insulating solution. 


As the project was coming together, some problems revealed themselves. 

Tangled wires made it hard to test our project and figure out which connections were not working.

We added some temporary sounds to try to troubleshoot our creation. 


The students demonstrated creative and practical problem solving skills to come with a better system to test the connections of their gratitude board. I love it when students figure out that they must isolate a variable and have a system when troubleshooting. Untangling the wires and recreating the wiring on a new makey makey revealed a broken green jumper cable.


Eventually the bell rang and it was time to go back to class.  When the bell rang,  all the pieces of the Gratitude Board were ready to assemble into a final product.  The last part was to gather all the sound clips from the Padlet and bring them into the Scratch program. 


While the kids were heading off to class, I showed our enthusiastic and creative librarian that Padlet allowed you to Share and Export to a CSV file. 


 The CSV file contained linked to all the recordings in mp3 format.  We quickly clicked on each link and downloaded that file  to our local drive as mp3. 


Then in one swoop, we were able to use Scratch's IMPORT Sound feature to  quickly bring all the mp3 into Scratch.  


Once that was done, it took less than a minute to replace the 'test sounds' with our actual recording. 

You can view the Scratch program and listen to the audio files on Scratch here.


I had never used this workflow before, but it worked quite well and allowed the students  to learn and practice collaboration skills as we assigned different roles to the ones that showed up each day. I do plan to use this workflow again. 


Minutes before it was time to leave for the day, I shared the Scratch file and copied the link.

I added the link of the Scratch file to the Padlet for easy access and created a shortened URL

Having the shortened URL to the Padlet made it easy to access anytime you want to set up the Gratitude Board.  


I must say the final product was something that everyone was proud of. It was filled with student voice and staff voice.  It looked amazing and both adults and students were drawn to interact with it. 


 It felt like what Ron Berger calls Beautiful Works. 


The librarian and I reflected on lessons learned and how we were able to adapt to new curve balls each week and still end up with a successful project in the end.  Next steps is to show the finished pieces with the original group of kids who started this project and debrief with them providing time to reflect and add evidence to their eportfolios.






Friday, November 18, 2022

VermontFest 2022

 VermontFest 2022  was my first post-covid conference and it was so great to connect in real time with so many amazing educators.

Both sessions I lead were filled with joy, laughter, and great conversations.


What's Working In Our Spaces for Creating and Making
(including STEAM spaces)

Facilitated by Melissa Bushey and  Lucie deLaBruere 

This session will be a round table discussion where we can share updates of how our makerspaces, STEM/STEAM spaces, Project Spaces, Mobile Spaces, IDEA Labs, Innovation Spaces have evolved. How have these spaces changed? What's working well. What would we do different? What do we aspire to? Let's talk and network around this topic.

Whether you are moving full speed ahead or in the beginning phases come network with other librarians, tech specialists, and classroom teachers to share and network around this topic.

Slides

Jamboard


Let's Create With Code You Can Touch


How might we learn computational thinking by creating and making physical objects? Why does this approach help bridge the equity gap we often see in computer science? We'll discuss these questions during this hands on workshop. You'll leave with a digital file you can use with a 3D printer, vinyl cutter, laser cutter, embroidery machine, or other maker tool to create a physical object that includes code you can touch. We'll briefly look at Scratch, Tinkercad Code Block, and Turtle Stitch as options. Leave inspired to Create a T-Shirt, Cookie Cutter, Zipper Pull, Earrings, or other other fun artifacts using Code you can Touch.


Get your Slides Here

Take the Snowflake Challenge 


And then this happened at lunch


Jessica Wilson - 2022 Frank Watson Award
Lucie deLaBruere 2022 Making IT Happen Award


Ended  the conference inspired by Ken Shelton's message


Tuesday, November 1, 2022

Code You Can Touch using laser cutter or vinyl cutter

 In this post I continue to advocate for creating using Code You Can Touch.  

In the previous post, we used Makey Makey and Scratch to make physical objects interactive by adding the ability to generate fun sounds when you interact with them.

In the next few posts, we will actually CREATE a design using ALGORITHMS and then use MAKER tools such as laser cutters, vinyl cutters, or 3D printers to MAKE a product that uses the design that we CODED. 

Let's start with  coding designs that you can use with cutting tools.  I happen to have a Cricut Maker and a Glowforge laser cutter in my maker-space, but you can use this workflow with any maker tool that imports SVG (vector files).  In the next post, we'll play with 3D printers.

Imagine wearing earrings that you created with code or sporting a shirt or some jeans that have a design that you created with code.  Could your night light include a design you created with code.  The possibilities are endless. 

But first let's  briefly examine WHY you would want to to CODE a DESIGN instead of draw one or download one from ETSY. 

Of course, one reason is to develop skills in computational thinking.  Others might find this approach an introduction to computer science or learning to code.  Each of these are different but related and all value the transferable skill of creating and understanding algorithms.  This brief video from Digital Promise does a great job describing the importance of computational thinking in our computational world.


I would also consider creating physical objects with code to be an inclusive pedagogical strategy.  Digital Promise describes inclusive pedagogy as  
"engaging all learners in computing, connecting applications to students’ interests and experiences, and providing opportunities to acknowledge, and combat biases and stereotypes within the computing field."

If we want to change the Dave to Girl Ratio we must create opportunities for under-represented populations to create confidence and interest in tech and computer science.  Creating beautiful and colorful objects that you can 'touch and feel' is one way to engage a broader audience with computer science.


The Cricut Maker was a popular choice during TechSavvy Girls Camp 2018

I would not advocate that Coding a Design is the only way  (or best way) to produce artifacts with maker tools.  It's just ONE way.  But it does provide a way that engages students in the learning process with HARD FUN. 

Engaging students with fun does not have to be 'make it easy".  Seymour Papert dedicated his career to creating environments that included hard fun.  

Once I was alerted to the concept of "hard fun" I began listening for it and heard it over and over. It is expressed in many different ways, all of which all boil down to the conclusion that everyone likes hard challenging things to do. But they have to be the right things matched to the individual and to the culture of the times. These rapidly changing times challenge educators to find areas of work that are hard in the right way: they must connect with the kids and also with the areas of knowledge, skills and (don't let us forget) ethic adults will need for the future world.   ~ Seymour Papert

Learning through Hard Fun while coding, creating and making is a great way to help students develop the growth mindset that can change the way they learn across all content areas. Carol Dweck and Jo Boaler offer some concrete research on this topic in this article. 

For additional research on Hard Fun, check out Nicole Lazzaro's  model Four Keys to Fun.  


In the workflow of CREATING  Code You Can Touch outlined below, students spend some time EXPLORING some FUN tools.  We start with a LOW FLOOR tool (like Scratch) which can quickly have students feeling CONFIDENT.  As students are MOTIVATED to  PRACTICE further we provide CHALLENGES which leads to OBSTACLES that can be overcome.  As MOTIVATION increases to further EXPLORE leads to new ORIGINAL DESIGNS leading to CREATIVE CONFIDENCE with CODE.   If this sounds a bit like game theory - it is!  The best games are HARD FUN.

Walking away with a Physical Artifact that you CODED is like giving birth to something that you will treasure and that object becomes a physical reminder of the GROWTH MINDSET and sense of MAKER EMPOWERMENT you gain during the process. 

Start by INSPIRING  students with some amazing examples from @CeMoCreates and @morrill_rob


Or why not create a few of your own examples to provide students some artifacts they can actually touch!

Although there are lots of great examples of ART created by CODE,  I would suggest starting with some unplugged activities to introduce your students to algorithms while moving and turning around a room using angles and degrees as units. 


To start CREATING CONFIDENCE with basic algorithms consider using SCRATCH by MIT and the PEN Extension


Consider printing out Challenge Cards like this for your students to explore.


Having students share and compare their code is a great way to look for patterns and understanding that there are more than one way to create similar designs.


Once your students feel confident with the PEN tool, 
let's start to develop an understanding ANGLES and  DEGREES 

Depending on the age of your students, you might use resources like this introduction  from MATH IS FUN  or this Khan Academy Lesson along with some unplugged activities where students move around the room or create dances using degrees and angles to describe movement. 

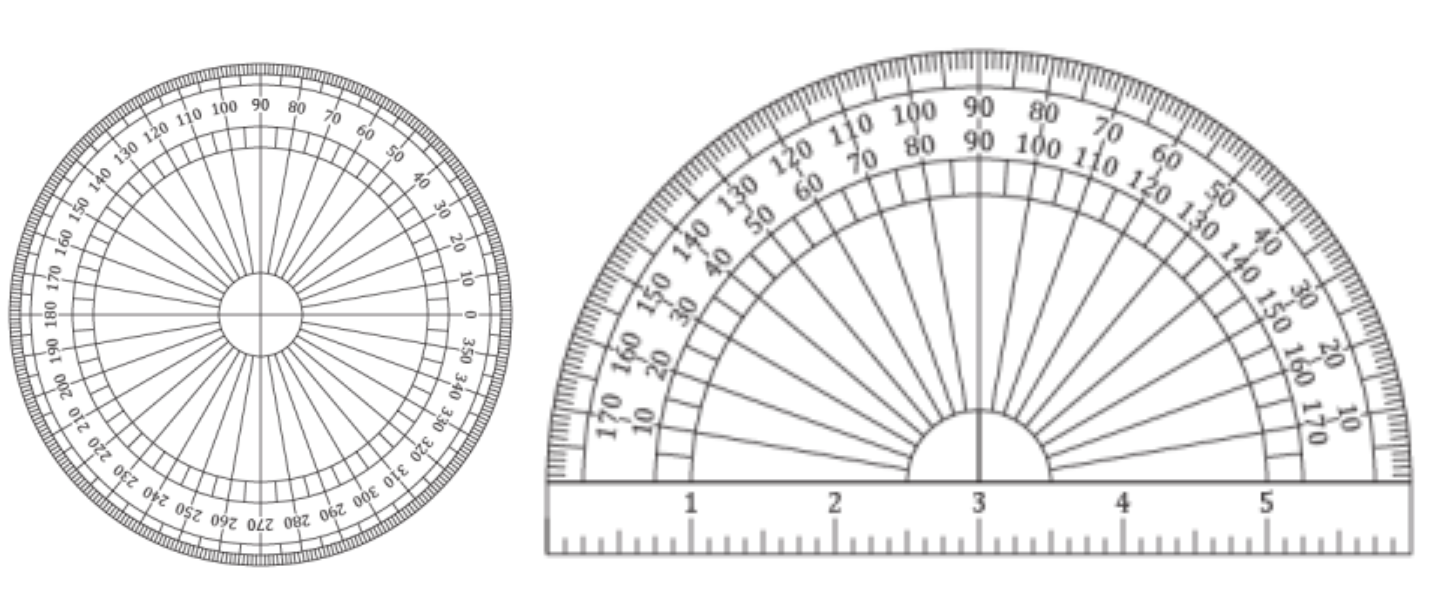
You might want to pass out some of these Printable Protractors(pdf)

Now its time for the students to explore using two different types of commands when creating their algorithms in SCRATCH 

Let's start by pointing the cat in a certain direction. 


Pointing your Sprite in a direction has very predictable results.

Once you feel confident with predicting what direction your sprite will move next using the POINT in DIRECTION block, it's time to start playing with the TURN DEGREES block.


Point in Direction Block

The blocks points the sprite in a specified direction and moves within 360 degree angle.

Example; pointing the cars  towards their destination.

Turn Degrees Block

These block turn the sprite in specified amount of degrees , it can be either clock wise or counter-clock wise. It can change the direction where the sprite is facing towards.

  • Experiment with these two commands until you truly understand these.
  • Try different numbers. 
  • Use the protractors to predict what will happen.

This is a great time to introduce the GREEN FLAG event command and the ERASE ALL command.
Here are a couple of challenge cards you can use with your students.


Did you know that you can change the background in SCRATCH.
Try adding the X,Y coordinate grid background


Here's a new challenge card that for your students once they understand the coordinate grid.


By this time, your students should be prime to learn how to use LOOPS in their algorithms
I like to wait to introduce LOOPS until you actually NEED them to solve the problem of 'having too many tedious repetitious commands that seem to form a pattern".  This develops the computational thinking skills of pattern recognition.


Here's a great video to introduce the concept of using REPEAT (LOOPS) when drawing POLYGONS


Explore! How many degrees would you need to turn to create 

3 sided polygon?
8 sided polygon?
A circle?


Here are two more challenge cards you can try with your new skills.


Your new confidence with drawing polygons is about to get SO FUN!
How might we create some cool designs by arranging several polygons near each other?

Let's add a NEW Event "When M Key Pressed" that slightly moves the cat and gets it ready to draw another polygon from a slightly different perspective.

Then lets' use the EVENT "When S key pressed" to draw a Polygon.

Keep doing that over and over again and (count) the number of REPEATS you need.
How might adding a WAIT command help you understand what is happening?
Where would you want the drawing to pause to allow you to see EACH segment being drawn?

Notice that the commands that only happen ONCE at the beginning of the program are still under the green flag event. 

NOW for the Final Performance.
Can we MERGE all the pieces of code so that we
 NEST the two commands into ONE ADDITIONAL BIG REPEAT LOOP.
We'll use the number of REPEATS you kept track of manually.


See if you can explain what's happening in the code above. 

Now see if you can create your own original designs
using different polygons and different values for the TURNS.
Here is a challenge card you can use. 


I like to create STUDIOS in SCRATCH to collect student designs. 

Once you have a gallery of original designs that you coded to pick from,
 it's time to create your physical artifact.  

You'll need to save your SCRATCH design.
I would suggest making sure the pen color is BLACK and the background is WHITE.
This provides a contrast that will lead to the best outcome.
You'll need to delete or hide the BACKGROUND if you used the XY Grid.

To save your design, RIGHT CLICK on your design and SAVE. 


Once you have the DESIGN saved as a PNG on your computer
you can IMPORT it into an SVG FILE CONVERTER like www.picsvg.com


You'll get different results depending on the filters you use.
You might not get the EXACT replica of your design, but I know it will be a fun and beautiful design that you will feel proud to have coded. 


Your final step is to Download your SVG file and
Import it into your favorite MAKER Tools to MAKE SOMETHING MEANINGFUL to YOU! 


Will you add your design to a T-shirt with IRON ON Vinyl?
or LASER CUT some earrings?
or 3D print a keychain?

The possibilities are endless and I can't wait to see what you CREATE. 
I'd love it if you would share your designs to this Scratch Studio
or share picture of the physical artifacts you made to this PADLET.