
 Today was the first day of SxSwEDU 2019. It was the fifth year that Craig and I have come to SxSwEDU and SxSwInteractive. What a perfect place to be to reflect on the questions we are pondering during our 3rd annual March Maker Madness series.
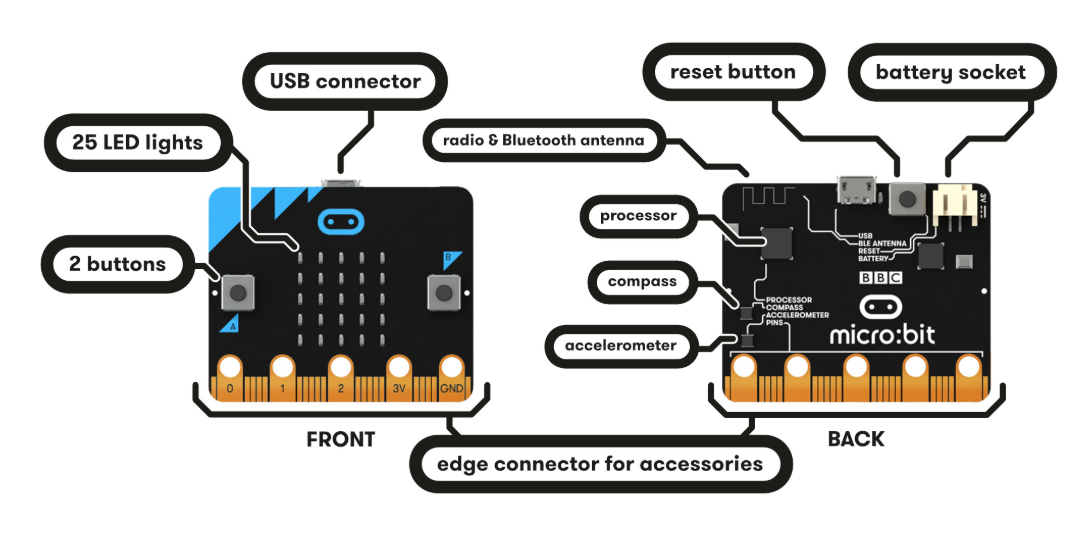
As I found myself using micro:bits during my last workshop of the day while chatting with a room full of smart educators about how they use them, I was inspired to make micro:bits the focus of our first conversation about HOW we MAKE.
During my visits to makerspaces and conversations with educators around making in the classrooms, I have seen many different types of makes. I've seen
- Guided Facilitated Make and Takes
- Short Challenges
- Self Exploration of Materials and Tools
- Applied Challenges
- Makes that create a solution to a problem
- Making prototypes as part of Design Thinking
- Open Makes with students choice
- Group or Community builds
- Making as part of Project Based Learning
- Self Expression
- Material Discovery
- Entrepreneurship or Product Development
- Making for social good or making change
- Makes that build confidence and competence
The micro:bits that we were using today in our workshop are definitely something that can be used with ALL of these types of makes, so I would definitely include them in my conversations when it comes to WHAT belongs in my makerspace and HOW we can learn through creating and making.
There are so many amazing micro:bit resources online, that educators often ask where do I start?

HOW do I get started with micro:bits?
My favorite way to get started is with the Rocks Paper Scissor lesson that you can find on MakeCode's website.

WHY?
Because EVERYONE can relate!
Which hits on that "WHO" question! Rock Paper Scissor transcends both age and gender.
And if you need one more reason, there are so many ways to extend this Rock Paper Scissor into different types of makes (see list above)
What starts as a skill builder, can soon be used for Short Challenges or Applied Challenge. You can use micro:bits to have your students create solutions to problems in their world, or to make prototypes as part of a Design Thinking lesson.

And it definitely counts as a MAKE that builds confidence and competence. I like to bring in lots of materials for students to pick from to build a bracelet from. The time when that fifth grade girl came up to me and said - "I never realized I could code wearables! I want to learn more." had me sold that micro:bits would become part of my toolkit as a maker educator.

And I can think of so many ways to make curricular connections to both ELA and Math.
You might want to see what resources your library has on Rock Paper Scissors and start a book shelf.

And perhaps consider these ideas for connecting your Rock Paper Scissor maker activity to the curriculum.
- What are the odds of winning at Rock Paper Scissors Collect Data.
- Compare it to the mathematical odds.
- Read How to Win at Rock Paper Scissors from the BBC Science and Environment department.
- How might you compare a Random exchange of Rock Paper Scissors to a Human Exchange?
- Analyze Web Site Credibility of articles that offer tips for winning at Rock Paper Scissors.
- Summarize some of the tips offered for winning at Rock Paper Scissors.
Not only are micro:bits accessible and easy to get started with, they have a very high ceiling and can be coded in both Block Based or text based environments.
I'd definitely get started using Make Code
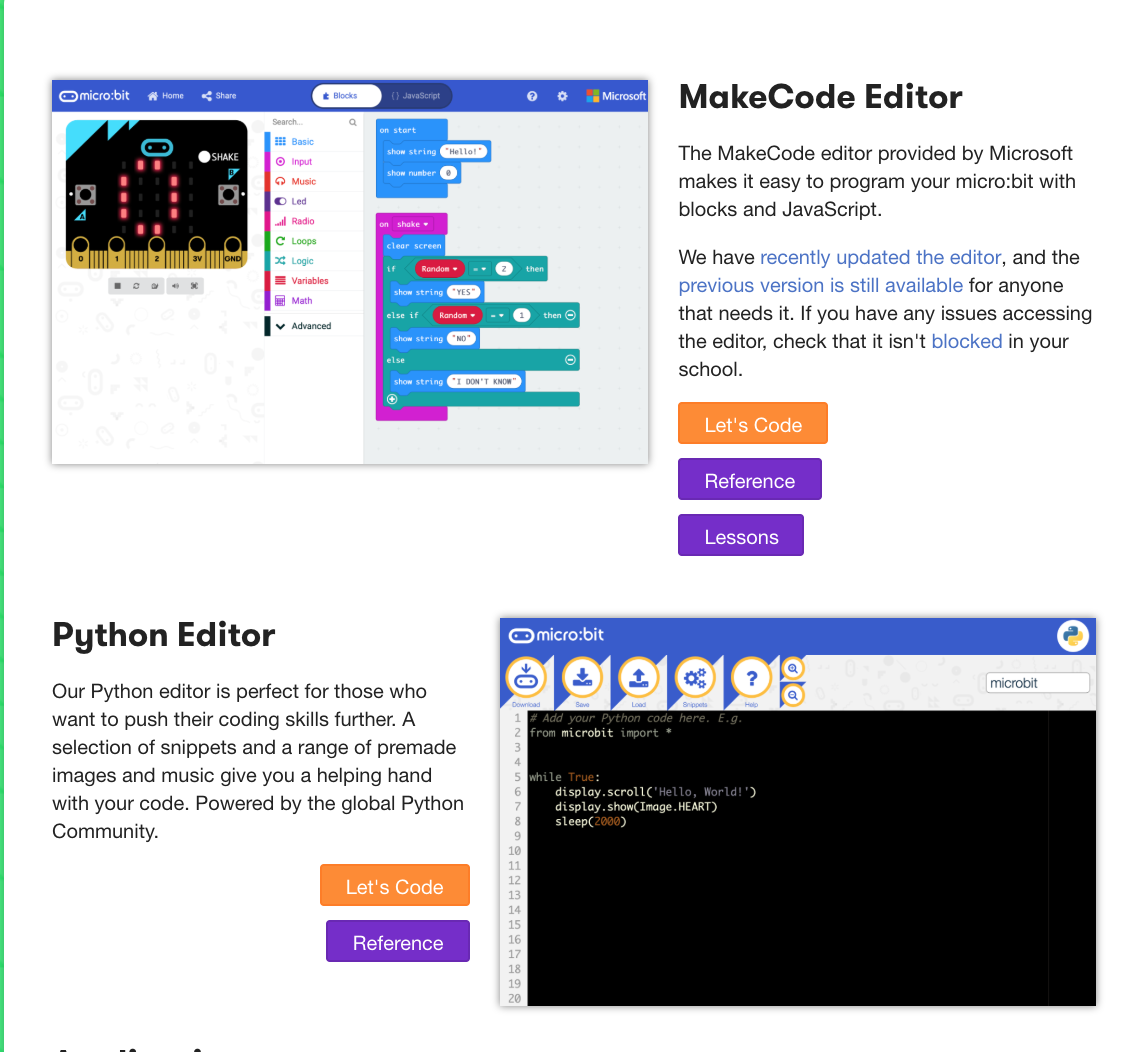
But when your students are ready, they can give a text based editor a try. (See: https://microbit.org/code-alternative-editors/
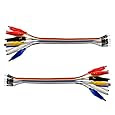 Oh and along with themicro:bits I would make sure that my makerspace has some
 - Alligator Clips
- LED's
- Inexpensive Servo Motors
- Crocodile Clip to Jumper wire

oh... and perhaps a pile full of fun yard sale or dollar store finds that can inspire some fun prototypes.
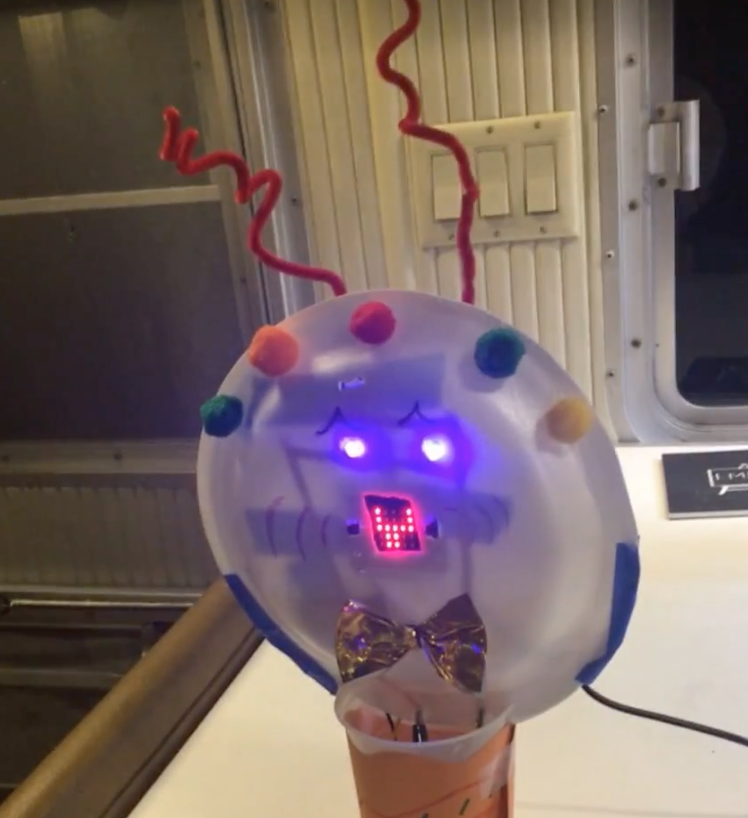
And before you know it your students will be coming up with fun projects like this paper plate character with an emoticon face and wiggly ears or prototyping solutions to problems that might improve someone's life.
Stay tuned for more HOW to's with micro:bits later in this series.
Hi,
ReplyDeleteIts a lovely post and hoping to use it in my coming up workshop. Can you share details of your paper plate monster emoticon project? What materials were required? How much time did it consume. I am planning to put the rock paper scissors basic programming and your paper plate monster in a 1 hour schedule. Is it doable?