Tuesday, January 7, 2025

CS Inspired by Literature #WAOTL Challenge 1 Coding an Animation

In  my recent posts, I introduced a #WAOTL series where you and your students might experience computer science by using Scratch to create and code an interactive experience with bioluminescent characters from the children's book "Whose Afraid of the Light" by Anna McGregor.  

Here are the posts in the series so far

Today's post will Kickoff the first of 5 challenge cards you and your students can use to create the interactive experience 


In Challenge 1 students will create and code characters from one of the 2024-2025 Red Clover Book Award nominees.


Here is a Sample completed project to Challenge 1  


Start by creating a NEW Scratch project at http://scratch.mit.edu

Your students may access Scratch in the following  ways depending on district policy. 
  • No login (Save projects to your own computer or Google Drive)
  • Use Scratch Teacher account to create student accounts which they supervise.
  • Students create their own accounts with parental permission. 


To start the challenge have your students draw one (or all four) characters from the book.
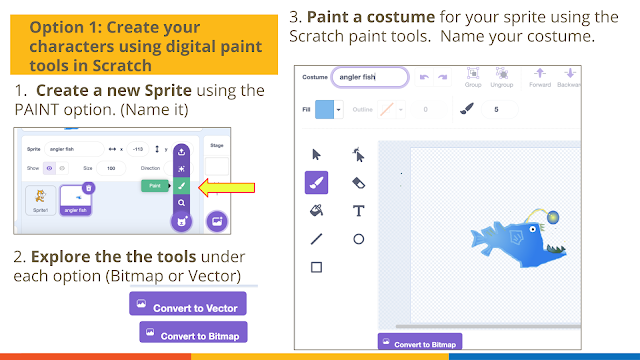


Your students can  draw a character from the book using the digital paint tools built into Scratch. The Scratch interface allows you to switch between Vector drawing tools and Bitmap drawing tools. 


Vector graphics in Scratch allow you to draw shapes that remain smooth and crisp at any size.The vector editor uses points and curves to define shapes mathematically.

Bitmap graphics in Scratch) work with individual pixels. the images can become pixelated when enlarged.

I like the the vector editor because it uses a layer approach to more easily change parts of projects when editing different costumes. However, the bitmap editor comes in handy at times also. Watch this 5 minute videofrom STEAMIST to see which tools  are available when in vector or bitmap mode.   I would suggest  guiding your students through an exploration of each of these tools 


Tip: When you are in vector mode you will see a button that says 
Convert to Bitmap.  
When you are in Bitmap mode that button will say Convert to Vector. 


Your students can choose to create hand drawings of the characters. I go over my workflow for this option in step by step details  in my previous blog post.

Now that your students have created or imported characters from the book in a Scratch Project...

Let's DIVE INTO CODING AN ANIMATION


I would encourage you to create your own sprites, but here’s a Scratch Starter Project you can use if you’d like to learn to code an  animation without completing the previous steps.  In this starter project, you will find 4 sprites already created by young learners, so you can dive right into learning to code an animation. 


Next, you'll want to duplicate the costume of the sprite and use the paint tools to add a new costume that appears to glow or be bioluminescent.


Now it's time to add Code to create a blinking/glowing effect. Click on the CODE Tab for your sprite. Drag out the following blocks of code.


This would be a great time to provide students with the block code Challenge 1 card and have them experiment with  arranging the code. Don't forget to show them how to pull apart the code blocks and reassemble them in different order. 


Once your students have created their own solution to this Coding Challenge #1,  ask them to compare their solutions.  What would happen if they changed the Wait Time to more or less seconds?


Finally, apply your new coding skills to create all 4 characters from the book. 


These steps are also included as part of the  Challenge 1 teacher guide .  You can find additional steps to this Challenge in the previous blog posts.


Lucie's Notes and Tip:  Younger students  (K-2) might become the artists for this project, while older students (Gr 3+) could code the project or use Scratch paint tools to draw sprites. Adults or older student mentors (Gr 5+) could assist uploading hand drawn images from younger learners into the Scratch project. 

You could have students complete a project with just 1 sprite instead of all 4 characters then create a collaborative Scratch project with the contribution of different students. 
If students each created 1 animation, the sprites could be exported
(Right click and download) and also imported (or uploaded) into another Scratch project making it possible for a group of 4 students to each complete one part of this project. 

Stay tuned for our next post which will walk you through Challenge Card #2 where we learn to add code that turns our Scratch project into a Guessing Game.


Subscribe to this blog to be notified when the next challenge is posted.

Originally created for  CSTA-Vermont during Computer Science Education Week 2024


Sunday, January 5, 2025

Import Student Art Into a Scratch Project - WAOTL

In my last blog post, I introduced a #WAOTL series where you and your students might experience computer science by using Scratch to create and code an interactive experience with bioluminescent characters from the children's book "Whose Afraid of the Light" by Anna McGregor.  

Although Scratch does offer opportunities to paint digital drawings of the characters, I  love including students' hand-drawn art into Scratch projects.  There are several ways to go about this depending on the tools you have access to.  If you are looking for a step by step workflow for bringing in your student art work into Scratch projects, this post is for you. 


If you have your own workflow for importing art into Scratch projects, you can skip this post and proceed to the next post in this 
series 


STEP 1: Create Hand Drawn Art Work

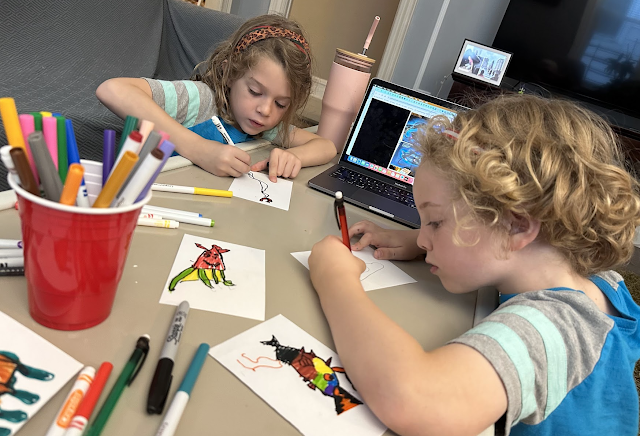
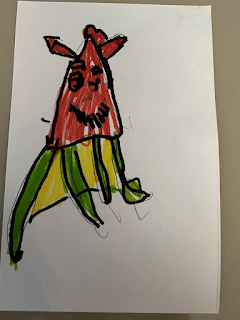
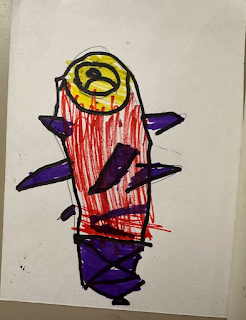
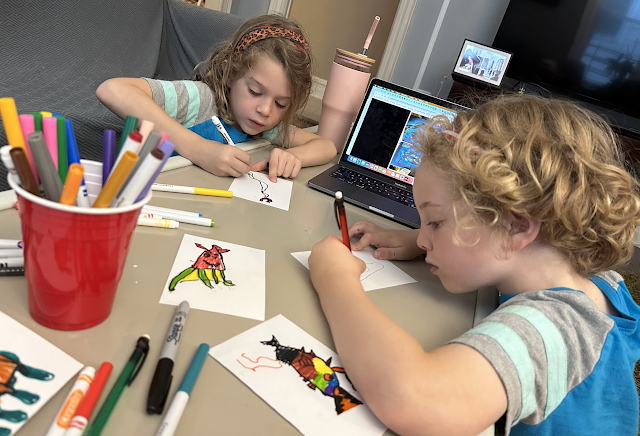
I ask students to use the unlined back of index cards to draw and color a picture of one of the characters in the book. (You can also use cardstock cut to size). Make sure to include a yellowish color for the part of the character that glows in the dark.  It's also important that there is a sharp contrast between the white background and the drawing. One way to achieve this is to outline the drawing with a black sharpie or a bright bold colored sharpie. Here are a couple drawings from young learners from Grade K and Grade 1.


STEP 2: Create a Digital Copy with Transparent Background

The next step is to take pictures of the art work and remove the background. There are many ways to approach this.  One way is to use some of the features of your phone's photo apps that automatically remove the background.  But since it's impossible to know what phone or apps teachers have access to, I'm going to use a workflow that works no matter what type of phone or tablet you have. 

1. Use the browser in your phone (or tablet) to go to the website remove.bg
(I use this so often that I've created a shortcut to this website on my phone)

2. From the remove.bg website, click on 

Upload
Choose Take Photo
Snap Photo
(Carefully try to only capture the white background around your character)
Select Use Photo
(The background should disappear)
Click on Download 
Click on Save Image


You now have a digital photo of a hand drawn photo image with a transparent background on your phone.   

STEP 3: Transfer photos of art work from phone to your computer

You can use several methods to transfer these images to your computer before uploading them to Scratch.   If your school uses Google Apps then I suggest using the Google Drive App on your phone to upload the pictures in a Google Drive folder that can be shared with your students.


STEP 4: Upload images into a Scratch project

The next step will be to download the images onto your computer so that you can  upload them in a SCRATCH project.  

Depending on the age of your students, you can now either

--
Share the folder with your students so they can download the pictures they need individually .
  • Click on the three dots.. next to folder.  
  • Select Share. 
  • Change General Access from Restricted to Anyone with the Link. 
  • Copy Link.   
  • Share the link with students (either in Google Classroom, via email, or other method)  

  • Download all the pictures on your teacher computer, and upload them to a Scratch project that your students can remix. 

--Download the folder of images on your teacher computer and add them as sprites to Scratch project that students can access and REMIX. 


If your school allows students access to Google Photos, you can also create a  Google Photos Album to transfer images from phone to computer for students to access.  Be sure to check first  because many districts restrict use of Google Photos for students course.

Of course if you have access to different tools, (i.e. Air Drop) use the method that works best for you and your students based on available tools and age of students. 

Now it's time to bring those images into a SCRATCH project. 

There are some options depending on the age of your students and the method you chose above.

Option 1: For younger students, you might download all the artwork on your  teacher computer. You can then upload all those images at once as individual sprites on ONE Scratch project.  The students can then REMIX that project and TRASH the sprites they don't want.


This will import each image as its own sprite. They will be piled on top of each other.  Here is an Example Scratch project with art work created by my grandchildren in Kindergarten and Grade 1. 

Option 2. For older students, you can share the link to the Google Drive folder of images and they can independently DOWNLOAD only their images onto their computer or Chromebook, then UPLOAD the images as a sprite in their own Scratch projects.

Here's a video recap of all the steps above,
plus a few extra tips on how to create shortcuts on your phone. 


These steps are also included as part of the  Challenge 1 teacher guide .  The rest of the Challenge 1 steps will be described in details in the next blog post.


You might also want to check out this great tutorial  and video from the Scratch team to guide you on how to bring your drawings into Scratch.


Lucie's Notes: Although this process is more consuming that the rest of the steps in this series, I'm confident you will see that importing student hand drawn art is worth the time investments.  Once the students start working with their own drawings, they are hooked to learn to code them into a fun experience. There is something about the act of creation that motivates the students to persevere through challenges of learning a new skill (like computer science).  Motivation is KING in teaching and learning coding or any subject! 

Another thought I had was that older students (Grades 4-6) often act as reading buddies for younger learners.  Why not have your older reading buddy import a younger student's art work into a Scratch project that becomes an interactive experience for their reading buddy. Older students now have an authentic audience for their coding project as they gain  computer science skills inspired by literature.

If you give this a try, please reach out and share.  I hope these tips give you the confidence to give it a try.

In the next post we'll show you how to create and code a Glow effect to the  sprites to simulate the bioluminescence found in the children's book - "Are You Afraid of the Light"

---------------------------------------------------------------------------------------------

PS. This blog post is part of a series guiding you to experience computer science by using Scratch to create and code an interactive experience with bioluminescent characters from the book. Most of the coding challenges target grades 4-6.

Younger students will be able to participate in SOME of the activities in collaboration with older students or with support from teacher and other adults.  

Originally created for  CSTA-Vermont during Computer Science Education Week 2024


Thursday, December 19, 2024

Computer Science Inspired by Literature - WAOTL

For over a decade I have been celebrating Computer Science Education week with Vermont educators.  In 2013, we created a place for Vermont schools to share their participation in #CSEdWeek and the #HourOfCode activities that many of them participated in.  Since taking on a role as a chapter leader for Vermont-CSTA, I've continued these efforts. Here are some highlights from our Vermont schools participation in #CSEdWeek2024

One of my contributions this year was to design a workflow for elementary classroom teachers, librarians, and their students to code an interactive experience using SCRATCH  to accompany the children's picture book "Who's Afraid of the Light" by Anna MacGregor.  This was one of my grandchildren's favorites from the Red Clover Book Award nominees.   

I also created a PD opportunity for educators who wanted to create confidence with code using this workflow.  If you're interested in enrolling in this PD opportunity (including a certificate of participation for continuing ed credit) email me at ldelabruere at gmail and I'll send you the Google Classroom Code. 

I also plan to share the workflow and lessons here  over the next few blog post for those who just want to try it with their students. 

This blog post is the first in this series of posts.

In this series, you will experience computer science by using Scratch to create and code an interactive experience with bioluminescent characters from the book. Most of the coding challenges target grades 4-6.
Younger students will be able to participate in SOME of the activities in collaboration with older students or with support from teacher and other adults.  

Your characters will include the storyteller (i.e. diver), Fergus,  and 3 additional bioluminescent sea characters from the book. You will learn to code a blinking light animation effect to simulate bioluminescence 

You will also learn to control your characters, hide and show your characters, make them move and add dialogue between them. You will also change the setting (backdrop) and add sound.

Here is part 1 of a teacher guide that also includes a Welcome video to get you started.


To get started go ahead and read the book "Whose Afraid of the Light." by Anna McGregor.
You can get a copy from your local bookstore or your library. 

You will meet 4 bioluminescent characters:
a gulper eel, a vampire squid, a spook fish, and an angler fish.

Use the unlined back of an index card to draw one character per card.
Trace the outside of the character with a bold black line using a Sharpie.
Color the inside of the characters with vibrant bold colors.


My 5 and 6 year old grandchildren loved this part.  I imagined students in grades 4 and older adopting a reading buddy from lower grades and encouraging their reading buddies through this part of the process. 

Perhaps each of the younger readers could draw ONE character that older children can use as they learn to code the experience.  I can tell you from experience that the younger learners will be very excited to see their illustrations used in these Scratch projects.  When your older students use younger reading buddies as an 'authentic audience' for their projects, they  hear comments like "There's mine!" contributing to a feeling of community amongst your students.  That's an outcome worth striving for in our schools. 

In the next blog post in this series, I'll describe a workflow that I  have used for bringing hand drawn student work into a SCRATCH project. 


Wednesday, November 20, 2024

Computer Science & Making Inspired by Literature - Red Clover Books


Each year, Vermont librarians nominate 10 picture books for children grades K through 4 to read  and vote for their favorites. This year's Red Clover Book inspired me to consider how we might make a connection between computer science and literacy.  You can learn more about the Red Clover Book awards through the Department of Libraries an the Red Clover Award Website.

For years, I've  watched  librarians  take a lead in their school's involvement in Hour of Code or Computer Science Education week. So many librarians also provide opportunities for our younger student to learn through creating and making including maker tools and supplies in their libraries.  They inspired me to created an ebook with idea cards for hands on making and projects for learning computer science, inspired by the  Red Clover book nominees.  With support from STEAM educator, Tina Smith, and school librarian, Jessica Wisloski, we launched this e-book at the Vermontfest conference as part of the Vermont-CSTA Computer Science series of workshops and at the interactive popup makerspace that Jessica and Tina
facilitated. 


Y
ou can find the e-book at  https://bit.ly/red-clover-all

The book includes 40 idea cards  (4 for each of the Red Clover books). These idea cards include projects and links to resources curated from colleagues as well as web resources. I also designed one or more computer science projects using Scratch for each book.

As part of the Vermont CSTA chapter leader team preparing for Computer Science Education Week, I, also, created a version that focused on the computer science projects using Scratch. 

You can find the CS version at https://bit.ly/red-clover-cs

For each book,  you will find a link to a Scratch project that can be used to introduce students to computer science concepts and practices. Although the CS projects could most easily be completed by students grades 4 and up, younger students could be enaged with parts of the project with support from adults or with older students as mentors.


As I continued to envision students coding the Scratch projects as they engaged with the book,  I realized that a teacher/student guide might be helpful.  After consulting with my youngest grandchildren about their favorite Red Clover book, I started to create the teacher/student guide for Who's Afraid of the Light  by  Anna McGregor. 


You can find the teacher/student guide for Who's Afraid of the Light at https://bit.ly/red-clover-cs-WAOTL


The teacher/student guide for Who's Afraid of the Light includes 6+  Computer Science Challenge Cards that can be used in several ways.  Each challenge introduces a limited set of code-blocks that can build a  mini Scratch project related to the book.  Each challenge also offers a link to a Scratch project that can be used to scaffold the experience. Students can choose to look inside each Scratch project or remix the projects.  They could also build the project from scratch (pun intended). Educators could use the Challenge Cards and supporting slides to lead students using whole group instruction, or they can make them available as handout for students to explore and try. 


If you'd like a version with just the Who's Afraid of the Light Challenge Cards you can find it at https://bit.ly/red-clover-cs-cards-WAOT 

The Challenge cards are made available through Creative Commons license for you to print out.  I printed my copy on cardstock and cut them out for students to rearrange into an algorithm that solves each challenge. 


Next steps for me are to coach a group of students and their teacher as they 'kid test' the challenge cards.   Please contact me, if you'd like to collaborate on this next phase. I'm also taking suggestion as to which teacher/student guide I should take on next! If you see one of the  computer science ideas  inspired by the Red Clover book  that you'd like to try, let me know.  Let's see where the interest lies for the next  Red Clover  inspired Compuer Science teacher/sudent guide. 

The current and any upcoming Teacher/Student guides and Challenge cards for the computer science projects inspired by literature will be shared throughout the year on Vermont CSTA website and on the Create Make Learn blog.  If you are interested in trying these with your students, please reach out so  we can collaborate. 


Friday, September 27, 2024

AI Vermont for Elementary Educators

 On Saturday, September 28 AI-Vermont will be hosting elementary educators for a day long exploration of artificial intelligence.   When asked to prepare an interactive experience for educators, I thought of the different ways I've used AI as an educator to assist me with instructional design and which one of these might be most useful to elementary educators. 

But soon I found myself drawn back to using AI and computer science to CREATE, MAKE, and LEARN that AI is not magic and computer science skills are still relevant skills to be teaching our students. 
 
So in our workshop, we will create a "Snap Chat" like project that uses  pre-trained models and two extensions (Video Sensing and Face Detection) available in the Machine Learning for Kids version of Scratch.  All the resources can be found on the Machine Learning for Kids website.


We'll also use the website to experience Training an AI model by collecting images as data and using them to Train and Test the model to see if it can differentiate between our hats and our shoes.  My hope is that this will allow participants to better understand what is meant when we talk about "training" the AI and see how easily biased the data can be. I do believe that our elementary students should be aware of what's under the hood with the AI features in the tools and toys that are increasingly becoming part of their lives.

Join me for this interactive mini experience with AI   using these slides 


Friday, August 30, 2024

Create Make Learn Fall Course launches Sept 21

 Many of you have asked us to offer a 'non-summer' version of the  Create Make Learn Institute.   We are excited to announce that this FALL will be the first FALL Create Make Learn Institute kicking off at The Generator Makerspace in Burlington, Vermont on September 21.

Yes, it's quick turnaround time, but we could think of no better time than Fall to come spend 4 Saturday's creating and making with colleagues as you create confidence with Makerspace and STEAM tools. 


The course will model personalized learning practices and provide you will opportunities to create confidence with the following topics: 

  • Create and Practical Problem Solving
  • Design Thinking
  • Cardboard Tools
  • Laser Cutting
  • 3D Printing
  • Vinyl/Craft Cutters (i.e. Cricut)
  • Circuits 
  • Makey Makey, Microbits & Micro-controllers
  • Physical Computing
  • Create With Code
  • Hand Tools
  • Meaningful Making
  • STEAM Infused Project Based Learning
Click here for or a more detailed overview of the  draft schedule, 

The topics each week are subject to change to meet the interest and needs of registered participants.


Won't you join us to experience a little JOY this Fall.  Register at www.CreateMakeLearn.org


Saturday, July 13, 2024

Cambridge Rotary Sponsors Girls and STEM Project

This June, I once again witnessed the amazing  support from  Rotary International to their local communities.   On their website, Rotary International is described as 

"Rotary is a global network of 1.4 million neighbors, friends, leaders, and problem-solvers who see a world where people unite and take action to create lasting change – across the globe, in our communities, and in ourselves."
Girls in STEM
Tech Savvy Girls Camp 2018


Through their support of Girls and STEM, our local Rotary clubs are indeed creating 'problem-solvers who see a world where people unite and take action".  For years,  the Rotary Club of Newport has made it possible for  young women like, Sydney (see video below) to spend a week with their peers creating confidence with technology through  creative and practical problem solving at TechSavvy Girls summer camp.


This June, the Cambridge Area Rotary Club sponsored a Girls in STEM event at Cambridge Elementary School that engaged 3rd and 4th grade girls with Circuits and Code.  The event, designed and lead by Faith Horton (Cambridge Elementary) and Lucie deLaBruere (Create Make Learn) provided the girls with the opportunity to express their creativity while creating confidence with computer science and circuits.


THANK YOU to the Cambridge Area Rotary!


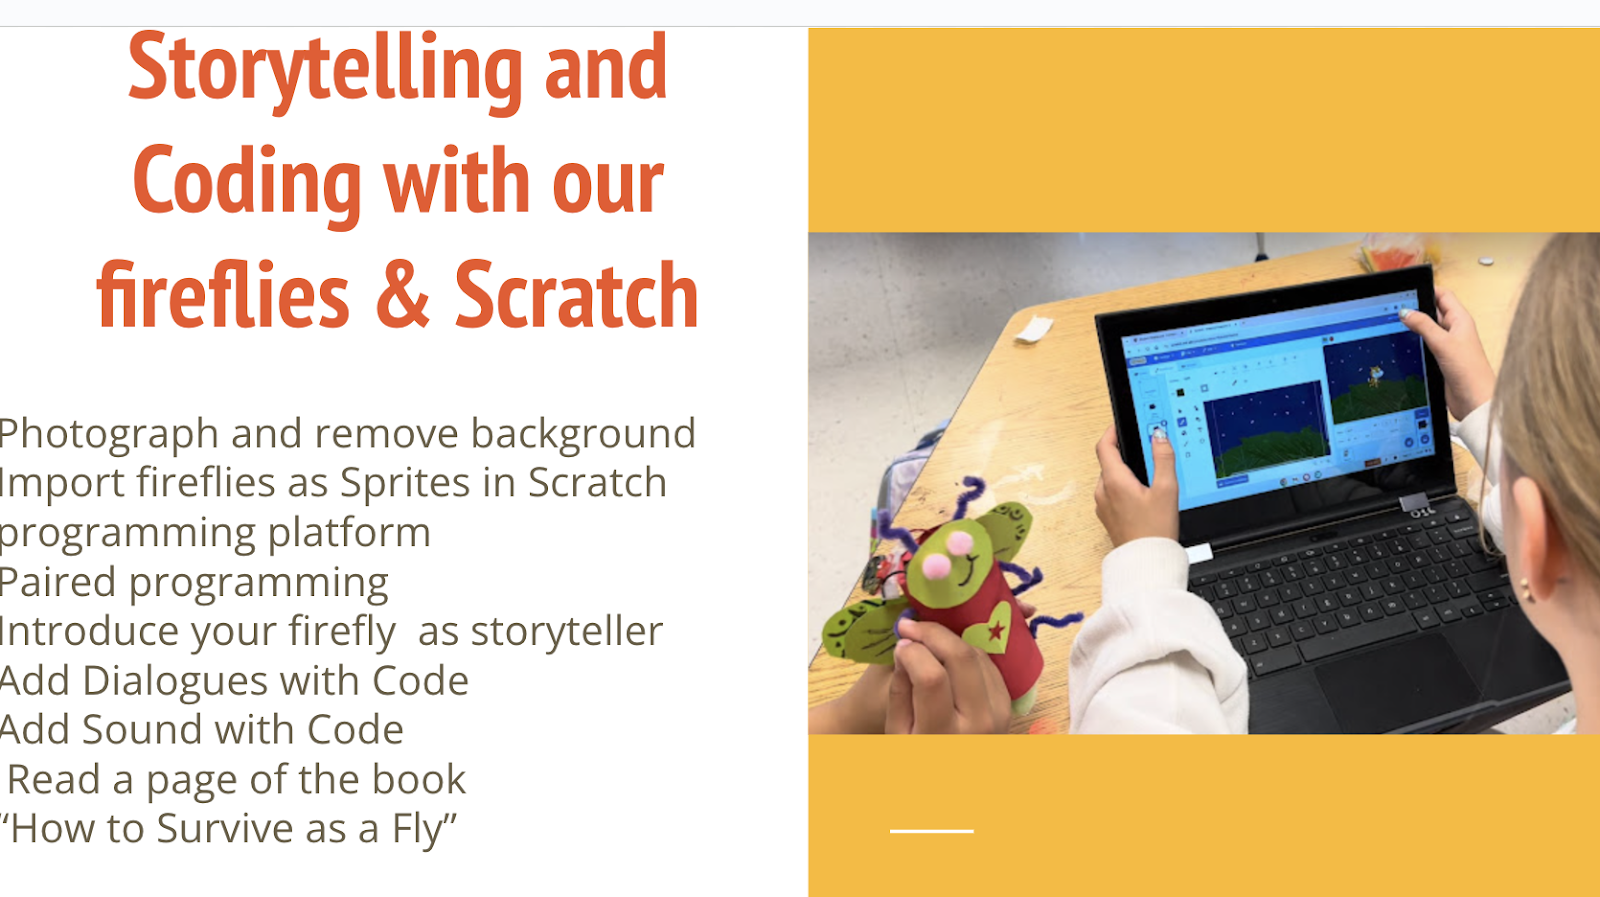
We used Scratch (a coding platform from M.I. T) to start coding firefly stories. 

In no time at all, the girls coded a backdrop with blinking fireflies and learned how to animate firefly sprites that could tell stories as they moved across the screen. 


Soon, we turned our focus to batteries, led lights, and switches to build simple circuits.  Inspired by colored LED and empowered with a wire stripper, the girls  put together circuit assemblies that would become part of a firefly model.  


Using creative and practical problem-solving, we used our circuit assemblies in creative firefly models whose abdomens lit up.   Colorful paper and craft supplies assembled with tape and glue fueled by creativity yielded some amazing fireflies.


Watch Cambridge girls empowered with creativity, circuits, and code!


As our time together for this session came to an end, the girls left with light up fireflies in hand and a greater awareness of how creativity, code, and circuits can empower them with new tools for creative and practical problem solving.   Hopefully many will be back during our week long exploration of many different ways to play with circuits and code.   Here's a sneak preview of different ways we will play with circuits and code at Cambridge Elementary later this summer.