Tuesday, November 1, 2022

Code You Can Touch using laser cutter or vinyl cutter

 In this post I continue to advocate for creating using Code You Can Touch.  

In the previous post, we used Makey Makey and Scratch to make physical objects interactive by adding the ability to generate fun sounds when you interact with them.

In the next few posts, we will actually CREATE a design using ALGORITHMS and then use MAKER tools such as laser cutters, vinyl cutters, or 3D printers to MAKE a product that uses the design that we CODED. 

Let's start with  coding designs that you can use with cutting tools.  I happen to have a Cricut Maker and a Glowforge laser cutter in my maker-space, but you can use this workflow with any maker tool that imports SVG (vector files).  In the next post, we'll play with 3D printers.

Imagine wearing earrings that you created with code or sporting a shirt or some jeans that have a design that you created with code.  Could your night light include a design you created with code.  The possibilities are endless. 

But first let's  briefly examine WHY you would want to to CODE a DESIGN instead of draw one or download one from ETSY. 

Of course, one reason is to develop skills in computational thinking.  Others might find this approach an introduction to computer science or learning to code.  Each of these are different but related and all value the transferable skill of creating and understanding algorithms.  This brief video from Digital Promise does a great job describing the importance of computational thinking in our computational world.


I would also consider creating physical objects with code to be an inclusive pedagogical strategy.  Digital Promise describes inclusive pedagogy as  
"engaging all learners in computing, connecting applications to students’ interests and experiences, and providing opportunities to acknowledge, and combat biases and stereotypes within the computing field."

If we want to change the Dave to Girl Ratio we must create opportunities for under-represented populations to create confidence and interest in tech and computer science.  Creating beautiful and colorful objects that you can 'touch and feel' is one way to engage a broader audience with computer science.


The Cricut Maker was a popular choice during TechSavvy Girls Camp 2018

I would not advocate that Coding a Design is the only way  (or best way) to produce artifacts with maker tools.  It's just ONE way.  But it does provide a way that engages students in the learning process with HARD FUN. 

Engaging students with fun does not have to be 'make it easy".  Seymour Papert dedicated his career to creating environments that included hard fun.  

Once I was alerted to the concept of "hard fun" I began listening for it and heard it over and over. It is expressed in many different ways, all of which all boil down to the conclusion that everyone likes hard challenging things to do. But they have to be the right things matched to the individual and to the culture of the times. These rapidly changing times challenge educators to find areas of work that are hard in the right way: they must connect with the kids and also with the areas of knowledge, skills and (don't let us forget) ethic adults will need for the future world.   ~ Seymour Papert

Learning through Hard Fun while coding, creating and making is a great way to help students develop the growth mindset that can change the way they learn across all content areas. Carol Dweck and Jo Boaler offer some concrete research on this topic in this article. 

For additional research on Hard Fun, check out Nicole Lazzaro's  model Four Keys to Fun.  


In the workflow of CREATING  Code You Can Touch outlined below, students spend some time EXPLORING some FUN tools.  We start with a LOW FLOOR tool (like Scratch) which can quickly have students feeling CONFIDENT.  As students are MOTIVATED to  PRACTICE further we provide CHALLENGES which leads to OBSTACLES that can be overcome.  As MOTIVATION increases to further EXPLORE leads to new ORIGINAL DESIGNS leading to CREATIVE CONFIDENCE with CODE.   If this sounds a bit like game theory - it is!  The best games are HARD FUN.

Walking away with a Physical Artifact that you CODED is like giving birth to something that you will treasure and that object becomes a physical reminder of the GROWTH MINDSET and sense of MAKER EMPOWERMENT you gain during the process. 

Start by INSPIRING  students with some amazing examples from @CeMoCreates and @morrill_rob


Or why not create a few of your own examples to provide students some artifacts they can actually touch!

Although there are lots of great examples of ART created by CODE,  I would suggest starting with some unplugged activities to introduce your students to algorithms while moving and turning around a room using angles and degrees as units. 


To start CREATING CONFIDENCE with basic algorithms consider using SCRATCH by MIT and the PEN Extension


Consider printing out Challenge Cards like this for your students to explore.


Having students share and compare their code is a great way to look for patterns and understanding that there are more than one way to create similar designs.


Once your students feel confident with the PEN tool, 
let's start to develop an understanding ANGLES and  DEGREES 

Depending on the age of your students, you might use resources like this introduction  from MATH IS FUN  or this Khan Academy Lesson along with some unplugged activities where students move around the room or create dances using degrees and angles to describe movement. 

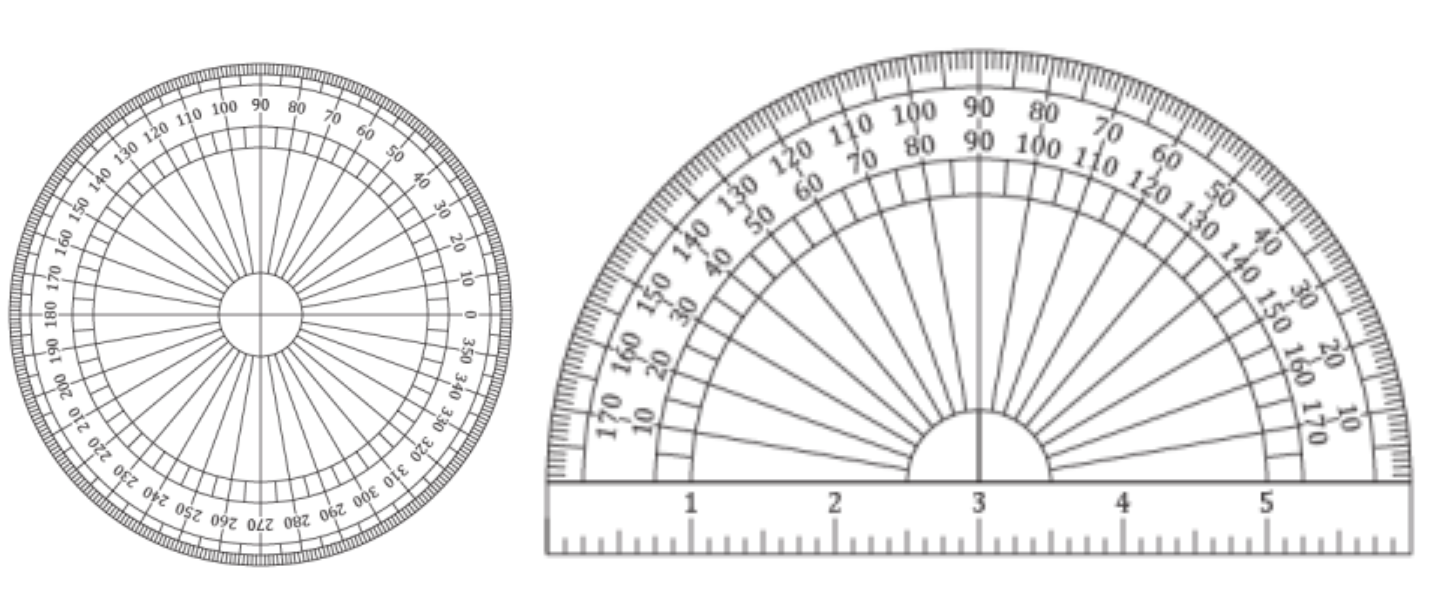
You might want to pass out some of these Printable Protractors(pdf)

Now its time for the students to explore using two different types of commands when creating their algorithms in SCRATCH 

Let's start by pointing the cat in a certain direction. 


Pointing your Sprite in a direction has very predictable results.

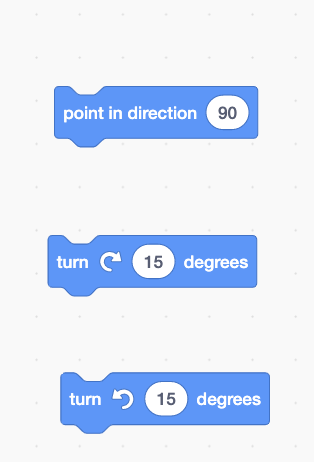
Once you feel confident with predicting what direction your sprite will move next using the POINT in DIRECTION block, it's time to start playing with the TURN DEGREES block.


Point in Direction Block

The blocks points the sprite in a specified direction and moves within 360 degree angle.

Example; pointing the cars  towards their destination.

Turn Degrees Block

These block turn the sprite in specified amount of degrees , it can be either clock wise or counter-clock wise. It can change the direction where the sprite is facing towards.

  • Experiment with these two commands until you truly understand these.
  • Try different numbers. 
  • Use the protractors to predict what will happen.

This is a great time to introduce the GREEN FLAG event command and the ERASE ALL command.
Here are a couple of challenge cards you can use with your students.


Did you know that you can change the background in SCRATCH.
Try adding the X,Y coordinate grid background


Here's a new challenge card that for your students once they understand the coordinate grid.


By this time, your students should be prime to learn how to use LOOPS in their algorithms
I like to wait to introduce LOOPS until you actually NEED them to solve the problem of 'having too many tedious repetitious commands that seem to form a pattern".  This develops the computational thinking skills of pattern recognition.


Here's a great video to introduce the concept of using REPEAT (LOOPS) when drawing POLYGONS
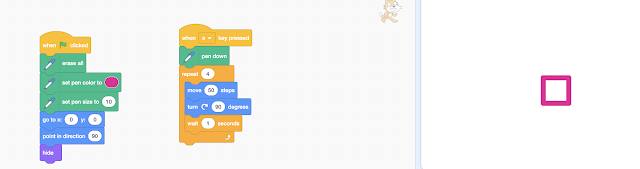


Explore! How many degrees would you need to turn to create 

3 sided polygon?
8 sided polygon?
A circle?


Here are two more challenge cards you can try with your new skills.


Your new confidence with drawing polygons is about to get SO FUN!
How might we create some cool designs by arranging several polygons near each other?

Let's add a NEW Event "When M Key Pressed" that slightly moves the cat and gets it ready to draw another polygon from a slightly different perspective.

Then lets' use the EVENT "When S key pressed" to draw a Polygon.

Keep doing that over and over again and (count) the number of REPEATS you need.
How might adding a WAIT command help you understand what is happening?
Where would you want the drawing to pause to allow you to see EACH segment being drawn?

Notice that the commands that only happen ONCE at the beginning of the program are still under the green flag event. 

NOW for the Final Performance.
Can we MERGE all the pieces of code so that we
 NEST the two commands into ONE ADDITIONAL BIG REPEAT LOOP.
We'll use the number of REPEATS you kept track of manually.


See if you can explain what's happening in the code above. 

Now see if you can create your own original designs
using different polygons and different values for the TURNS.
Here is a challenge card you can use. 


I like to create STUDIOS in SCRATCH to collect student designs. 

Once you have a gallery of original designs that you coded to pick from,
 it's time to create your physical artifact.  

You'll need to save your SCRATCH design.
I would suggest making sure the pen color is BLACK and the background is WHITE.
This provides a contrast that will lead to the best outcome.
You'll need to delete or hide the BACKGROUND if you used the XY Grid.

To save your design, RIGHT CLICK on your design and SAVE. 


Once you have the DESIGN saved as a PNG on your computer
you can IMPORT it into an SVG FILE CONVERTER like www.picsvg.com


You'll get different results depending on the filters you use.
You might not get the EXACT replica of your design, but I know it will be a fun and beautiful design that you will feel proud to have coded. 


Your final step is to Download your SVG file and
Import it into your favorite MAKER Tools to MAKE SOMETHING MEANINGFUL to YOU! 


Will you add your design to a T-shirt with IRON ON Vinyl?
or LASER CUT some earrings?
or 3D print a keychain?

The possibilities are endless and I can't wait to see what you CREATE. 
I'd love it if you would share your designs to this Scratch Studio
or share picture of the physical artifacts you made to this PADLET.


Monday, October 24, 2022

Code You Can Touch with Scratch and Makey Makey

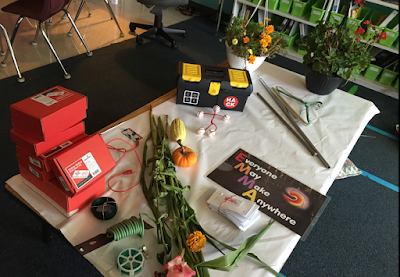
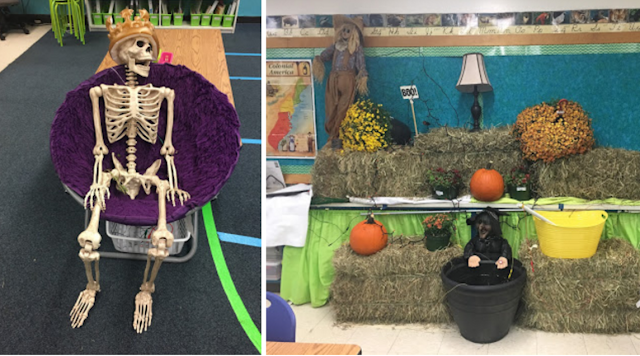
 Fall is a perfect time to introduce a Code You Can Touch project with a harvest theme. This project was originally created when two fifth grade teachers from our Create Make Learn community asked if I could help them introduce coding using Scratch.   The results was a fun Fall display that started in their classroom during the the Fall School Open House event and then became part of a Champlain Valley Maker Faire event. 

I recently organized the resources so they could be used to introduce a Code You Can Touch unit using the most recent version of Scratch.  Here are the slides that outline the approach I would take to introduce computational thinking to a group of students using Scratch and Makey Makey. 


During this process, the students will experience the principles of computation

  • Decomposition: Breaking down data, processes, or problems into smaller, manageable parts
  • Pattern Recognition: Observing patterns, trends, and regularities in data
  • Abstraction: Identifying the general principles that generate these patterns
  • Algorithm Design: Developing the step by step instructions for solving this and similar problems
The process was divided into three parts.

Part 1: Unplugged Activity

To get started you will want to

Print out the following  cards  ahead of time. 


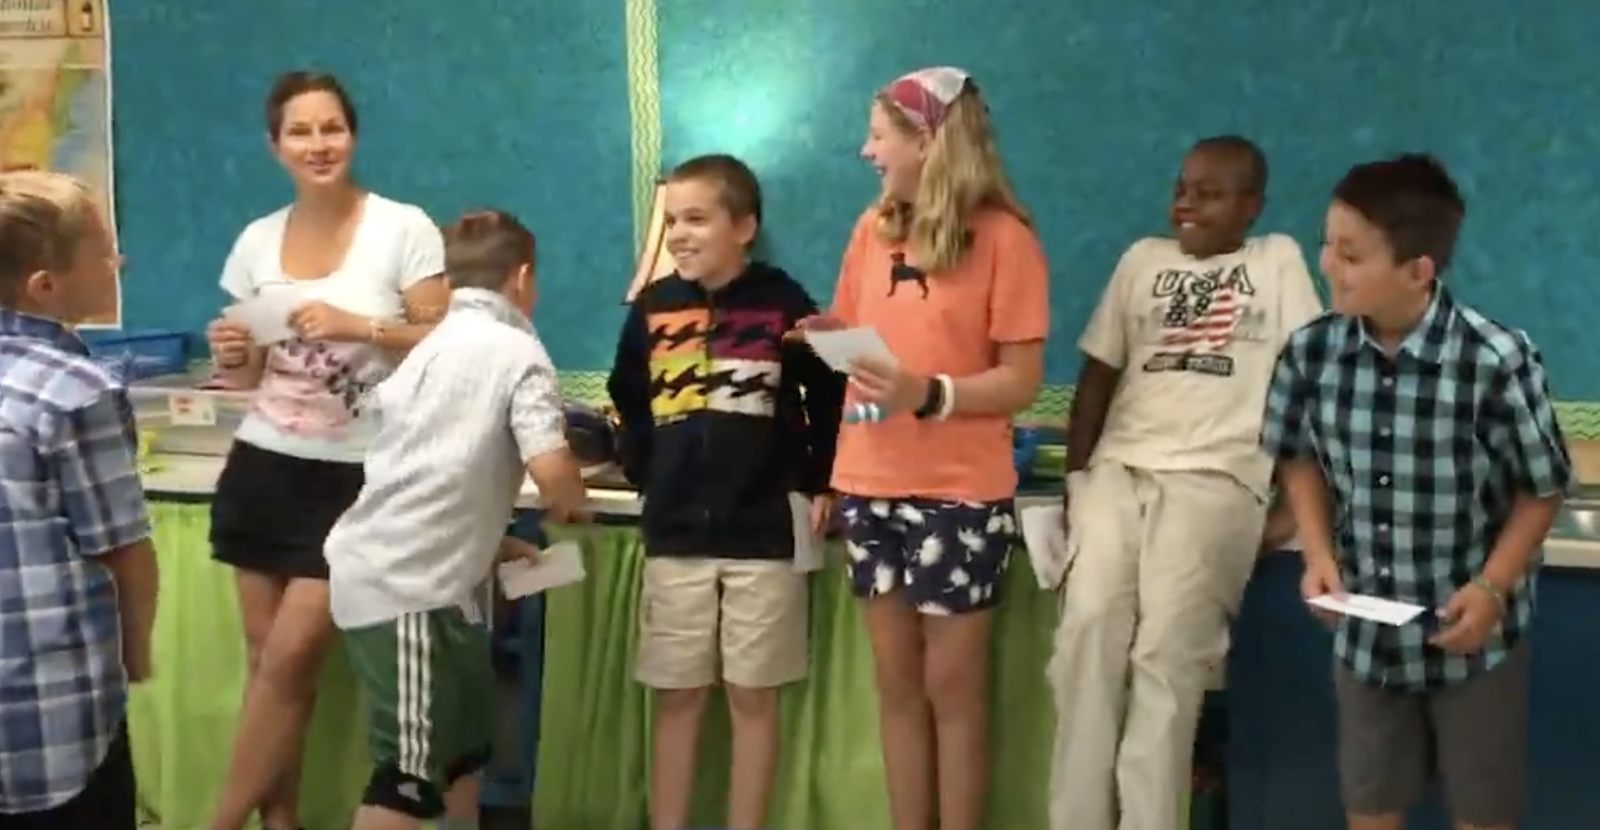
My first time trying this activity, I organized students in groups of 10 and passed out cards 3 - 12 to each group. Assign one person to be the CODER and the rest of the students to be a piece of code.


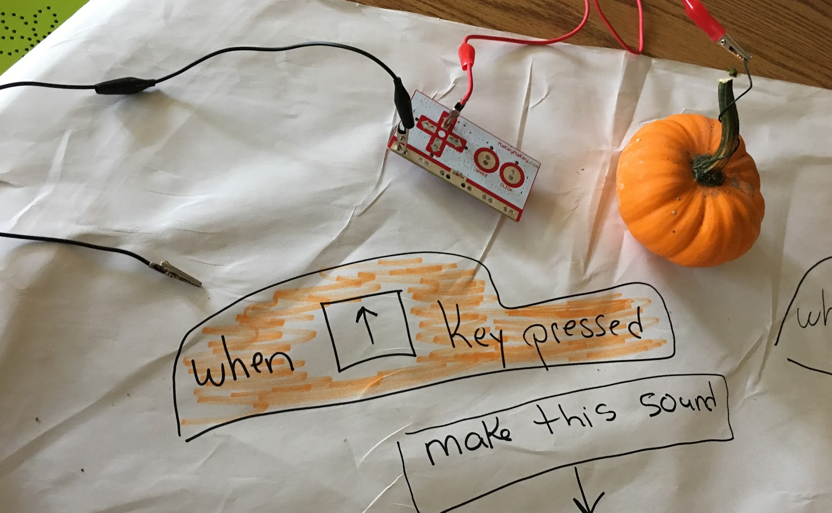
Ask the coder to gather ‘pieces of code’ and sequence them in order so that a musical scale is played when the green flag is lowered (clicked).

Have students simulate 'running the code' or going through the sequence of commands. The coder touches the student with the green flag to 'start' the program.


For the next round

Print out cards 13 - 1and cut them in half. Give a group of a dozen students one of those commands to hold.


Students with the code library cards will need to pair up one Play Note card with one Event card during this challenge.

The pair of students should hold their cards so they are touching. Each pair of students should spread around the room.

Once the coder has completed the challenge, make sure to try the algorithm by having the teacher or another student ‘test’ the program by clicking on each event to play a musical scale.


Part 2: Introduce block coding with SCRATCH

Scratch was developed at MIT Media Lab to teach even our youngest learners to create with code/ https://scratch.mit.edu/


Load this Piano Program created with SCRATCH


https://bit.ly/scratchpiano1


https://scratch.mit.edu/projects/121583649/


Press the green flag


NEXT


Load this Piano Program created with SCRATCH


https://bit.ly/scratchpiano2


https://scratch.mit.edu/projects/120757700/


Play the piano using your keyboard keys (c,d,e,f,g,a,b, space key


I would suggest to have students work in pairs

One student loads the SEQUENCE Program on their computer and one loads the EVENTS program. 


Each can make some changes to the code and Explain the changes to your partner. 


If you'd like to create this algorithm from Scratch you will fiorst need to add the MUSIC extension to SCRATCH.


Once you have added the MUSIC extension you will see new code blocks available.


Part 3: Introduce physical computing using Makey Makey

I like to start with this INSPIRATION or phenomena video.

Then bring in some fun Fall materials to play with along with your Makey Makey


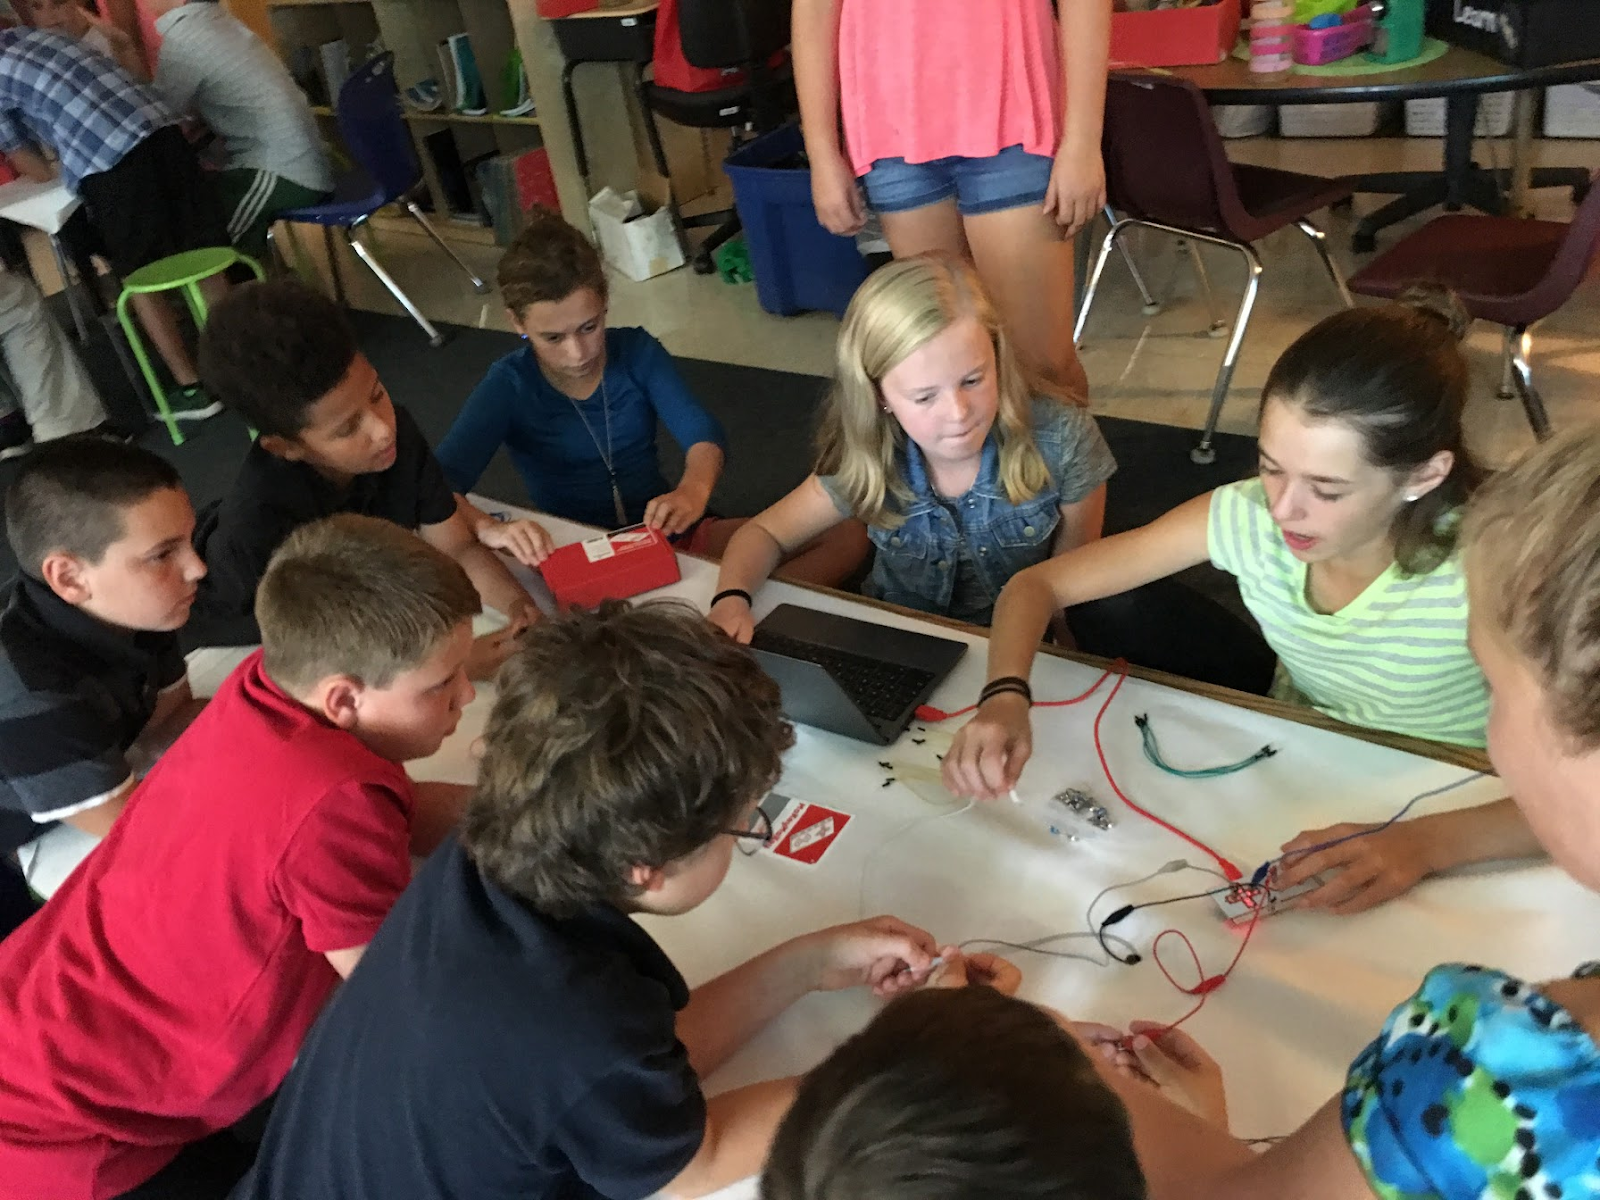
Pass out a Makey Makey to each group of students

Students setup their

own Musical Invention 


Explore Play Invent


\
What will your students create with Code They Can Touch?


 Inspiration from Mallets Bay Elementary School students

BLOG Post -  (short video) 
and  (Coding, Prototype Video)


Sunday, October 23, 2022

Processing Loss with Meaningful Making

You may have noticed the big gap between March and October in post to this blog. I'm gearing up with a few blog posts, but wanted to share why the long absence from our Create Make Learn community. 


At the beginning of March, my dad went into hospice. I flew back to Vermont, and was able to join my sisters  journeying with our dad during this phase of life.  He died March 25th.  His funeral was held April 2, 2022


One month later, my mom had a sudden hemorrhagic stroke. She held on long enough for my 4 sisters and I to be with her when she died on May 3, 2022  (a month after my dad's funeral).  We spent the next couple month trying to grasp the sudden loss of both our parents and planning mom's celebration of life for July 31, 2022


I cancelled all my professional commitments, including Create Make Learn Summer Institute.
It would have been our 10th anniversary. 

Less than two years prior I had my first experience processing loss of a family member through making when my dear 26 year old niece lost a brief but furious fight with cancer. 


During the past few months processing the loss of my parents, I did not shy away from creating and making -- and thought a lot about how meaningful making can contribute to both processing loss and finding joy in challenging times. 

In preparing for my dad's funeral, I created two keychains.  Most of my dad's career has been in auto sales. Until weeks before he died, he was actively involved in managing his GMC dealership -  deLaBruere's Auto Sales and showed up with lunch for the staff every Thursday.  So I created two renditions of a keychain that we gave out at his funeral.  One version was for those who bought a car from my dad and the other was for anyone else.  I used a medium maple plywood  and my GlowForge to make about 100 of each. 

It was not about the product, but the process of making these that was particularly meaningful to me during this time of saying goodbye to a man who I attribute to my commitment to project based learning.     My dad loved to be engaged in a project.  It's how he lived his life.  When one project finished, he quickly became engaged in a new project.  We still laugh about the year that he decided his project was going to be to MOVE THE POND.  So whenever I take on a project that others don't understand  - I often answer - "I'm not sure why, but it just seemed to be a "move the pond' project. 


A very dear cousin of ours mentored us through the journey of my dad's final days. We were less than month into the grieving process when we got the call from the hospital that my mom had arrived at the ER after suffering a major hemorrhagic stroke. They were born a month apart and both died at 82, a month apart. 

While planning my mom's celebration of life, I knew I would make something, but it took me a little longer to decide what to make.   Mom loved butterflies and  they became a prominent theme in the celebration we were planning. My sister planned a release of 82 monarch butterflies.   I found a beautiful 3D butterfly design on ETSY and created a table decoration that held a prayer card and a memory seed packet.   Even though I did not design it myself,  I found the process of modifying it and creating 100 table decoration a very meaningful experience and a way to add a piece that was uniquely my contribution to the day's event.  I used my Cricut Maker to prototype, but ended up using my Glowforge laser cutter to cut a batch of 100 purple ones and 100 white ones.  With a little dab of glue I was able to add jeweled stickers for a final touch. 


Along with the butterfly envelopes, I also created a digital creation that we used to kick off storytelling during mom's celebration of life.  For this project I used Canva Video and WeVideo., It was my first time using Canva's video tool and I enjoyed learning some tips and tricks end up with a 5 minute media piece that celebrated so many parts of who mom was to so many. 


It's been almost 3 months since mom's celebration of life, and I'm just starting to move back into  professional projects.  I am even more committed to the concept that hands on meaningful making needs to be part of our journey in life.   And as John Dewey has taught us -  Education is LIFE (not just preparation for life) - so let's infuse it with meaningful making. 


Saturday, September 24, 2022

CodeYouCanTouch


Session Description

Slides

How might we learn computational thinking by creating and making physical objects? Why does this approach help bridge the equity gap we often see in computer science? We'll discuss these questions during this hands on workshop. You'll leave with a digital file you can use with a 3D printer, vinyl cutter, laser cutter, embroidery machine, or other maker tool to create a physical object that includes code you can touch. We'll briefly look at Scratch, Tinkercad Code Block, and Turtle Stitch as options. Leave inspired to Create a T-Shirt, Cookie Cutter, Zipper Pull, Earrings, or other other fun artifacts using Code you can Touch.


Thursday, March 10, 2022

Building 3D shapes with 2D cutters (part 2)

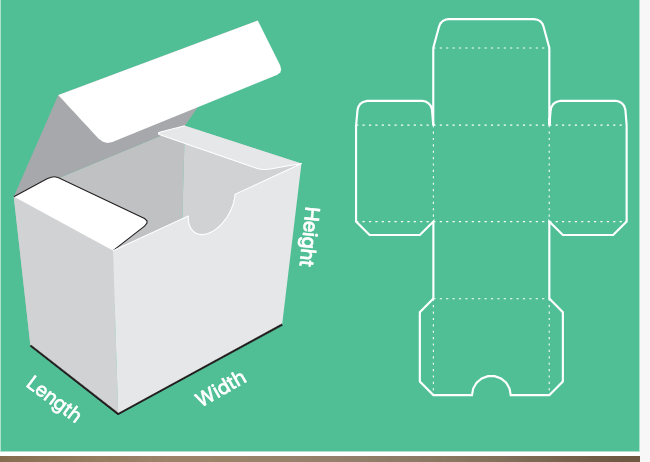
 In yesterday's March is for Making post we started to explore ways to create boxes or other 3D shapes using makerspace computer controlled tools like laser cutters and electronic cutters.


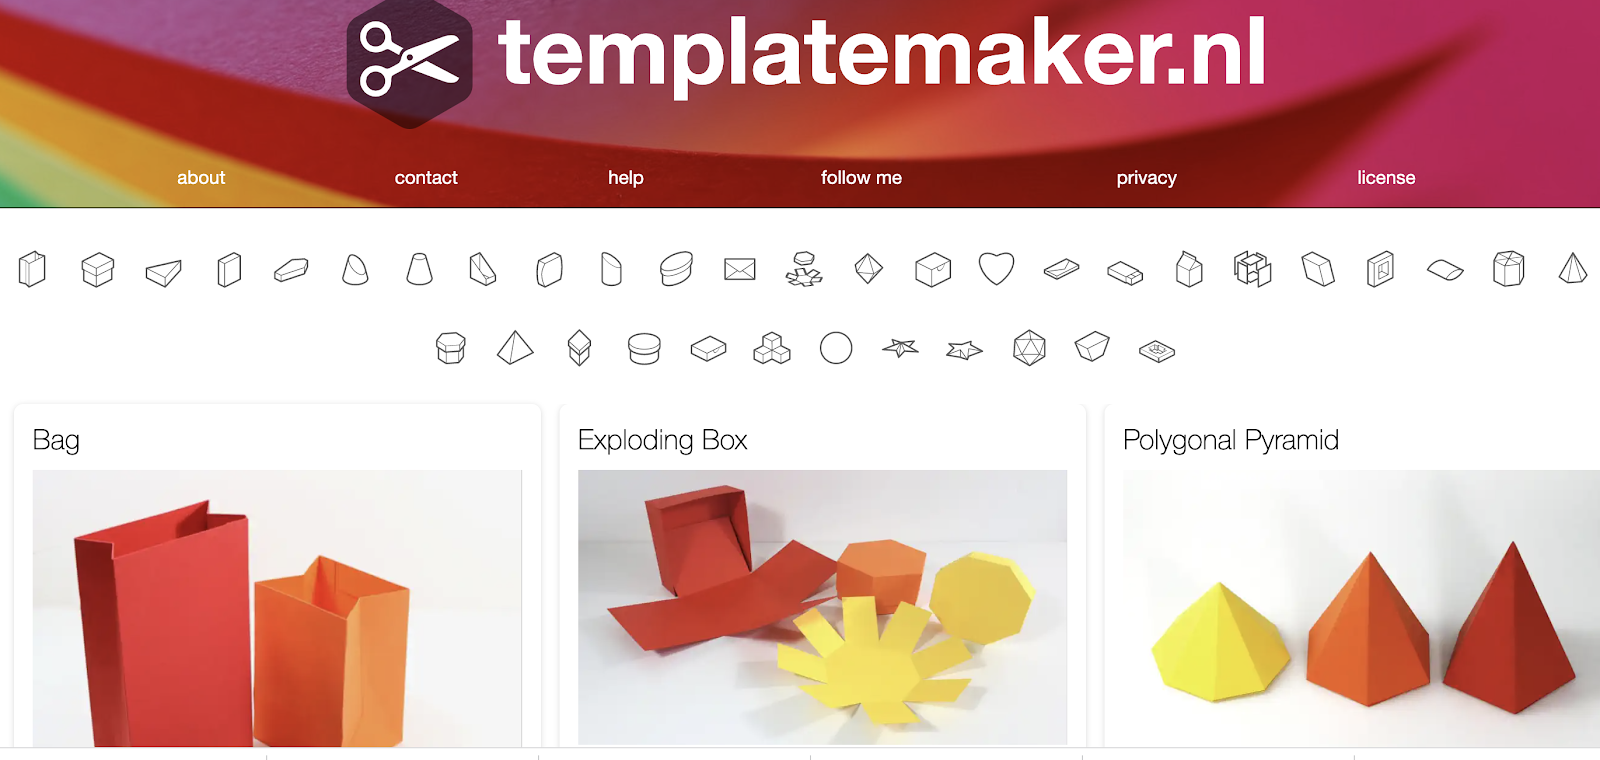
https://www.templatemaker.nl/en/

Today I'll share some great tools for creating files you can cut that can be used to create 3D Shapes 


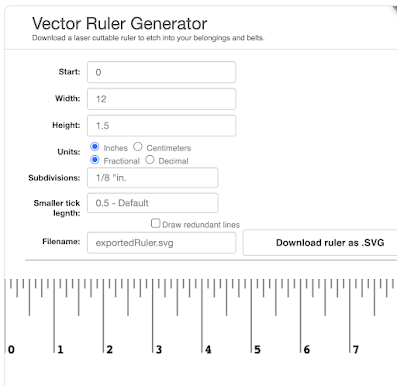
A great place to start might be to customize your own ruler then use that rule to plan your 3D shapes.

Try using this ruler generator   How about importing your ruler and adding your name before cutting it using the Text feature in of your cutting software or other vector software like Gravit. 


MakerCase is one of the most popular box maker is this simple to use box maker with simulation so you can visualize it before you cut it. 


Another popular box maker that includes a lot of variety is  Boxes. PY
It's a bit more complicated but has so many variations, its worth playing with once you have completed a few more simple boxes 


https://www.festi.info/boxes.py/index.html


A few other simple box makers include 


https://makeabox.io/


http://jeromeleary.com/laser/


Here is a fun Maze Generator that downloads as SVG for cutting and assembling


With a little practice you could be making some Flex Boxes like this. 


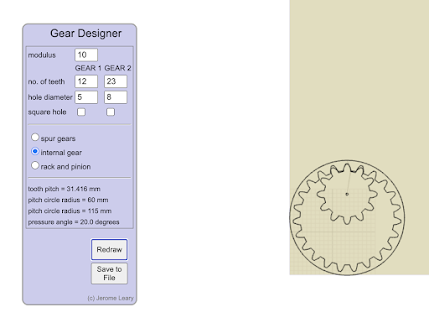
If you are looking for some a little motion in your project, consider using a Gear Generator 


http://www.jeromeleary.com/gears/


Gear Designer


https://geargenerator.com/

Or perhaps this Gear Calculator


Another helpful resource might be a SVG nesting tool like this which allows you to rearrange your SVG's so they waste less materials

https://svgnest.com/


Many thanks to Theresa from Maker Design Lab for sharing these along with her process as she is learning more about laser cutting. 


Wednesday, March 9, 2022

Building 3D shapes with 2D cutters (part 1)

Laser cutters and electronic cutters are great tools for cutting a variety of fairly thin flat materials ranging from cardstock to 1/4 inch wood or acrylic.  One of the first things that most people do with these is to create signs.  

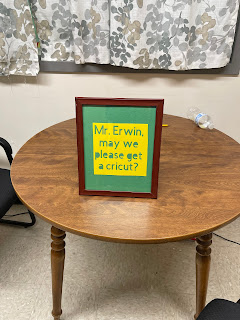
Not long after I loaned out my Cricut cutter to a small k-8 school, the principal found this sign on his desk. 


St. Albans City School found themselves creating  beautiful signs for their school from old chalkboards that had recently come down when the school invested in new whiteboards.


For Day 9 of my #MarchIsForMaking series, I would like to share some tools that teachers and students might use to get started creating 3D shapes with their maker space cutting tools.  


One of the first things you might want to try is to create NETS.  Ask your math teacher how they use NETS in their practice, and then consider how your electronic cutter of laser cutter might be used to create these 3D shapes. The 'net' of a shape (also called a geometry net) is a term used to describe what a 3D shape would like like if it was opened out and laid flat. A net is what a 3D shape would look like if it was unfolded. You can draw and fold nets to make 3D shapes.  ~  Learn more at https://www.twinkl.com/teaching-wiki/net 


You can find additional information about NETS and their use in at 


Most 3D software allows you to both CUT and SCORE your designs.
Some electronic cutters allow you to use PENS to create designs. 


Check out these resources for ideas 

Paper Box Template maker


Although its a bit cumbersome, this video offers some tricks for 
Using the templates found above with a Cricut maker


One possibility is to have students use their new understanding of NETS to 

Draw their own NETS using GRAVIT or other vector graphics tools


Remember that most vector software allows you to import graphics you can trace.

Just remember to trace your SCORE lines a different color than your your CUT lines.


Let's see what type of NET templates your students can make.

Cut them with paper to test them, then try them with different materials. 


Create fascinating structures as a whole class.


Check out the next post for more ways to build 3D shapes with 2D shapes.