Saturday, March 3, 2018

March 3 - Making Math Come to Life with String Art and Lights


Welcome to our second annual March is for Making series,where we strive to share 30 posts in 30 days that are filled with inspiration from our #makered community. 

In our third post we  are inspired by Faith Horton, as she grows her confidence as a maker educator with a string art project that will make math come to life for her students.  While I watched Faith's learning journey as a student in my Maker Centered Learning Class at Marlboro College,  her  Cambridge Elementary School students benefitted from watching their teacher exhibit a maker mindset (and growth mindset) as she worked on these two  project.


"I learned a lot throughout this making journey.  I have always wanted to be more comfortable with woodworking and I enjoyed the challenge to create something for myself  (although I might give it to my in-laws for Christmas) instead of just creating school projects. I did much of the project after school hours or on the weekend but many students watched the progress throughout the weeks because I kept my materials at school. They, most importantly, saw me as a learner and maker.  They made constant suggestions for improvement which was greatly appreciated and often followed.  Many  students wanted to join in on the fun and create their own. I need to gather more pieces of wood over winter break so we can get started! In the end, I was surprised that this project is perfectly accessible for all grades 1-6!"


Faith's journey through this project is evidence that learning is about the process as much as it is about the product and I want to THANK Faith for her willingness to share her journey with us, and with her students.  Here are a few excerpts from that journey.  You can see the rest of the journey on her  well documented project including the the math, science, and ISTE standards it’s aligned to. 


November 19: Today I tried to map out my Christmas Tree using the 4 quadrants and by plotting points. I am so confused and wondering if this is going to work. The template I was using seems to be for fabric or embroidery where strings are hidden behind. I know need to mathematically think of different way to make this design. ¨Rise and run¨, quadratic equations and middle school math memories are popping up in my dreams. Suppressed memories are more powerful than you think! Back to the drawing board tomorrow. I am thinking that I should make a prototype with corkboard before I drill any holes.
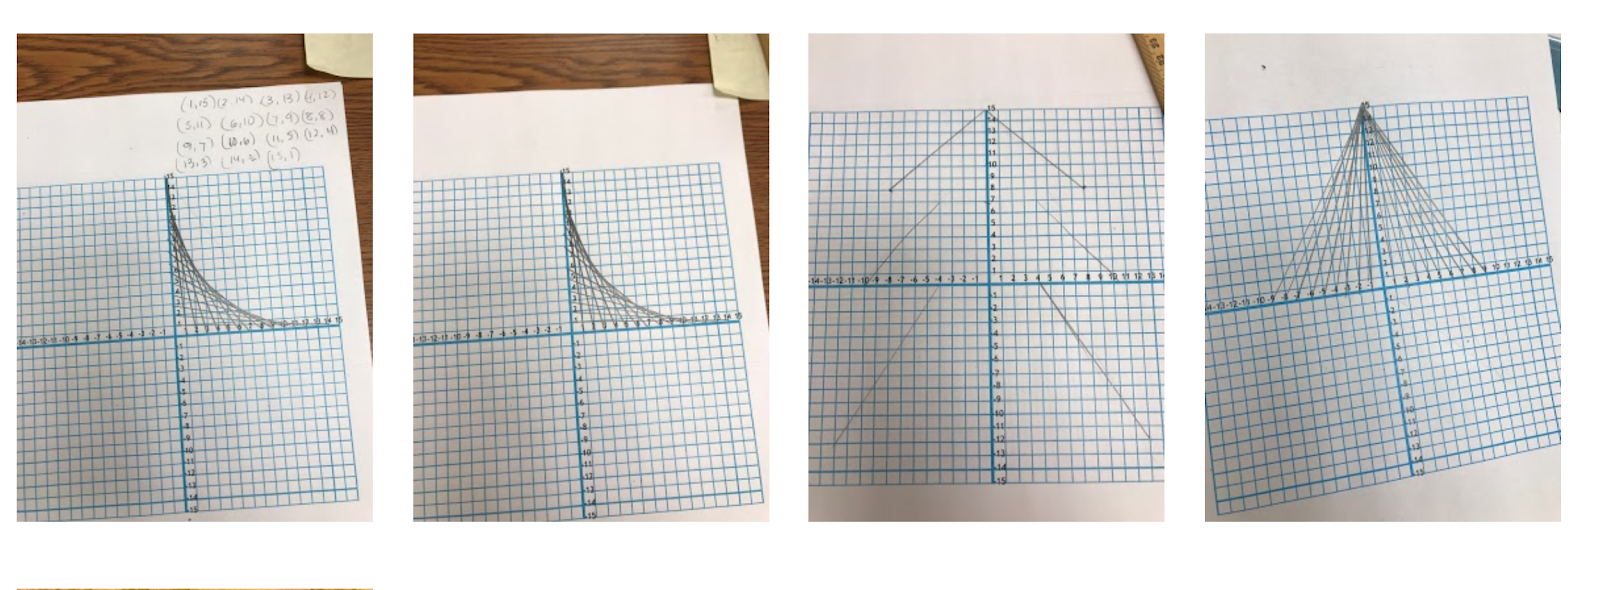


November 20: Ellen to the rescue! I asked Ellen to come look at my designs and help me problem solve. With stitching the string would we hidden behind the wood/paper and make clean lines like you see on the graph. She said, "Faith, just have the string overlap!" So I pulled out a geoboard as a test and the overlapped did work nicely. I will continue with my plans and just have double lines. Perhaps I could use yarn to make the lines blend in more. I am also wondering if I should use the 3D printer to make a modified geoboard to make this projects with students!


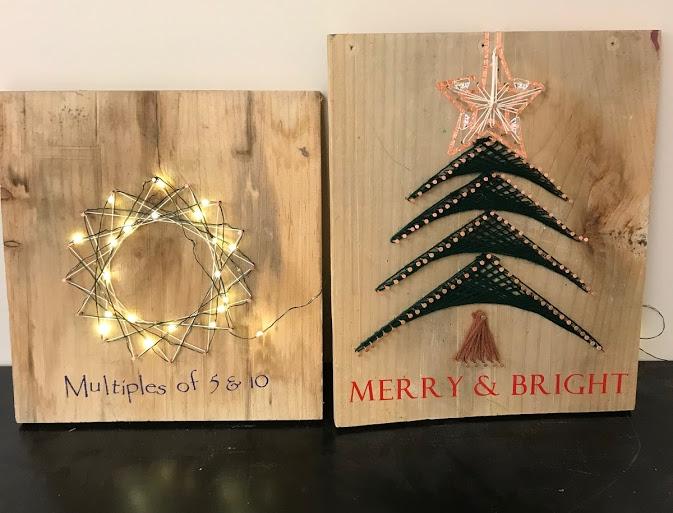
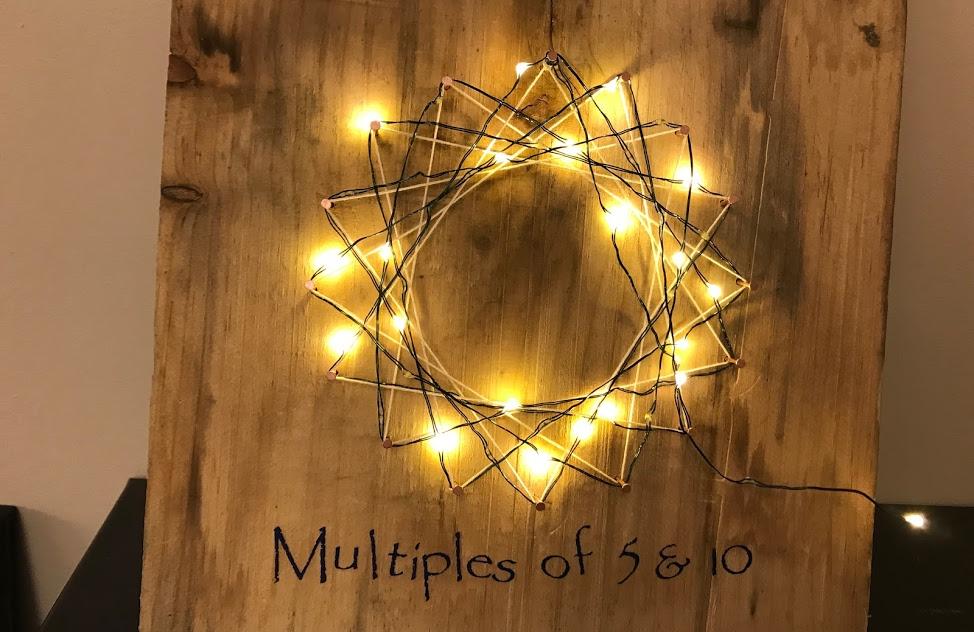
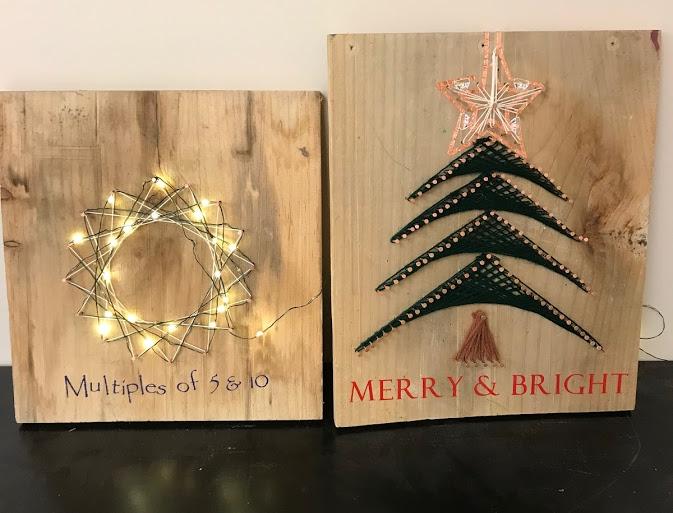
November 24: My first prototype will be a design I will use with 3rd or 4th grade students. I found a neat template for introducing multiples to students using string art. The design a circle with 80 points. Students can make a list of multiples and then use the circle to create a new design. The circle I started below will show a star-like pattern using the multiples of 5, and 10. I great connection to math class for 3/4 graders!
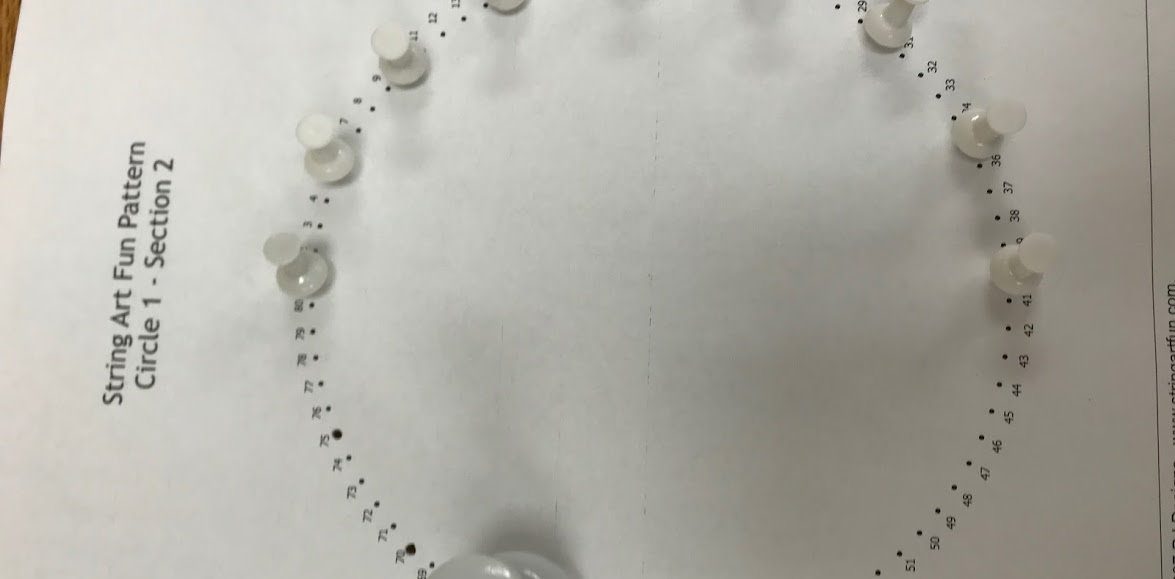


November 27: ...I successfully made the design of the multiples of 5 and 10s. It was so rewarding to thread the string and see a final product after such planning.
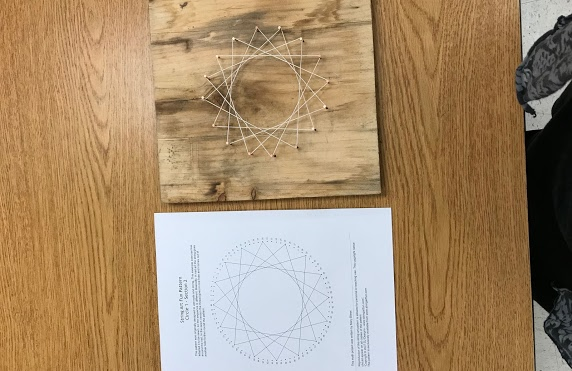


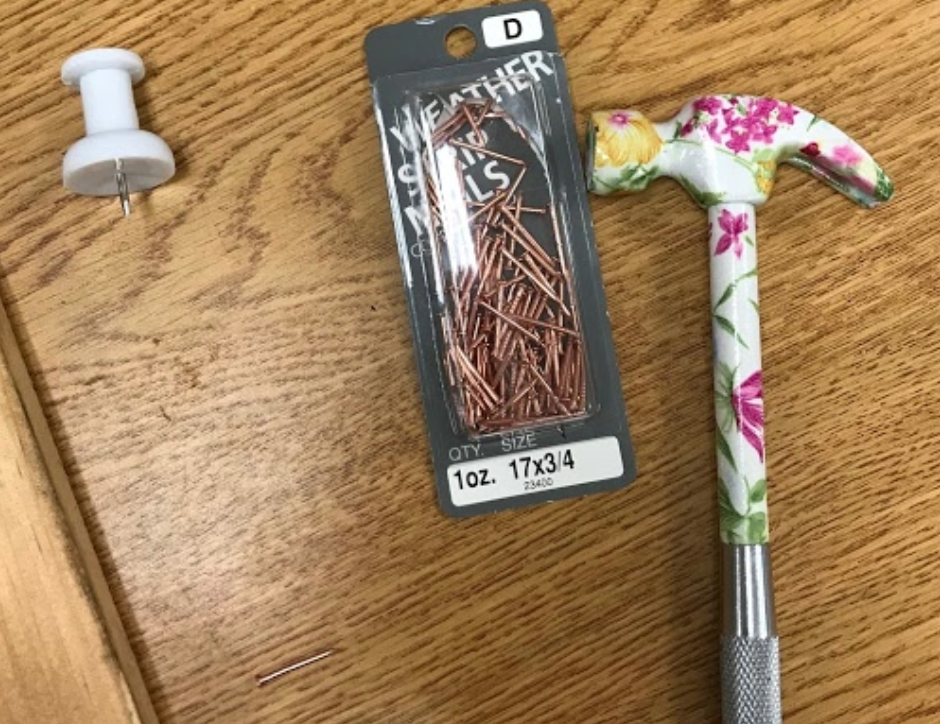
I am delighted the jumbo push pin and nails worked. I even hammered the nails with my dainty floral hammer. I am realizing that this project is completely safe and accessible for younger students. Yahoo! ...


December 1: Today I found EL wire at the hardware store and decided to thread it through my student prototype example. It really added some light to the project. More and more students are asking about multiples and how I creates the star shape.
Yesterday our Cricut came! Yahoo! It was much easier to use than I anticipated. I quickly got the hang of it and decided to add a jazzy title to finish the prototype. I also wanted to add the title so that students and teachers around me don’t just think I am hammering away creating meaningless projects but something mathematical!


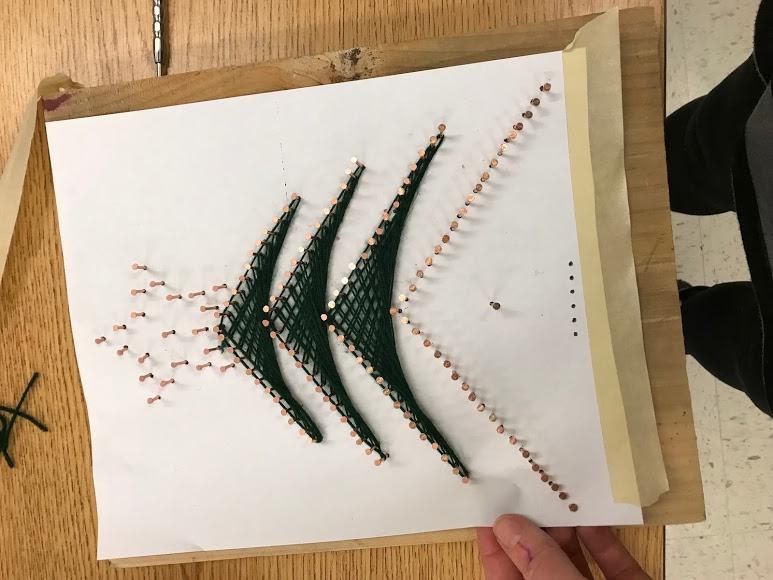
December 3: ….. Even though I didn't design the tree with my own mathematical plotting, all the leg work I did plotting parabola curves was helpful. It was much easier to control the string and the pattern with the prior knowledge. I did learn a new string tying technique after the first curve because the first tie unraveled toward the end. By the third curve, I finally got string tension and learned how to properly tie off the string!


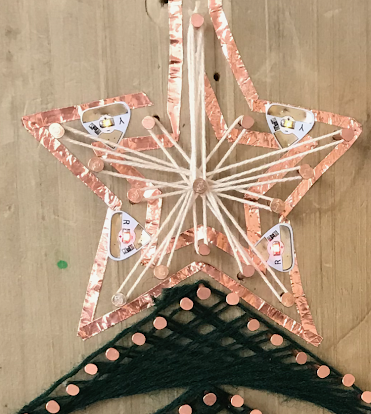
December 6: We have light! I guess I just needed to sleep on it. The copper tape was a perfect match to the color of the nails so I went with the copper tape and found LED stickers from Chibitronics. I made a parallel circuit out of the tape around the nails. I then added the stickers to four corners of the star shape. It was hard to get the stickers to stay on. The LED stickers are amazing little pieces of technology but don´t like to stick! With lots of hard pressing, I got it to work and then added the final touch of string!
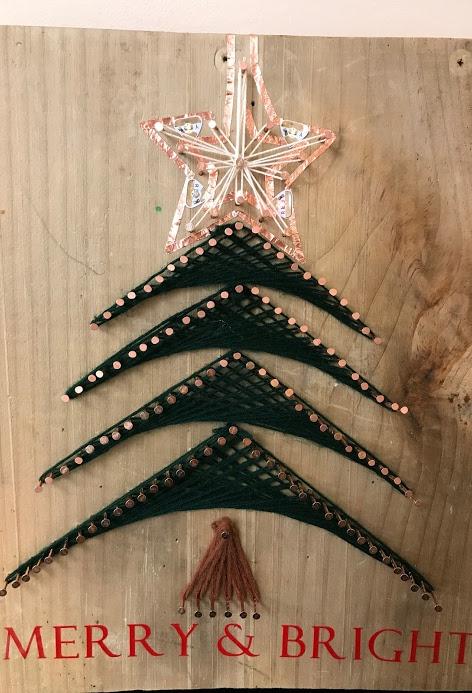


To see Faith’s whole documentation of this project (including her alignment to NGSS Science Standards, Common Core Math Standards, and ISTE Student Technology standards, check out her project documentation site she prepared for the Marlboro Graduate School Innovations in Education: Maker Centered Learning course last semester.


Thursday, March 1, 2018

March 2 - Personalize Learning by Making with Vinyl


Welcome to our second annual March is for Making series, where we strive to share 30 posts in 30 days that are filled with inspiration from our #makered community.

Our second post features inspiration from a group of young ladies who discovered making with vinyl this summer during TechSavvy Girls camp.

Check out the tips they share on how to use the Cricut Explorer to personalize water bottles, shopping bags, and more.

During our week-long TechSavvy Girls camp, we encourage the girls to explore new technologies. The week includes both guided exploration and open time to create, make, and explore new technologies. Hands down -- the favorite piece of technology this summer was the CRICUT EXPLORER and a large box filled with colorful rolls of vinyl.

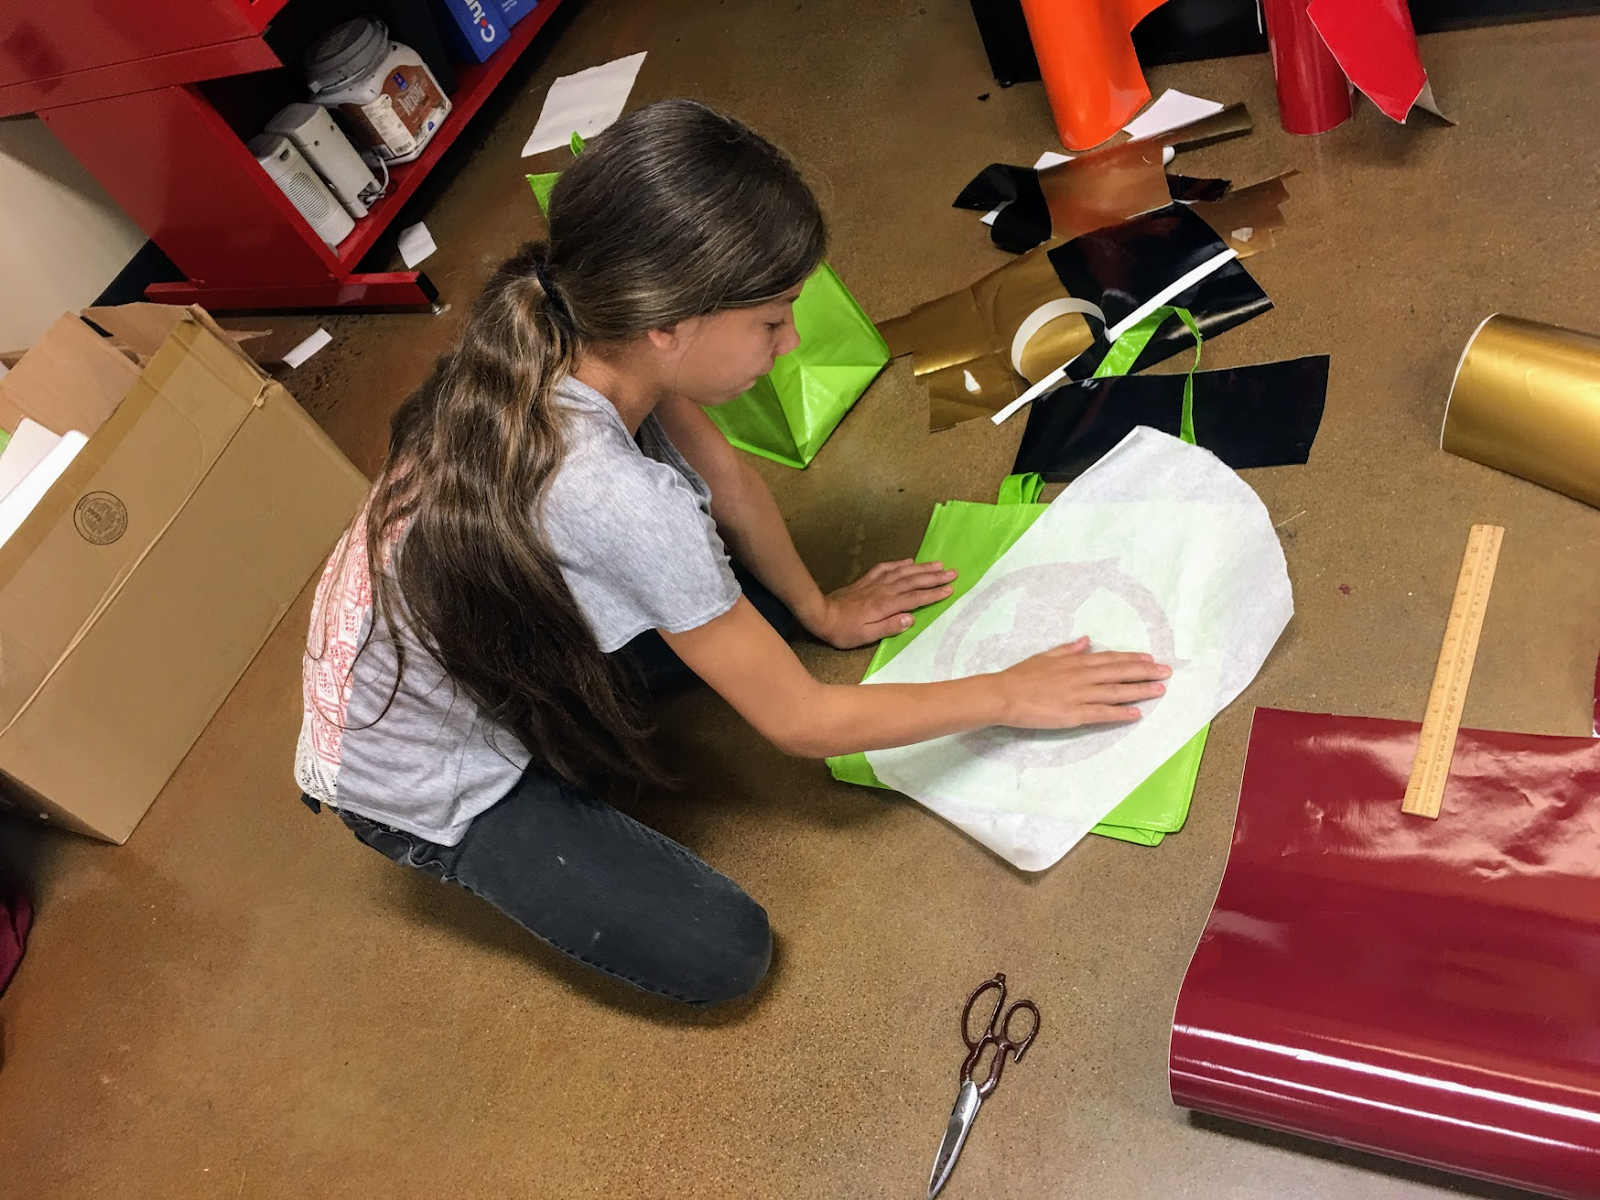
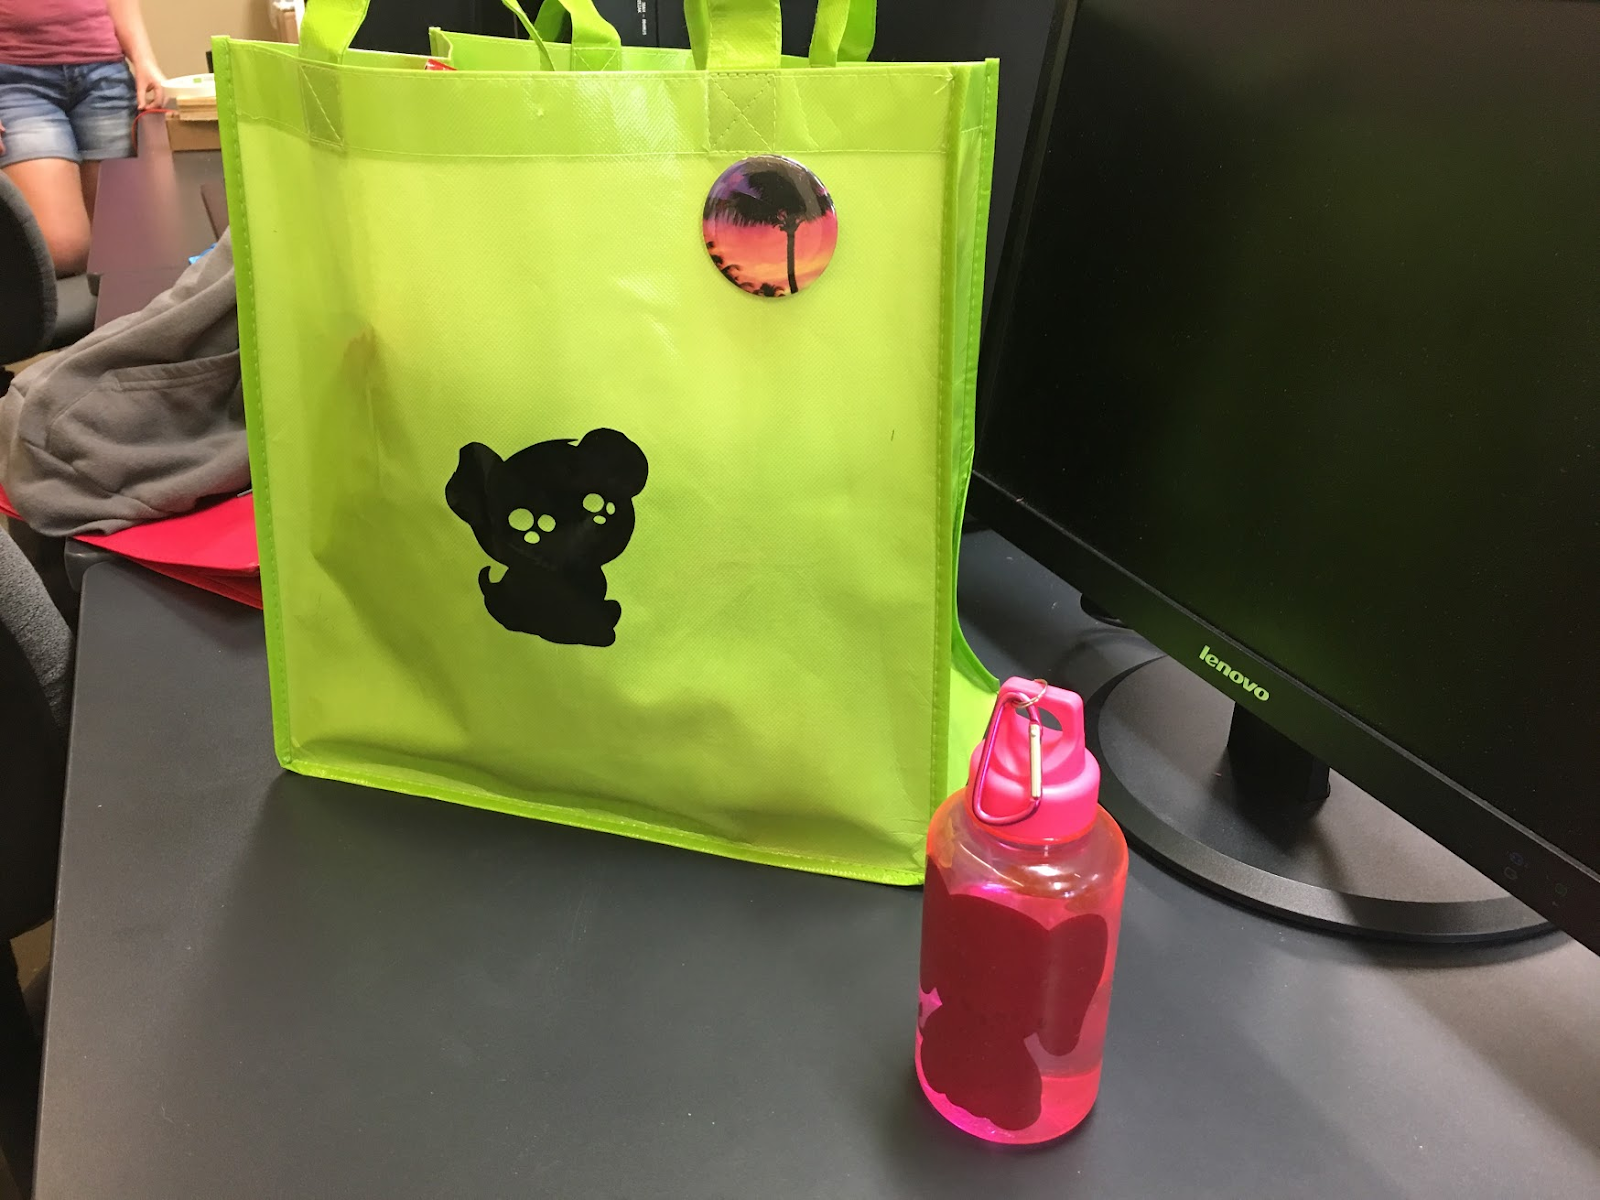
After a brief tour of how the machine works, the girls were quickly figuring out how to create new designs in Google draw and produce decals that personalized some of their favorite items - from shopping bags to water bottles.

The experience gave the girls a chance to not only design decals, but it also provided them with the opportunity to design a workflow that would allow a roomful of students to successfully create to their hearts content sharing a single Cricut Explorer.
The Workflow for Creating the Cricut involved 4 parts
Part 1 Imagine and Plan - Creating your Design using Google Draw
Part 2 Layout  your Design exported from Google Draw into the Cricut Design Studio and get it ready to send the Design to the Cricut Software.
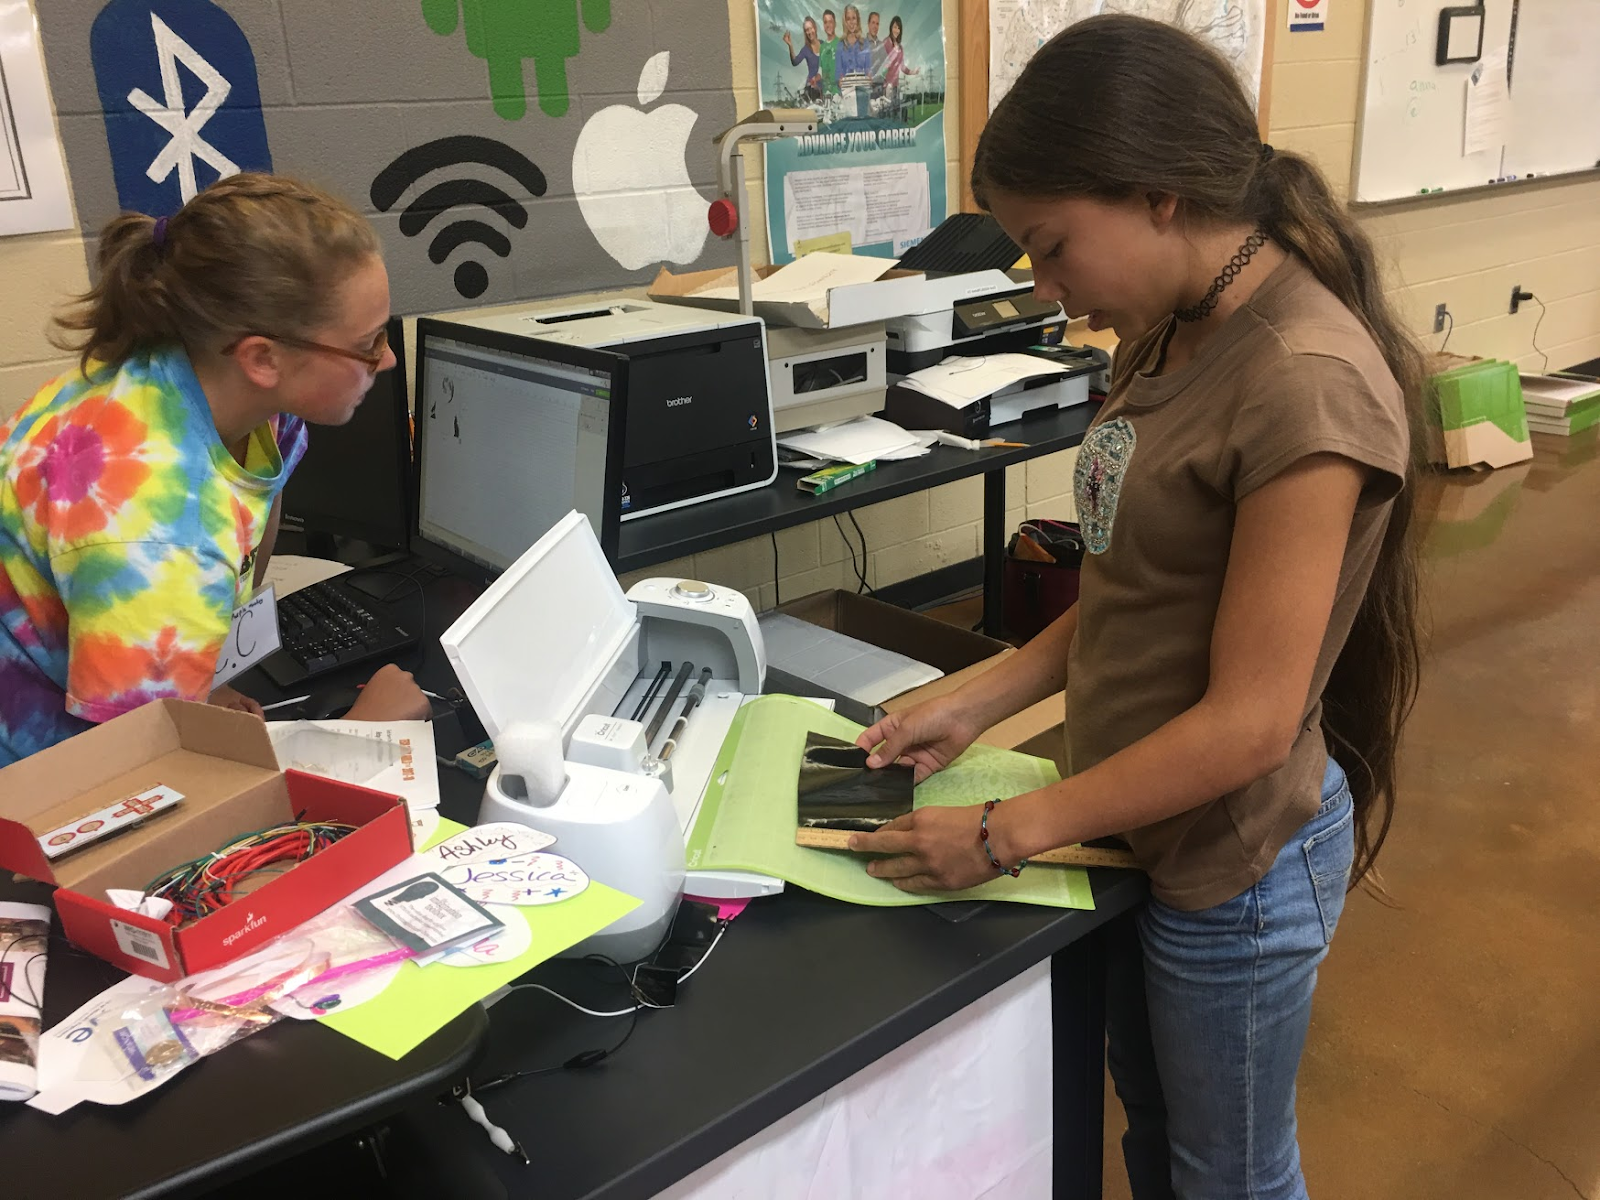
Part 3 Load the colored  vinyl into the Cricut Carrier and watch the Cricut cut the vinyl
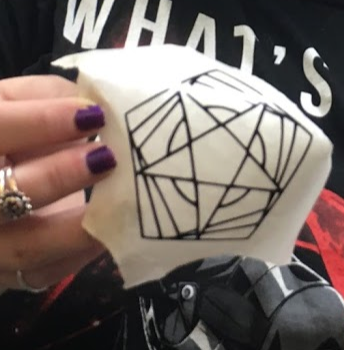
Part 4 Weed away the vinyl that is NOT part of your design.
Part 5 Transfer the design to your object (water bottle, shopping bag, etc)


Check out this video to see all 5 parts of the process and keep reading to pick up some tips and tricks we learned along the way. 


Before you Start

Tip # 1  - Install the driver on one a school computer and test the cutter at least a day before you plan to use it with students. 
We discovered was that the school’s firewall made it challenging to install the drivers on the school computers.  After some work with Cricut’s tech support and the school tech coordinator, we were successful using a manual command line solution   That computer became the ONE computer that would be tethered to the Cricut Explorer for the rest of the week.
Tip #2 - Do not encourage students to create their own CRICUT accounts if they are under 13. 
Not only does this violate their legal terms of service due to COPPA regulations, but it also would result in your students getting lots of unwanted email from the company!

Terms of Service:  If you are under thirteen (13) years of age, then please do not use our Site or engage in any Sponsored Activity. There are many other great websites for you. Talk to your parents about what sites are appropriate for you.
What we did was to create a Google  account that would be the primary account to access the cutter.  (ie - cricut@yourgoogledomain.org)
Tip # 3 Create a shared Google Folder for designs to be dropped into.  
Place the link to that Shared Google Folder on your class webpage, Google Classroom, LMS,  or simply make a short URL  that you put on the board or  taped to the Cricut Cutter itself.


Part 1 Imagine and Plan - Creating your Design using Google Draw

Tip #4  Some important skills
  • Customize the size of their Google Drawing
  • Locate creative commons images to add to their design
  • Keep designs SIMPLE - START with ONE color designs!
  • Use the Tool options of Image Search

  • Use large fat fonts or Word Art when adding text to their Google Drawing
  • Download the Google Drawing Design as a PNG


  • Then drop  the PNG to the Shared Google Drive

Part 2 Layout  your Design exported from Google Draw into the Cricut Design Studio and get it ready to send the Design to the Cricut Software

The second part of the Process  happens on the computer that is hooked up to the Cricut.
This Google Account controls the Cricut.  It also has access to all the files in the shared folders.

We soon had a backlog on this machine, but the girls were great at learning from each other.
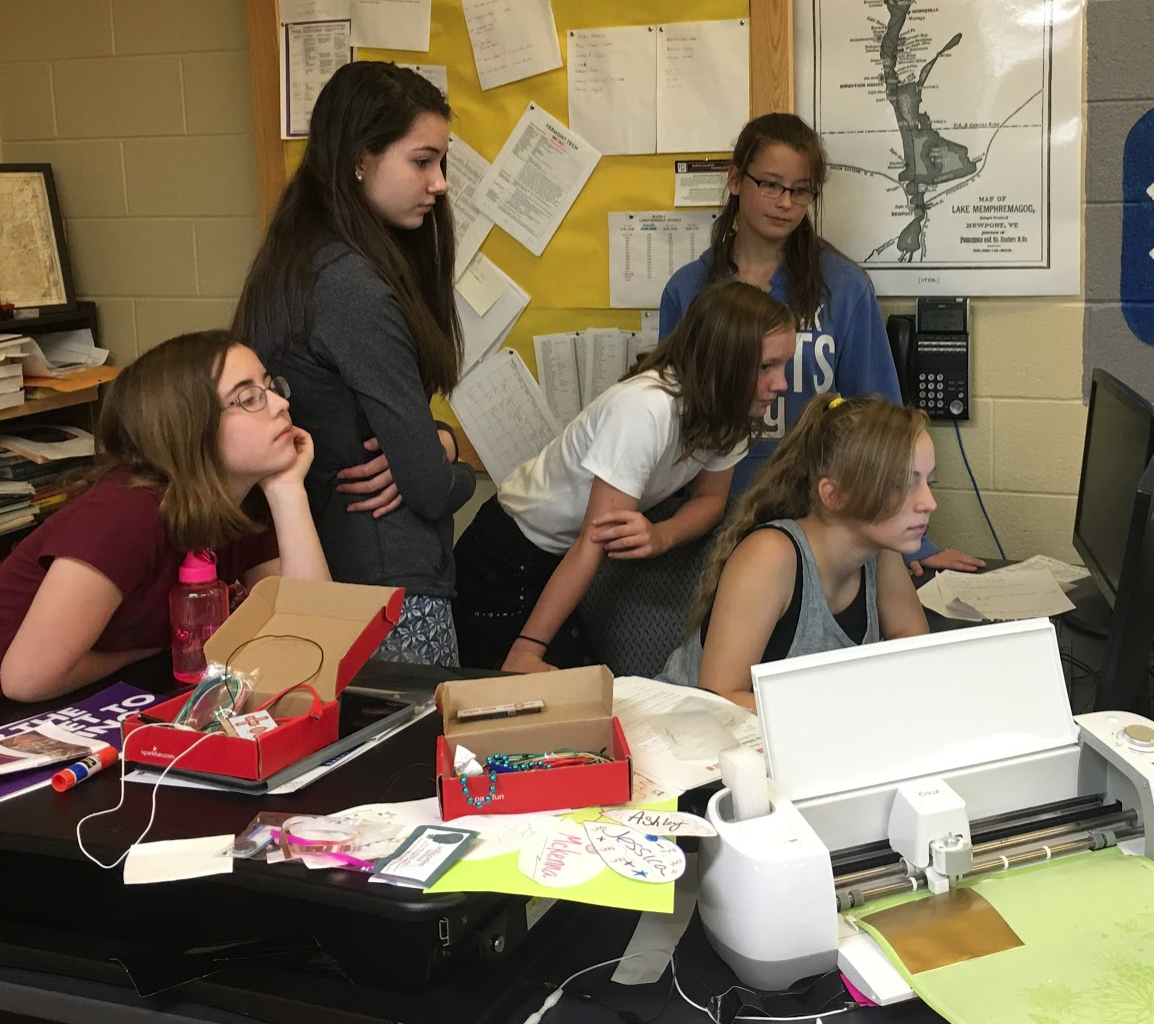
There was usually 3 campers working through the process.
  1. The person who was setting up their design in the Cricut software
  2. The person who just finished  with their design was there as coach.
  3. The person on deck to use the cutter there was shadowing to learn the process.

At one point the girls created a Wait List so everyone would know where they were in line.  There were plenty of other fun activities, but the Cricut was always in use.

Tip: Next year, I think we will want two Cricut accounts.  

One for the person who is cutting their design and one for the person on deck.  By going through two computers one station can be for  doing the Part 2 image manipulation  with the other computer station reserved for cutting the vinyl.
Tip:  Follow these steps  to load your Google Drawings into the Cricut Studio Software.
Find your image in the shared folder and download it to the computer running the Cricut Design Studio.
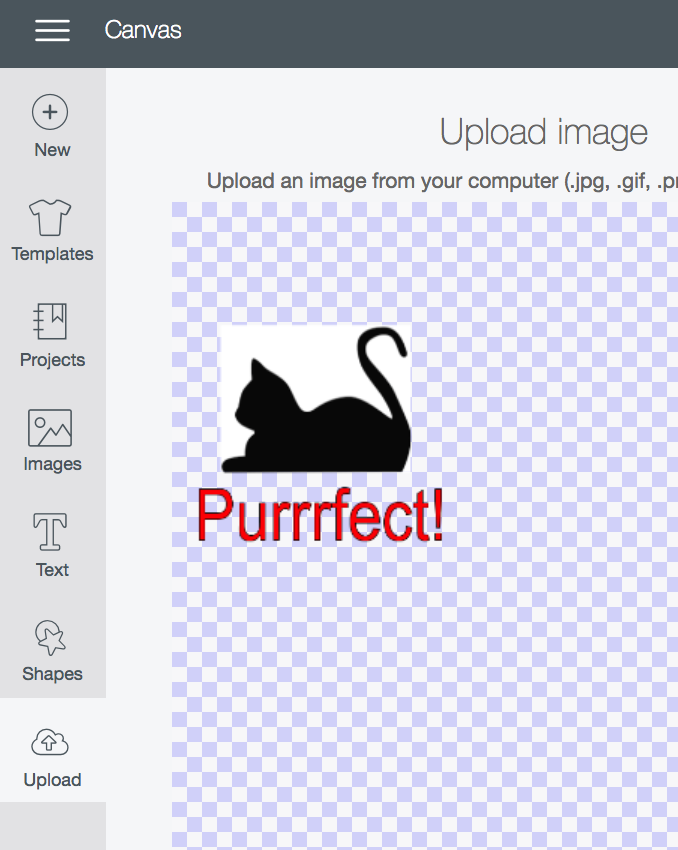
Create a New Project on the Studio
Choose UPLOAD image.
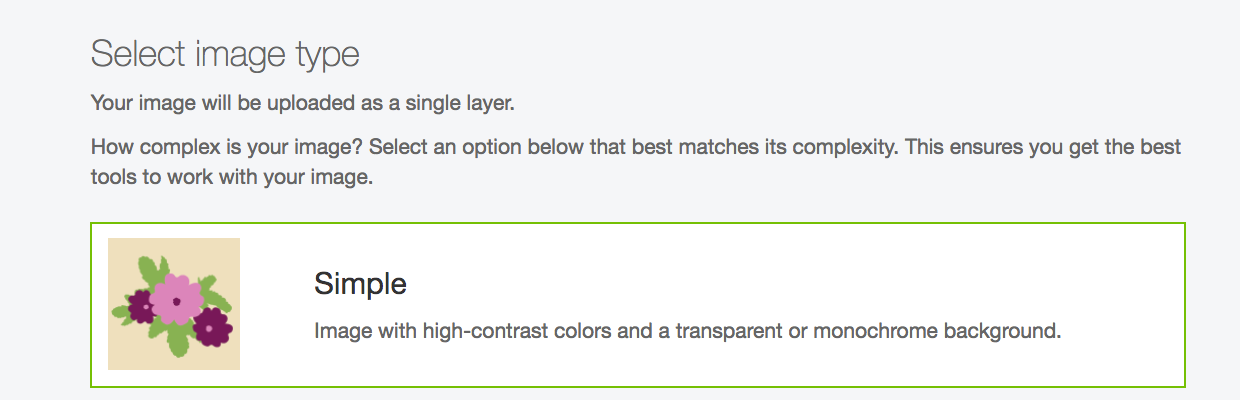
Select  the Simple IMAGE type (since we decided to make simple designs) then hit CONTINUE
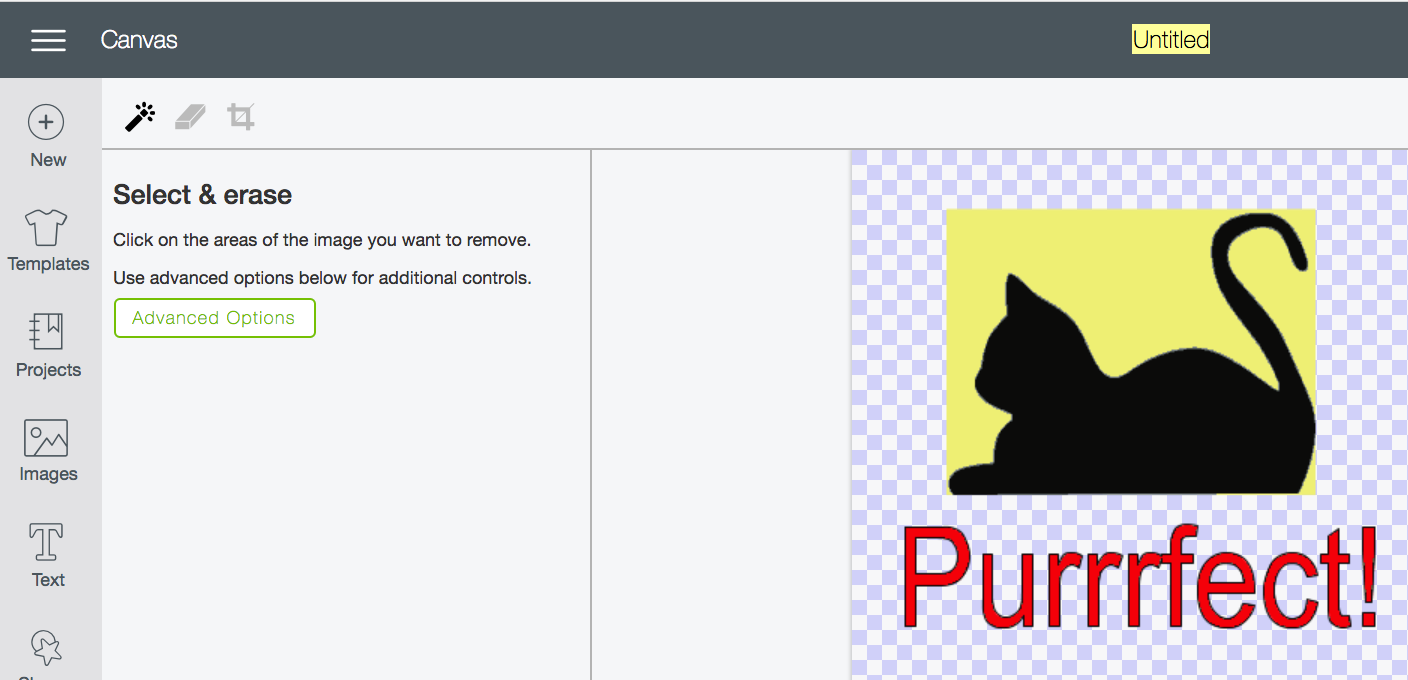
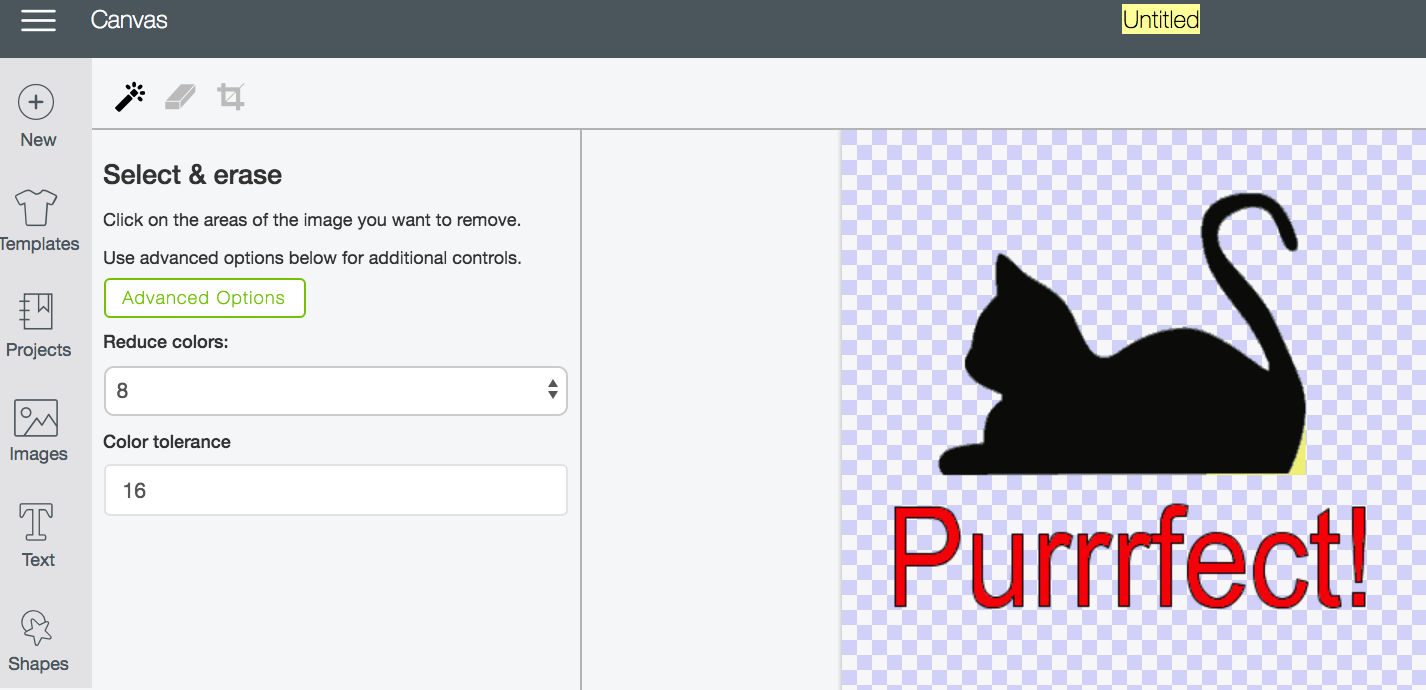
Look for the ERASE Tools
Use the Select and Erase Tools   to erase areas of the picture that you want to remove
TIP:  SAVE as Cut Image and Label the files carefully.

Be careful here!  Its easy to miss this step. 


THEN choose  SAVE as a CUT IMAGE - 
Make sure to Add a name and TAG to make it easier to find your image later as the list of images grows quickly and becomes hard to manage. 
Then click UPLOAD Image and select the image you just saved by clicking on it in the images.  TIP: If you can’t find it,  use type the name you used to save your image in the search box

Click on the Image you want then click INSERT in bottom right hand corner

Scale or move your image to a place where you have placed some vinyl on the map
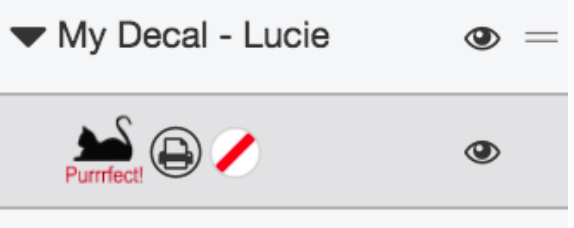
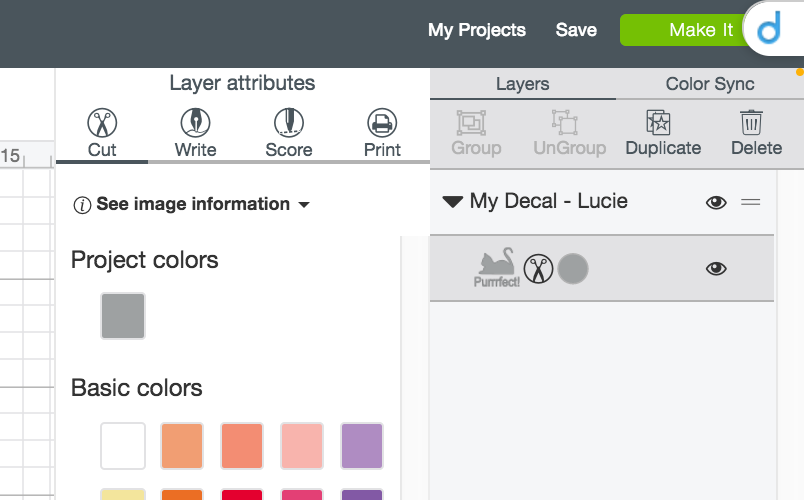
The next step is to make sure the Cutter is properly set to CUT the vinyl.  To do this, click on your image layer in the right hand side  right below the word LAYERS .  If you click on the little scissor or little printer icon, the layer window should pop up like this.

When the layer  attributes opens up,  click on the CUT icon right under the words Layer Attribute   to turn your layer into a layer that will actually be cut!  You should now see that the scissors  icon instead of the print icon on your layer. 


YOU are almost ready!    Look at the top right corner and lick the green MAKE IT button.
Preview your project one last time!
Make sure everything looks good!

Hit Continue!
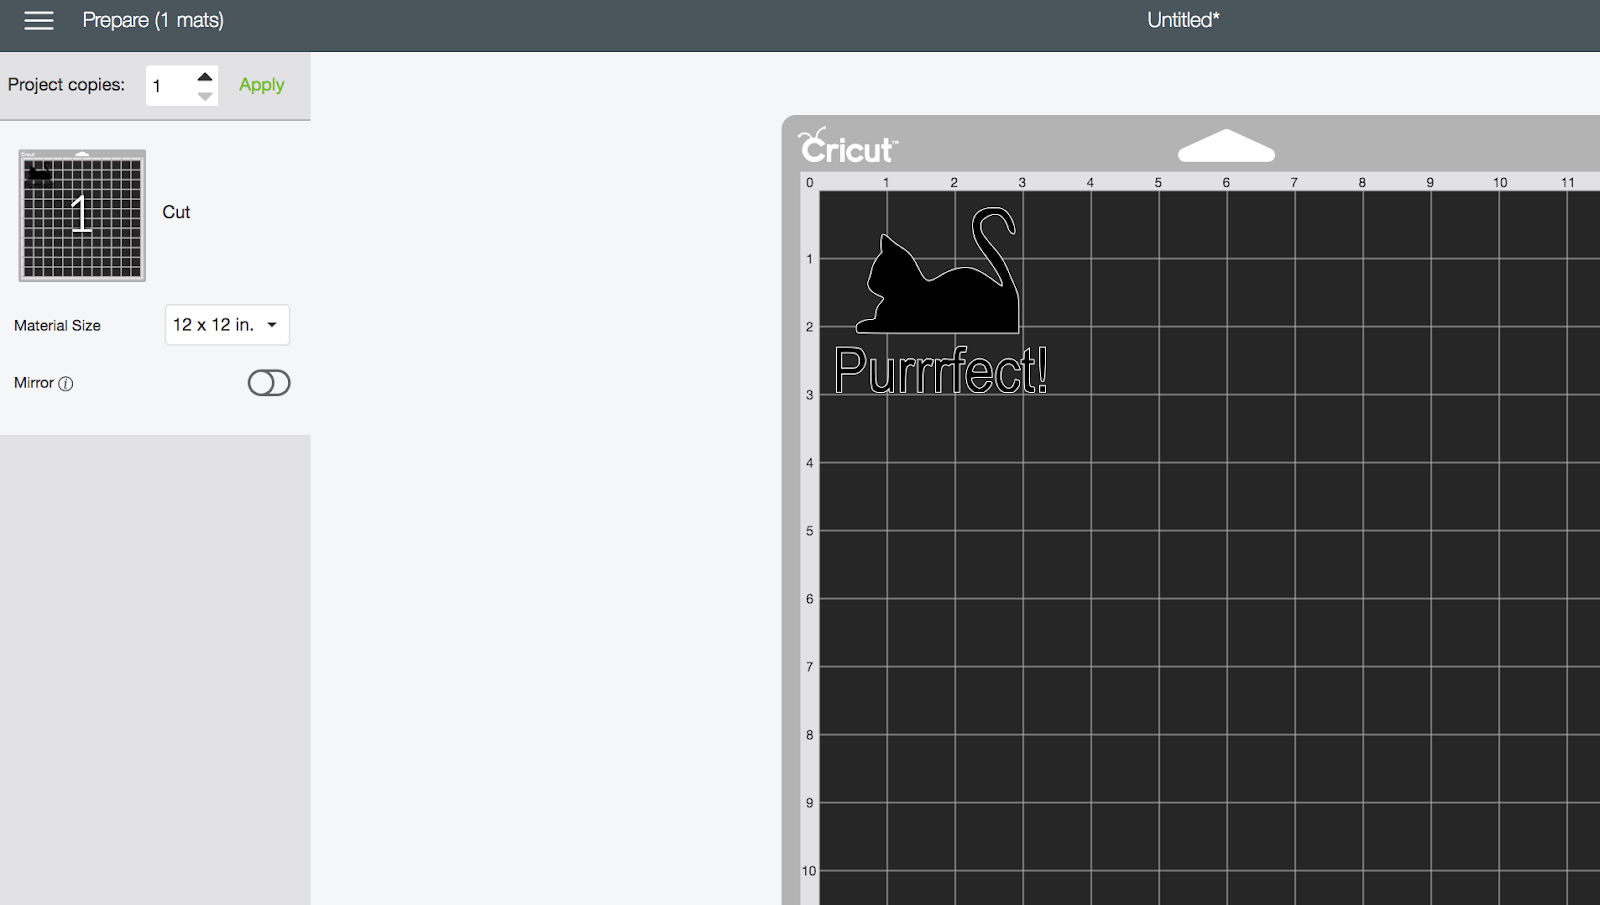
You’ll get one last opportunity to make some changes. This step previews where the vinyl will cut on your Cricut Mats. 

If you need to move the item over on the mat.. Simply hit EDIT

Tip: Try to layout your design to use as little Vinyl as possible.
Keep the extra pieces around for little projects. 


Part 3 -  Load the colored  vinyl into the Cricut Carrier Mat  and watch the Cricut cut the vinyl

Part 4 - Weed away the vinyl that is NOT part of your design.

Tip:  Dental picks work great for this!

Part 5 - Transfer your new vinyl design to your object to personalize it. 


Tip: Water bottles, plastic shopping bags, laptop cases, waste baskets or other items from the dollar store are great places to start! 
Tip: Be prepared for the unexpected!  

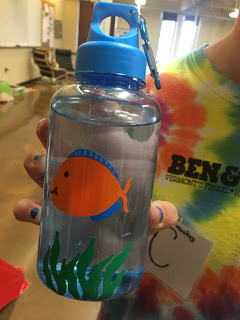
Once the girls felt confident with the process, their imagination started to run and before we knew it one of the girls had figured out a way to achieve a multi-colored fish bottle.  
Still others started imagined blinky lights and added sewable LED’s to their bags.
They were ready for more! Even on the last day of camp, the Cricut Vinyl cutter was the last thing packed up as the girls refused to leave it and some  parents  had to use some creative coaxing to drag their daughters away!
How would having a Vinyl cutter in your school library or maker space give students new ways of expressing themselves!   Would it be a tool they would reach for?  Would their new confidence and skill help them imagine new ways to show what they know?
I bet these students would!   What type of  communication tools do your students have access to.

March 1 - Making Makers with a Maker Mindset


Welcome to our second annual March is for Making series, where we strive to share 30 blog posts in 30 days that are filled with inspiration from our #makered community.

Last year we created a gallery of inspiration where our #makered community shared school maker space tours, classroom maker projects, and fun maker tutorials. 

This year we have even more stories of maker educators sharing how they include creating and making to help students learn.  Stay tuned throughout the month for stories of educators on their own journey of creating confidence through making.  We have some virtual tours of maker spaces coming  your way. You'll find  some helpful "how" to tutorials that  include maker projects and tips we've picked up along the way. 

As the Create Make Learn community continues to grow through our annual summer institute and through the people we create and make with throughout the year, the ideas and inspirations also grow - and we'd like to share some of our favorites in a new post each day during this   March is for Making series. 

As we gear up for another month of sharing and inspiring each other, I'd like to kick things off with a poem that reminds us  that a maker space is not a room filled with fancy3D printers, laser cutters,  and electronics.  A maker space is that amazing space between your ears!  The space where you will imagine and start to create.  It's that place where your maker mindset kicks in and becomes the most important tool in your journey of creating and making.


Last August,  during the closing of our  Create Make Learn Summer Institute when everyone was sharing their take-aways from a week of creating, making and learning,   a fifth grade teacher from Beeman Elementary held up an oversized cardboard 'A' that she had made and shared her latest creation - a  poem that captured her take-away from the week  about the value of a maker mindset! 


Enjoy her impromptu recitation of her poem in this short video.


You Need an A


It’s just an A you may say
But I beg to differ
A common A in the eyes of an untrained mind
Unwilling or able to see
The potential of an A
Anywhere, anytime, anyplace
An A can become much more..
A Megaphone
Cheering the soul
To see more, hear more, create more, be more.


Why an A could be a truss in a grandeur Bridge,
Spanning the edge of two to become one.
Or the side of a towering skyscraper
Overlooking the sea of humanity
Have you thought of a giant A
As a crutch, or a stretcher on the
Worst fall you’ve ever had?
Everyone deserves an A
When your chips are down
And there is no place else to hang your gaze.


Or better yet, two A’s
Combined to make a special pair
Of glasses to shield one from the rays
Of a once in a lifetime solar eclipse
Or angel wings when you say
Goodbye to a friend, a grandmother
Or a memory too painful to forget.


You’ll need an A
On a day when your daughter
Goes off to Kindergarten,
Everyone needs a bow to go along with
Their dimples of  joy.
Or a bowtie for the prom of your first
To be old enough to make you realize
Your days are numbered
In the best job you’ve ever held.


So an A for you can be a discarded piece of trash
Fit only for the reduce, reuse, and recycle bin.
You could close your mind to the creative urge
To make the A bigger than who you are.
Or you can embrace the A
Call it your treasure instead of trash

And proclaim to the world, “It’s NOT just an A!”


                   ~ Annette Carter  (2017)