
My First CNC Project with #CARVEY
When I started to look around for what type of projects people are making to cut their teeth with #CNC in school makerspace, I was not surprised to find the Fidget Spinners were trending!
Why not!
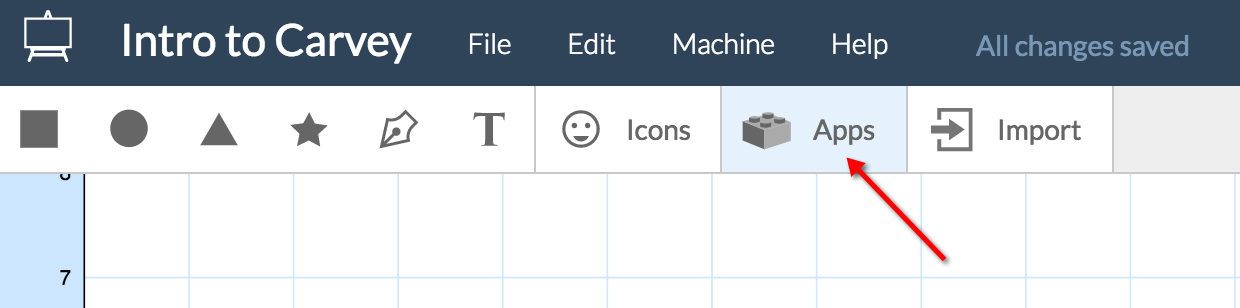
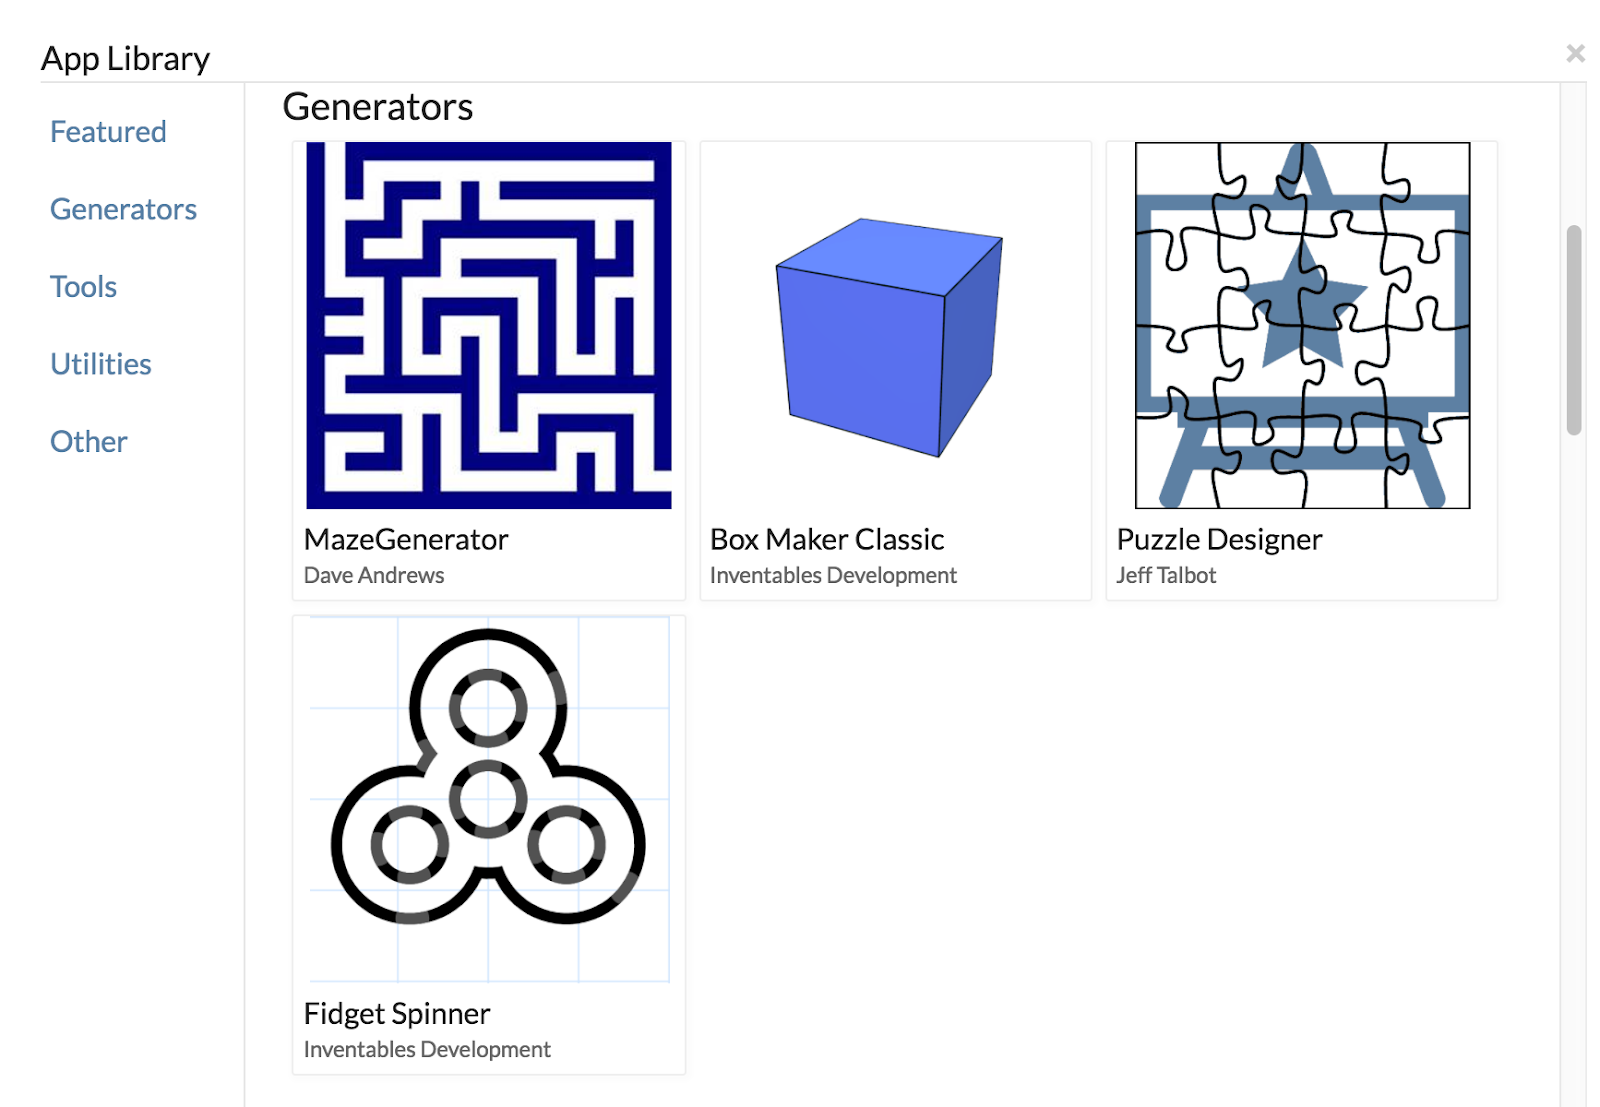
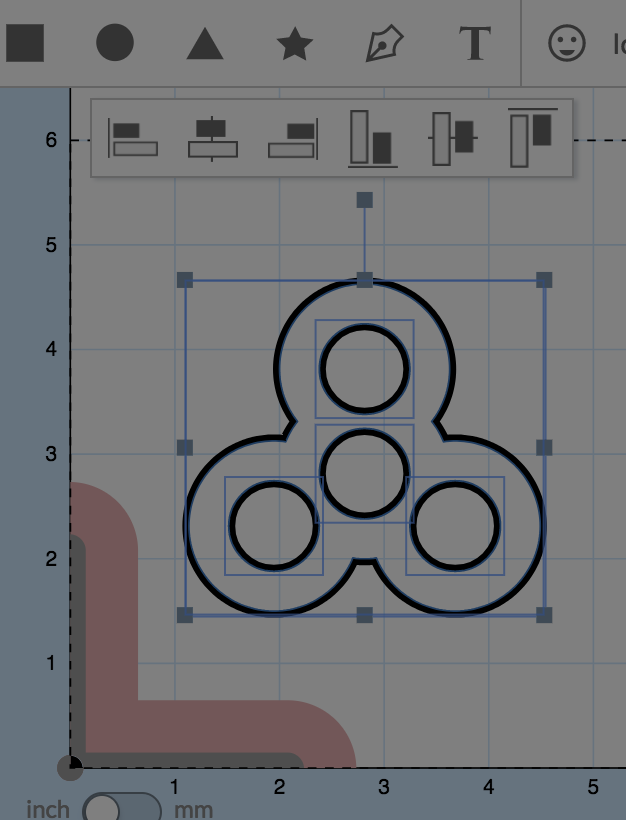
I was surprised to discover that Easel (the recommended software for Carvey) has a feature called APPs filled with templates to get you started for newbies like me!
Of course - I chose the ever trendy Fidget Spinner as my first project.
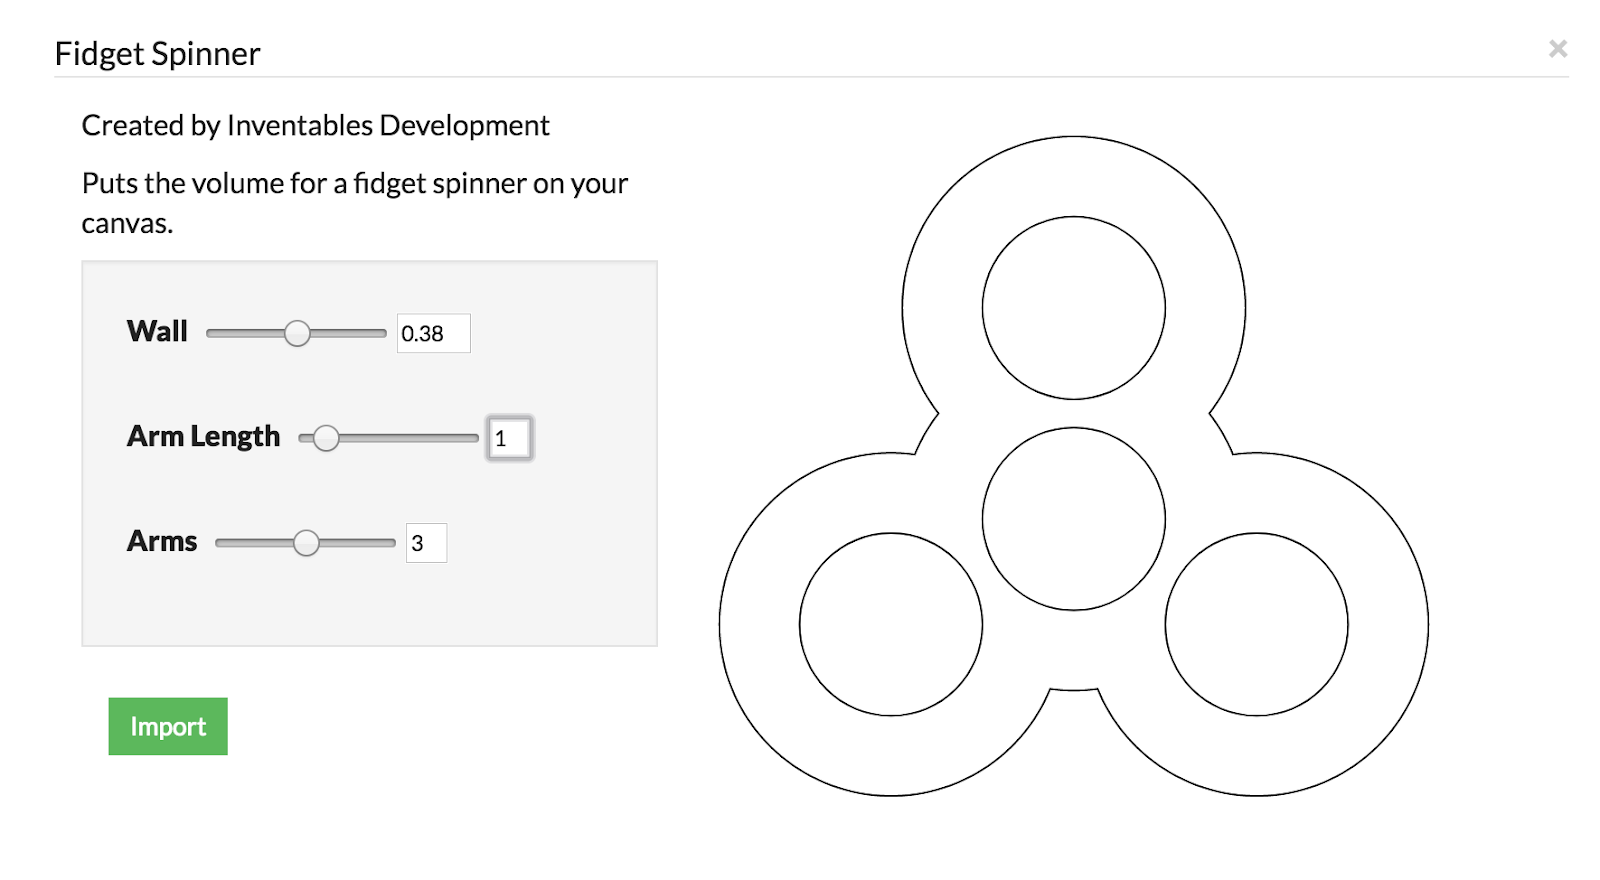
And set the number of arms, arm length, and wall size
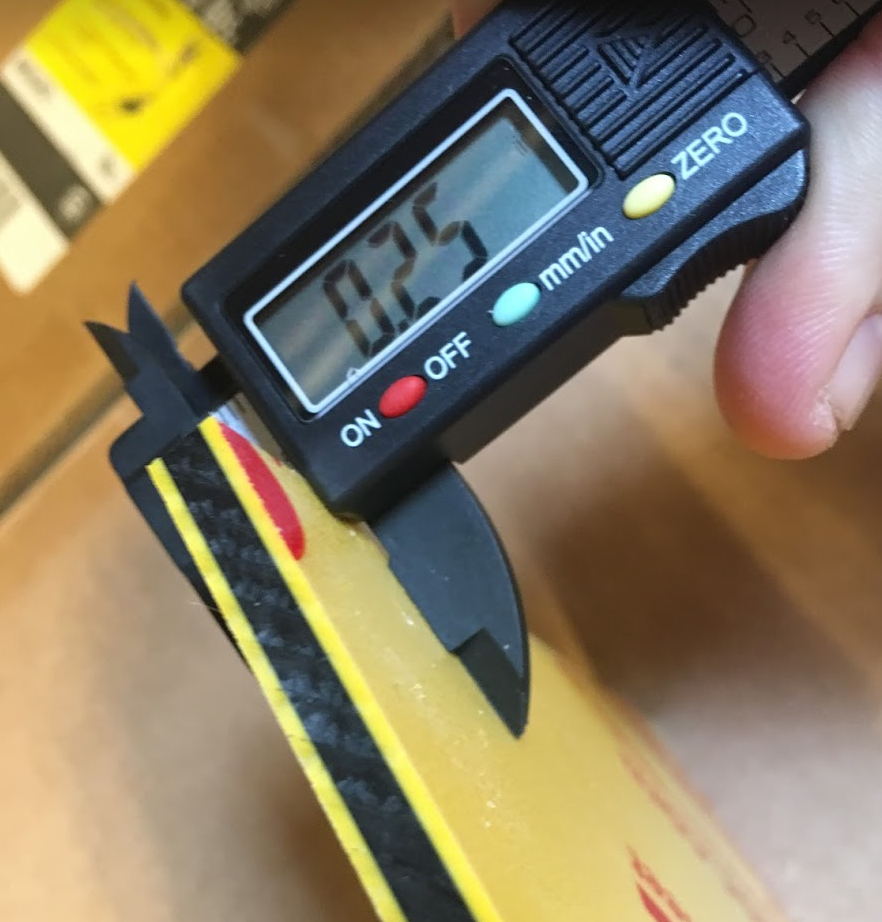
I then picked a colorful piece of HDPE and used the digital calipers that Inventables shipped with my Carvey to find the thickness of my material.
The next step was to click on the Material Tab and select the correct material, and the thickness of my material into the setting for the Z axis. Be especially careful to include the correct thickness here. If you enter an amount greater than the thickness of your material, your bit will cut into your WASTE Board. You should also check to see if your BIT size matches the size of the BIT that you have inserted into your CARVEY.

Now, grab the material you want to cut, and insert it securely in the bottom left corner of the wasteboard. Use additional clamps to secure the material to the ‘board’, making sure to tighten the clamps. Carvey provides extra aluminon support for the back side of your clamps in different sizes.
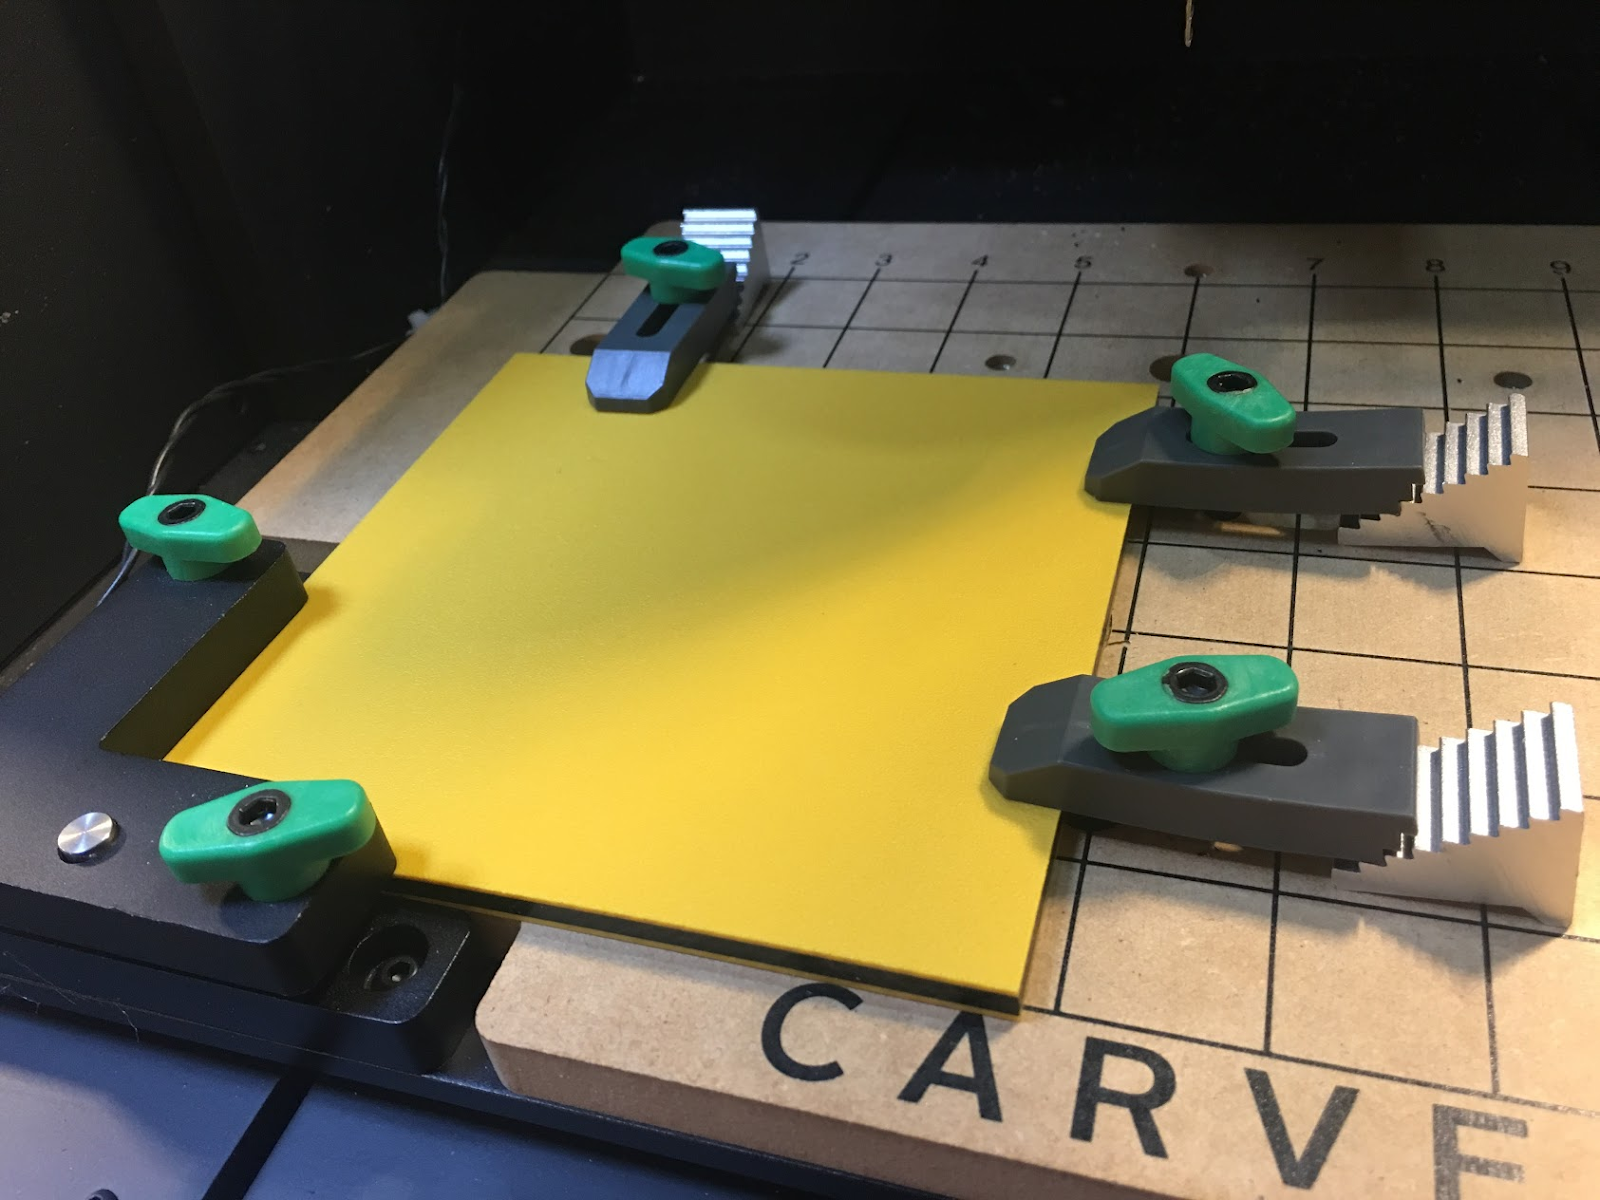
Don’t forget to compare the cuts outlined in your software to the location of your materials to make sure that the clamps are clear of where your CNC will cut!
When you are feeling confident that your design settings are correct, CHECK them again!
Then click on the CARVE button. Yes - this makes me nervous! I can still hear my CNC instructor, Matt Flego warn us that a CNC machine can eat itself and that we should keep our finger on the 'emergency stop' button when setting the CNC in motion.
Easel PROMPTs us to check each setting one additional time.
Double check these very carefully. You don’t want the bit to chisel away at your clamps or down through your wasteboard.
In my case, the Easel software did some quick checks and warned me that my object was too big for the Carvey.
Somehow I missed a decimal point and it thought my material was 25 inches high instead of .25 inches hight! YIKES!
After making the necessary corrections and checking everything again, I once again pressed CARVE and sent the job in motion!
Within minutes my fidget spinner was cut and I was vacuuming out the mess - which was nicely contained within the machine!
Time to shop for a shop vac and go pick up some bearing!

Admittedly this project didn't take a lot of design skill, but it was a good for me to learn the basic workflow of a #CNC job using Easel with my Carvey. Now that I've gained a bit more confidence with the tool, I'm looking forward to leveling up when choosing my next project.
Oh, And for those who are wondering "What's the deal with Fidget Spinners?"
No comments:
Post a Comment