Tuesday, May 13, 2025

Coding Robots for Creative Expression

Coding Robots for Creative Expression

When I say "robot," what image comes to mind?

Take a moment to picture a robot and what it's doing. 


Is it assembling parts in a factory? Perhaps it's vacuuming floors or delivering packages? Maybe it's even performing surgery or exploring Mars?

If you imagined a robot engaged in a task focused on efficiency, precision, or problem-solving, you're not alone. The vast majority of people envision robots solving problems. They think of robots as machines designed to make our lives easier by taking on repetitive, dangerous, or complex tasks.

Few people envision robots who can dance, create art, or express emotions?  But robots today are being used for creative expression. Check out this robot dancer and robot artist. 


By tweaking the prompts we use to introduce computer science to include creative computing challenges, we can engage a broader and more inclusive audience with computer science  education. 


When we integrate creative expression into computer science education, we not only teach technical skills but also foster innovation, artistic thinking, and cross-disciplinary connections.   This is one of the reasons I fell in love with the Finch Robot, 


If you are an educator  looking to bring creativity to computer science,
let me introduce you to  the Finch Robot.  
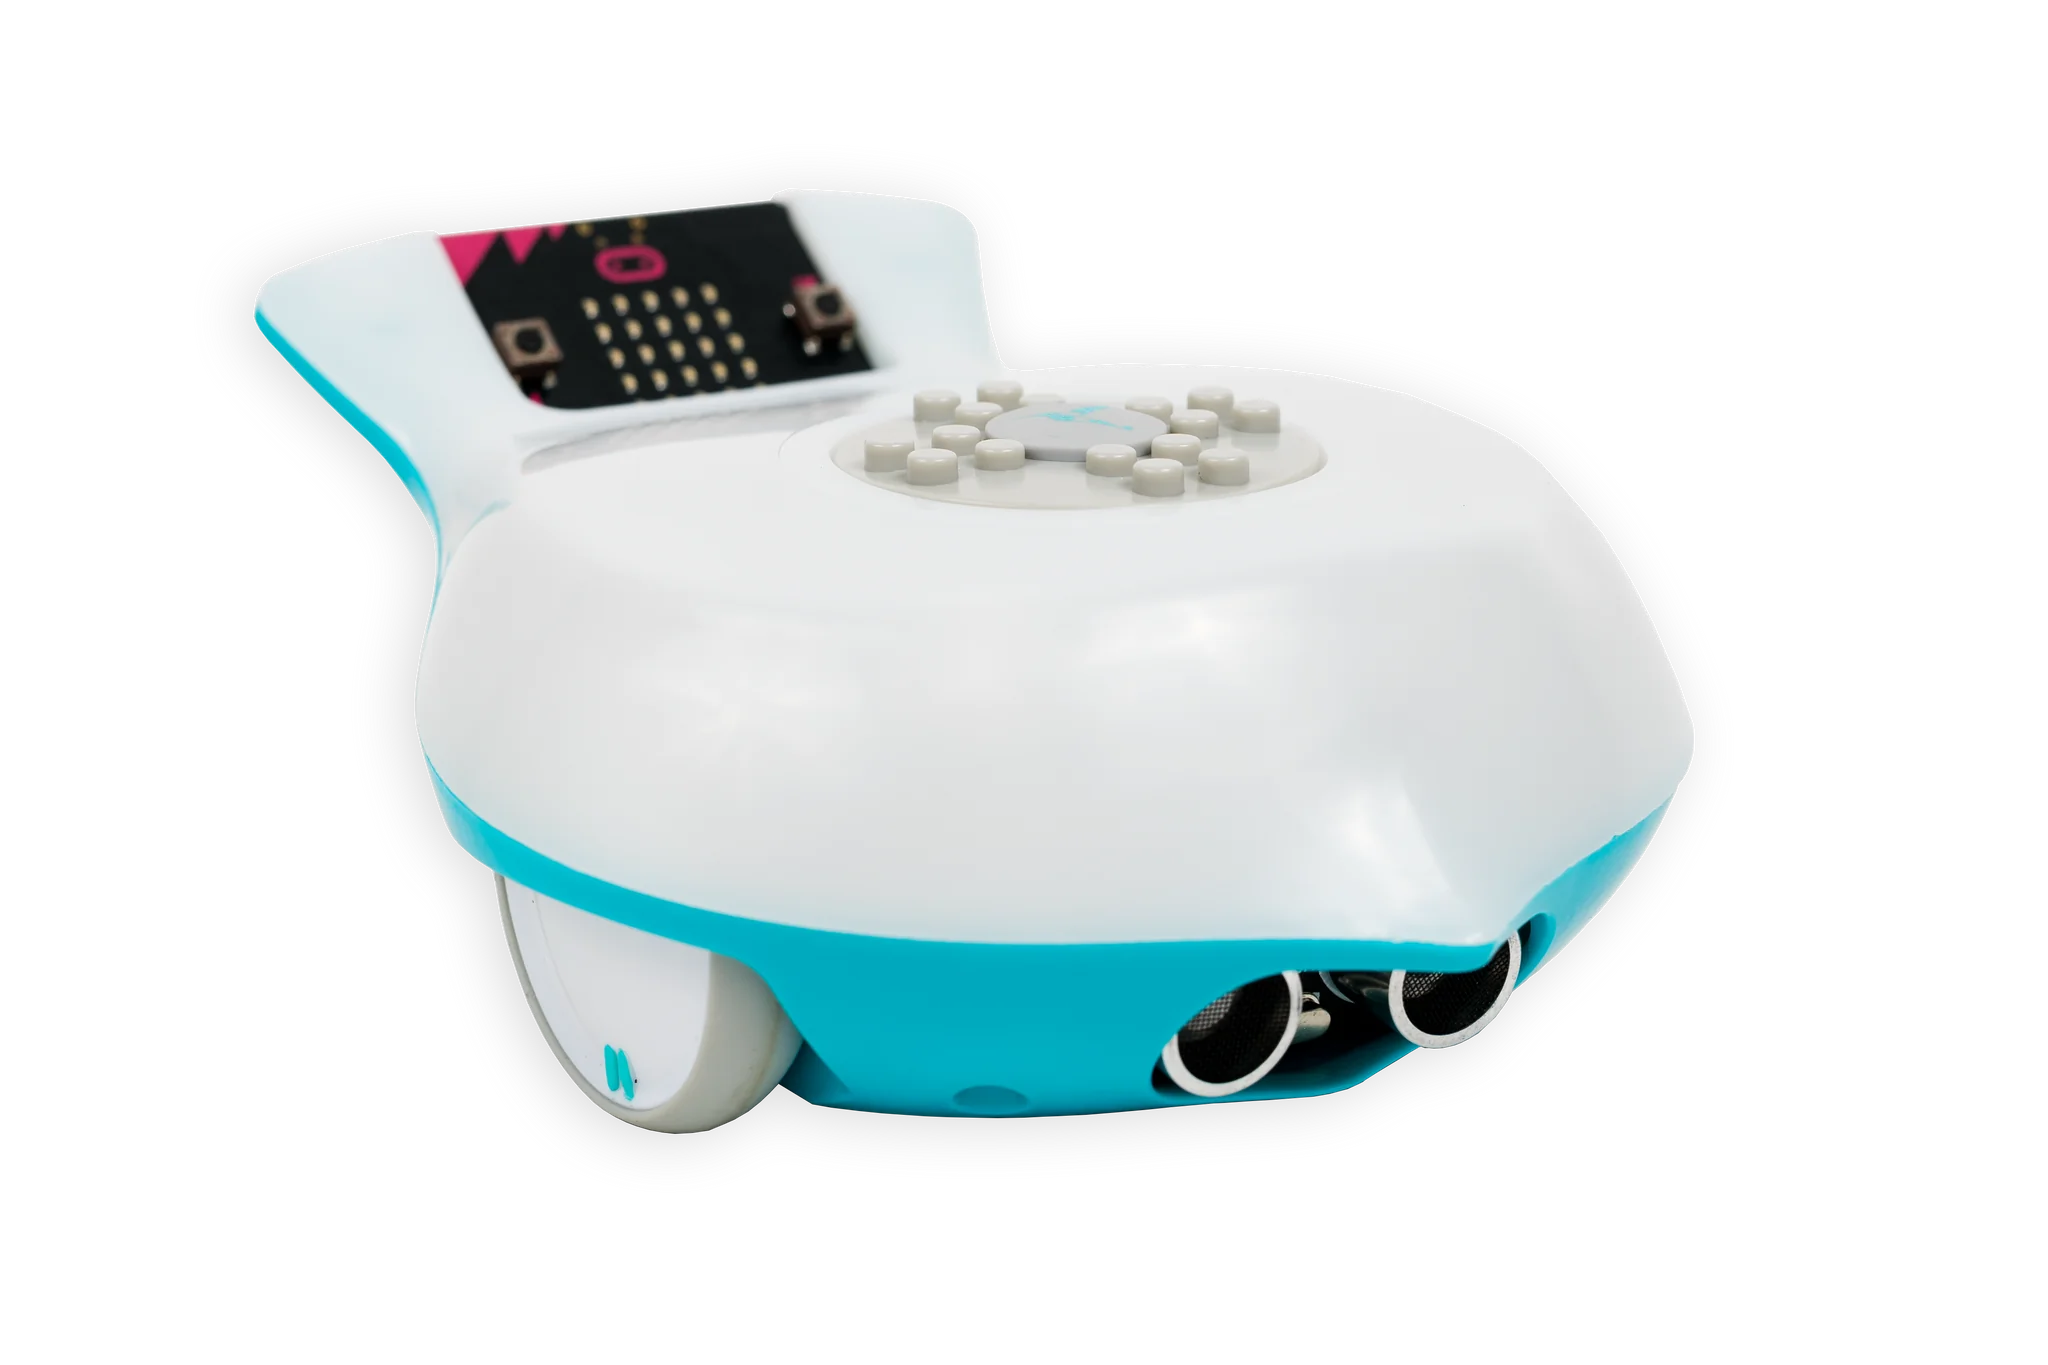

The Finch Robot was developed at Carnegie Mellon University's CREATE Lab, specifically designed to make computer science education more engaging and interactive. It's a small, two-wheeled robot with bird-like features that can be programmed by beginners to perform various actions, like talking, dancing, or drawing.   But don't be fooled by it's cuteness!  The Finch Robot can be used with students are young as Kindergarten, but can also be used to engage advanced high school students learning object oriented languages such as Java.    

How can ONE adorable robot deliver on this promise? 

It does this by offering multiple platforms for coding it on all types of devices ranging from tablets to chromebooks to laptop computers.   How you use the Finch robot depends on your educational goals and the age of your students.  
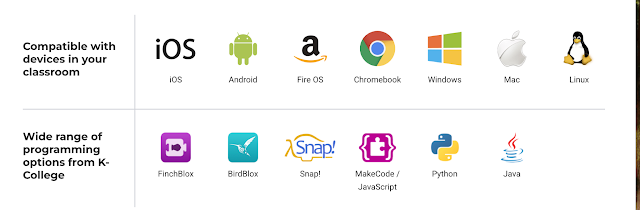


For my UVM computer science class project, I explored  5 different ways to  introduce age appropriate computer science concepts using the Finch Robot.

  • Kindergarten to 2nd Grade: Block-based FinchBlox introduces computational thinking concepts through simple visual programming
  • Upper Elementary: Web-based Snap! platform builds on block programming with more advanced capabilities
  • Middle School: MakeCode provides a hybrid experience, letting students transition between blocks and text-based JavaScript as they build confidence
  • High School: Text-based Python programming offers robust capabilities for more complex projects
  • Advanced AP Computer Science: Java programming introducing students to object oriented programming


Each of the Lessons below  uses the same Essential question. 


Each of the Lessons starts with the same "Hook". or Inspire Videos of robots engaging in creative expression.   Each of the Lessons below includes a couple skill builders that guide you towards the initial setup of the platform most appropriate for each level of students.  In each of the lesson is a skillbuilder to teach you how to  code your robot's movement as well as the LED lights in the robots tail and beak.  The skillbuilder is unique to the platform that is best suited for students of different ages. 
Lesson 1


Finch Blox Slides 

Introducing Computer Science to Younger Learners using Finch robot & FinchBlox


CS Lesson Plan  FinchBlox with younger learners


Lesson 2


Finch  Intro to Blocked Based with Snap Slides 

Introducing Computer Science to Upper Elementary using Finch robot and Block based Coding via the SNAP Plastform.

 CS Lesson Plan  Snap


Lesson 3 


Finch Using MakeCode JavaScript Slides

Introducing Computer Science to Middle School students using Finch robot and MakeCode (Block Based and Javascript)


MakeCode/JavaScript Lesson Plan


Lesson 4


Finch Using Python Slides

Introducing Computer Science to High School students using Finch robot & Python

Python Lesson Plan


Lesson 5 


Finch With Java Slides 

Introducing Object Oriented Computer Science to Advanced High School/ College students using Finch robot & Java

Java Lesson Plan


Following the initial skillbuilders, the lessons all end with the same Paired Programming Challenge, where students can use there new skills and CS platform to complete one of the three challenges below.


Even though the beginning "inspiration'. and the ending "Challenge" are the same for each lesson I created, the "how to Skillbuilders are specific to the CS educational goals appropriate for that level. on the different platform I recommend for that level sudents. 

There is a big difference between how a Kindergarten students interacts with Finch and a high school students learning object oriented programming using Java.


No matter where your students are in their computer science journey—from beginners taking their first steps into coding to advanced learners preparing for computer science careers—I believe that the Finch Robot provides an engaging platform for learning  to code a robot for creative expression.

If you'd like to learn more register for CSTA Vermont's Spring Event and join  Joe Bertellini and I as we introduce you to teaching computer science concepts using the Finch robot.  

Join CSTA Vermont members for their  annual Spring Event

Click here for More Info and Registration LINK

Announcement


Saturday, April 19, 2025

Create Make Learn Summer PD - June 23-27


This summer Create Make Learn is partnering with the Project Design Lab to offer educators our annual week of engaging hands on professional development  June 23-27 in Burlington Vermont. 

Super excited at the possibilities that this collaboration will bring.   For those of you who have attended Create Make Learn Summer Institute before, you know the power of bringing together a cadre of creative educators for a week of creating and making while making new friends and connections.

The Project Design Lab 2025 offers 9 different strands for educators to express their creativity while designing a project plan  that leverages the power of creative engagement – making things we care about  – to inspire deeper learning and a classroom culture of creativity and collaboration.

The Create Make Learn strand will focus on 

Creativity, Circuits, and Code that Bring Stories to Life

During the week,  educators will discover the magic of combining stories with technology and leave with the confidence to guide students in designing creative projects that deepen their engagement with literature using circuits and codes.

Learn more and Register here


At the Project Design Lab you will build a project plan using creative engagement – making things we care about – to deepen your student's engagement with literature.

No prior experience with circuits or coding needed.

We'll guide you through everything from basic LED circuits to block-based coding, helping you build confidence with each new skill.

You will leave with the confidence needed to guide students in designing creative projects that deepen their engagement with literature using circuits and codes. 

Who Should Attend?

  • Elementary teachers in grades 3-5
  • Middle & High School teachers: librarians, ELA, science, math, humanities, and art.
  • STEAM and enrichment teacheres


Learn more and Register here


Monday, March 31, 2025

Creating Confidence with Designing our first Cut Files using Cuttle.xyz

In the two previous blog post I introduced three project possibilities that focused on our Night Sky residency at Newport City Elementary Skills and some stellar books and literature connections.


 For each of these projects, students will be using either the laser cutter or Cricut cutter available in their school.  In this post we'll focus on the skillbuilding activity we used  to introduce both students and teachers to a workflow that students could use with the school's  brand new Glowforge laser cutter. 

This workflow will also work when students are designing for their Cricut Cutter. Although both these tools do offer a subscription based design tool, I recommend that students learn to design files using non-proprietary software for designing vector files needed when using a laser or cutting maker tools - like Cuttle.xyz.  It's a great choice for schools for several reasons.

  • It's browser based - so it even works on Chromebooks.
  • Cuttle.xyz has signed data privacy agreements with several schools
  • It's accessible for middle grade students
  • They have affordable K-12 pricing
  • You can try before you buy with 3 free projects.

One Day 1, we lead each students to creating a hanging constellation disc of the Big Dipper cut from cardstock. We carefully went over safety protocols for using the laser cutter and explained that prototyping often starts with paper and cardboard before moving to wood, acrylic and other materials for the final version. 


This  tutorial video features the steps we used to provide sixth grade students the foundational skills they needed to design laser cut files for all three project choices available for this residency. 


The next step was to get the downloaded SVG files from the students' Chromebooks to the laser cutter. My favorite workflow for this is to create a Google Form using the ADD File question.  The link to this Google Form is made available to the students via their Google Classroom or other LMS  Students quickly learned to submit and resubmit new iteration of SVG files to the laser cutter with helpful comments. 


In this residency,  both the teacher and I used our laptopss to display the SPREADSHEET associated with the Google Form used to submit their SVG files.  One of us circulated around the room assisting students with designing their vector files while the other supervised students cutting their files at the laser cutter.  


Students quickly learned the following steps and were teaching each other the sequence of 
1. Submit SVG file to laser cutter using the Google Form (above).
2. Download their SVG file from the spreadsheet (Google form response) to computer controlling the laser cutter
3. Upload the SVG file to the Glowforge app. 
4. Order the cut layers so the inside cuts before the outside.
5. Change the setting to match the material in the laser cutter.
6. Use AutoFocus to measure depth of the material.
7. Press Print and check the estimated time to make sure it feels reasonable.
8. Make sure you have a fire buddy with spray bottle on standby, then press TEAL GO button on laser cutter.
9. Always supervise you cut. Never walk away from the laser cutter.
10. Wait for the laser cutter to cool down . Open Lid and remove your cut.


By the 2nd or 3rd iteration students felt confident with the sequence and  were independently switching materials between cardstock, cardboard, and draftboard as they revised their designs. 

It was amazing to watch the projects come to life as students safely used real world tools and developed the growth mindset necessary to iterate their way from prototype to a successful project. 

Stay tuned for three more posts that showcased the steps featuring each of the 3 project choices during this integrated  STEAM based MAKER residency.


Project options (paper circuit journal cover,  interactive constellation poster,  projection device) 


Subscribe to this blog or Sign up for our newsletter
to get notified of new post, new resources and tutorials or new events 

And if  you'd like to learn how to  design your own integrated STEAM infused project using creativity, circuits, & stories this summer, join me and other creative educators for a fun filled week of hands on learning at the Project Design Lab June 23 - 27 in Burlington Vermont.  (includes lodging and graduate credit)  


Thursday, March 27, 2025

Literature Inspired by The Night Sky

Imagine a classroom where  students are engaged with literature (both reading and writing) while actively designing circuits,  engineering projection device, and creating interactive displays to help an authentic audience more actively observe the night sky.  This is exactly what you would have witnessed last week if you had walked into Liam Gannon’s sixth grade classroom during our maker residency at  Newport City Elementary School

students learning through creating and making


In the week’s prior to the residency, I worked with local educators to design possibilities for STEAM integration that  included English Language Arts. After learning that the students were studying astronomy in science class and learning about The Greeks in their ELA class, I began to see all types of possibilities for interdisciplinary learning between science and ELA.. It was the perfect topic for a project based learning experience. 

  • The Night Sky theme combines science concepts with cultural storytelling
  • Constellations provide natural bridges between astronomy and mythology
  • The subject matter intrinsically motivates students through wonder and imaginationprior to the residency

After looking closely at both the science and language arts curriculum in this K to 6 school, I noticed that space  was a topic that students engaged with in grade 1, grade 3, grade 5 and grade 6.   This provided the perfect opportunity for our sixth grade students to have authentic audience for their hands on projects and lead to the following essential question. 


An additional goal of the project design was that we would introduce students to the school's new laser cutter. Therefore I designed three different project prototypes that would allow for some student voice and choice and also be a skill builder that would create confidence with this new tool for creating and making. 


Paper Circuit Journals:
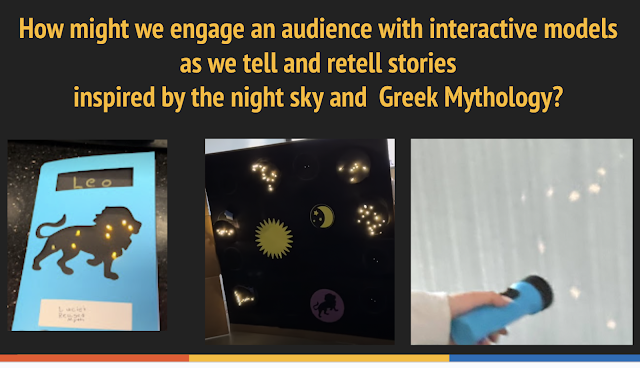
 Students create illuminated journals that literally shine light on constellation stories. By building parallel circuits and designing journal covers, they practice and review knowledge gained in 4th grade about energy, while exploring new astronomical knowledge and writing creatively. A student guide inquiry about constellation and retelling of myths  would be printed in booklet format to fit inside the journal cover. 


Projection Flashlight Design: An engineering challenge that asks students to create constellation projection devices using a flashlight and maker tools and supplies found in their classroom. This device would be used by younger students during a read-aloud of the picture book - "Usha and the Big Digger".


Interactive Constellation Displays: Students develop displays that combine visual, auditory, and interactive elements using circuits and code to communicate what they are learning about astronomy. This project would deepen understanding of energy from the 4th grade NGSS and include some engineering design options while building switches for interactivity with the circuits.  It would also introduce students to computer science through the use of Scratch to control a circuit board such as the Makey Makey. 


In future posts I will include tutorials and resources to help students and teachers create all three of these projects.  You can also create confidence in building each of these projects along or similar projects this summer during a fun filled week of hands on learning at the Project Design Lab June 23 - 27 in Burlington Vermont.  (includes lodging and graduate credit)  

 This post will focus on the curricular integration possibilities with science, research, reading, and writing. 

Curriculum Alignment 

 
In this district,  the  Next Generation Science Standards - .Space Systems: Stars and the Solar System is addressed in Grade 5 and 6.  

The project also allows students to review and apply the concepts learned during their 4th grade exploration of Energy. (Next Generation Science Standards- 4-PS3 Energy)

The district also uses the Amplify Learning - CKLA curriculum for English Language Arts.

As we kicked off our project, the sixth grade ELA classes were immersed in the CKLA-Grade 6 Curriculum Unit (The Greeks).  

This proved to be a great alignment as students explored the constellations in science class and read associated Greek myths, while learning all about Greek culture in their ELA classes.  This project also provides alignment possibilities with the CKLA-Grade 6 Curriculum  unit focused on Beginning StoryTelling   that kicks off in Grade 6. 


When we  noticed that the Space Theme was part of the Amplify Learning CKLA curriculum in Grade 1 and 3, we immediately saw an opportunity for the sixth graders to share their learning about the night sky with younger learners - both through reading aloud to their younger peers and engaging them with discussions about the night sky with their paper circuits,  projection devices, and interactive posters.


The following books were referenced throughout the projects. Some of these served as inspiration and reference books, while some were used by the sixth grade students as read alouds for their younger reading buddies.
  1. "Animals in the Sky" by Sarah Gillingham

    • Perfect for younger learners

    • Features 8 animal constellations with crisp, inspiring images

    • Ideal for guiding students in drawing their own constellations

  2. "Seeing Stars" by Sarah Gillingham

    • Comprehensive guide to all 88 constellations

    • Combines factual information with engaging stories and myths

    • Accessible for middle-grade students

  3. "Zodiac: Celestial Circle of the Sun" by Jacqueline Mitton

    • Beautifully illustrated by Christina Balit

    • Provides rich descriptions of constellation stories

    • Offers deep insights into Greek mythology

  4. "Zoo in the Sky" by Jacqueline Mitton

    • Another beautifully illustrated book by Mitton

    • Focuses on animal constellations

    • A top recommendation that students love to reference

  5. "Out of This World" by Sally M. Walker

    • Unique approach combining science and poetry

    • Features star-studded haiku that bring scientific concepts to life

    • Praised for making astronomical spaces feel personal

  6. "Our Stars" by Anne Rockwell

    • Explains the universe with bright pictures and simple text

    • Perfect for sparking curiosity in young learners

    • Accessible explanation of complex astronomical concepts

  7. "Usha and the Big Digger" by Amitha Jagannath Knight

    • Part of the Storytelling Math series

    • Introduces rotation, geometry, and spatial relationships

    • Features diverse characters and cultural perspectives

  8. "What We See in the Stars" by Kelsey Oseid

    • Combines art, mythology, and science

    • Over 100 original art pieces accompanying scientific facts

    • Covers constellations, planets, and celestial phenomena

    • Appeals to both young readers and adults rekindling their love of stargazing


Writing Opportunities

The project offers student choice with writing prompts for students who prefer creative writing as well as those who prefer non-fiction writing.


To scaffold the writing process we created this student guide to accompany the project.   This guide included guiding questions for reading fiction (associated myth). It then proceeds to scaffold summarizing and retelling the myth for a new audience. Finally it guides students through writing a new modern day version of the myth. This guide can  be printed in booklet format and inserted in the paper circuit journal cover created in science class. 


The power of learning through creating and making


I want to thank Newport City School for the opportunity to co-design a learning opportunity that invites students to see themselves as creators, storytellers, and explorers.

This project not only embodies the maker movement's core principle: learning is most powerful when students actively construct knowledge, but also
  • Encourages scientific curiosity
  • Develops storytelling skills
  • Fosters engineering thinking
  • Promotes collaborative learning


Ready to bring the creativity, circuits, and storytelling into your classroom? The universe is waiting.

Subscribe to this blog or Sign up for our newsletter
to get notified of new post, new resources and tutorials or new events 

And if  you'd like to learn how to  design your own integrated STEAM infused project using creativity, circuits, & stories this summer, join me and other creative educators for a fun filled week of hands on learning at the Project Design Lab June 23 - 27 in Burlington Vermont.  (includes lodging and graduate credit)