Monday, April 17, 2023

Registration open for Create Make Learn 2023


We are excited to announce that registration is now open for

Create Make Learn Summer Institute 2023.

Come celebrate our 10th year anniversary.


CREATE MAKE LEARN SUMMER INSTITUTE

Join us for the 2023 Create Make Learn Summer Institute.
July 10 - 14, 2023 in Bellows Falls, Vermont


Join the Strand that's right for you 
     from Newbie to more Advanced Learner

  • Getting Started with Creating and Making (for beginners)

  • Create Confidence with Creating, Making & Coding
    (
 for those with some previous experience)


Example session may include

  • Creative and Practical Problem Solving with 
Cardboard, Paper, and Loose Parts
  • Designing STEAM infused Literacy Projects
  • Make Media: Podcast & Green Screen Video Projects
  • Create Confidence with Circuits & Code
  • Design Thinking & Identity Projects in 2D & 3D
    (using 3D printers, Laser Cutters, Vinyl Cutters, etc)
  • Explore role of AI in Creating and Making

Complete and share a Meaningful Making Project applying your learning through design, creating, and making

Plan a curricular unit or school project where creating and making are central to learning goals and provide opportunities for students to develop growth or proficiency of Vermont Transferable Skills

Connect with peers that best meets your needs
PreK / Elementary /Middle School / High School


Wednesday, February 15, 2023

Growing Confidence with Cuttle, Circuit, & Cricut on Valentine Day

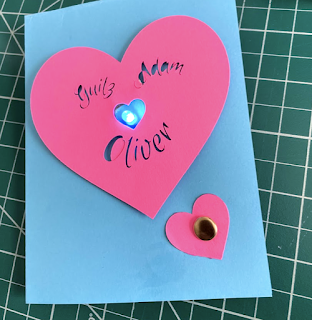
This Valentine's Day provided another opportunity for me to grow confidence with a new maker tool (Cuttle.xyz) and to create a project prototype that could  help teaches and students grow their confidence with circuits.

A few months ago I discovered Cuttle.xyz as a design tool that is accessible and affordable for students to create vector graphics that can be cut on laser cutters or electronic cutters (such as the Cricut or Silhouette Cutters).  Not only does it work on Chrome books, but the company has also signed Student Data Privacy agreements with schools in Vermont and other states.  This is a huge step towards and a commitment to increased equity in providing all students access to learning through creating and making. I've been searching for a vector tool that met those requirements for a long time.

The Cuttle Name SnowFlake Generator inspired me to make snowflake themed ornaments for people I love this Christmas.  This month their beautiful heart shaped box template inspired me to keep playing.  Since I did not have access to my laser cutter this month, I used my Cricut Maker to experiment further with Cuttle.xyz and used Valentines Day as an opportunity for create something for people I love and perhaps even fall in love with this new maker tool due to their commitment to education. 

 In this post, I'll share a simple project in hopes that it could help teachers and students grow confidence with

  • circuits and switches
  • designing and cutting out vector graphic software

I'll explain why I think Cuttle.xyz  is a must have tool for schools and why creating simple but beautiful projects with circuits and switches meets our UDL (Universal Design for Learning) goals as educators.


Here are the supplies you'll need to get started to create a light up Valentines Day Card.


coin cell battery
LED lights
copper tape
Brass Brad
Scotch Tape
Cardboard
Cardstock
Cutting tool (scissor or exacto knife)
pen/pencil
glue


This card can certainly be made by manually cutting out a colored heart out of card stock.

Since my goal was to gain confidence with Cuttle.xyz  as a vector design tool, I spent some time playing with different heart designs.  Check out this video or the steps next below to see  some features of Cuttle.xyz features I explored during this project.


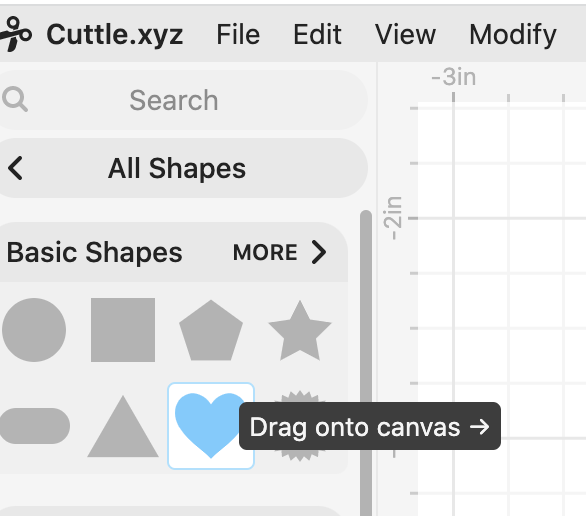
I started designing my Valentine by  by dragging out one of Cuttle's Built in Vector shapes.  


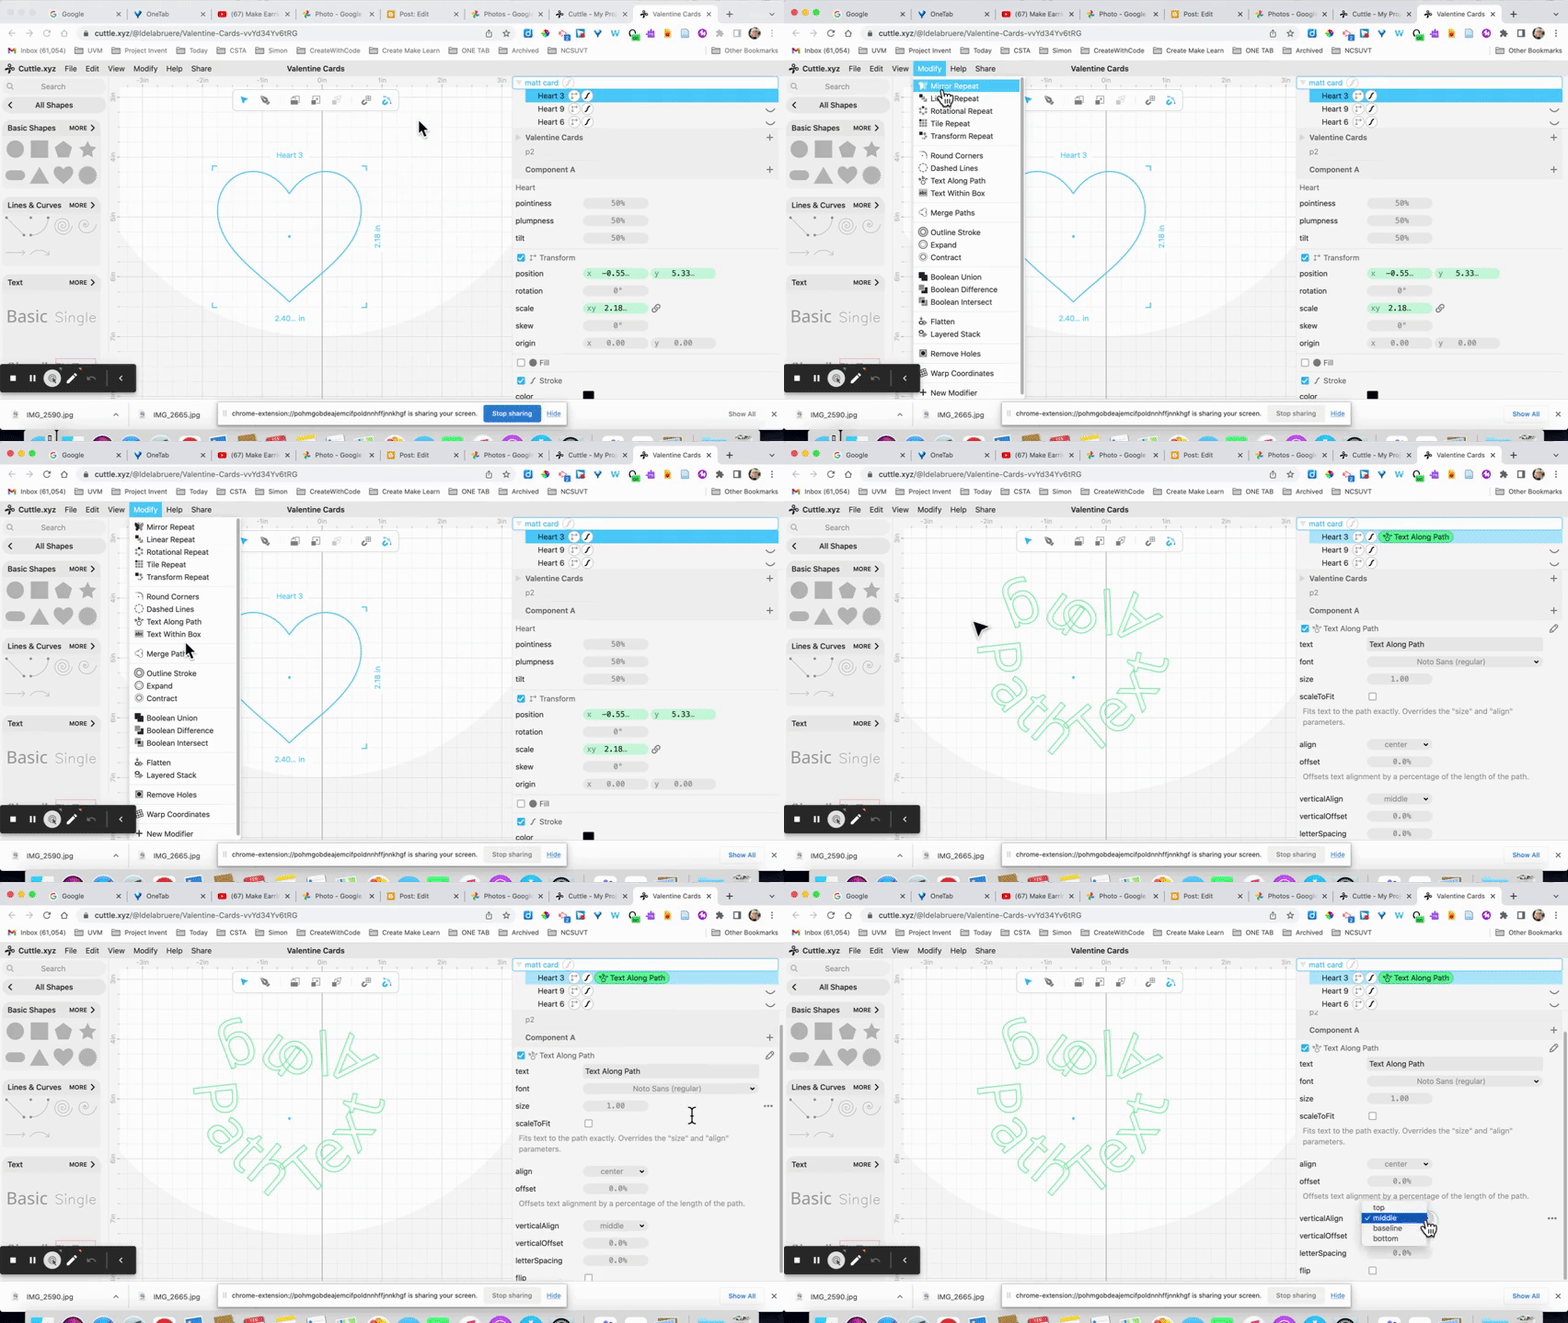
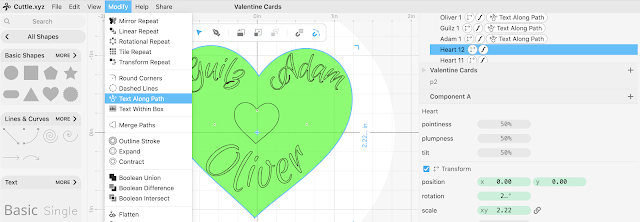
I used Cuttle.xyz's  Text Along Path Modifier to create different designs.
 I wanted to add the names of my grandchild (Julian)  and his two parents (Matt and Molly).

To use this feature, simply Select a Shape on your Canvas then Click on Modify and choose the Text Along Path modifier.


The shape will disappear and be replaced by the Words Text Along Path of your Shape
The shape will reappear when you hover over the image/shape
A box of parameters will appear along the right side of your screen for you to play with experiment with.


Explore the options in the right panel of the Text Along Path modifier.
Start by replacing the TEXT to the words you want and Changing the Font and Size of the font.
I loved that there are so many STENCIL fonts - which are mostly safe for cutting out text.  And Cuttle.xyz has some very fun one - Like this CODYSTAR option - which I settled on for my first design. 

You'll want to experiment with all the different parameters.


Experiment with the ALIGN feature and the Vertical ALIGN features, along with the FLIP checkbox.

The ALIGN tool will move. your TEXT around your Shape,  while the Vertical Align will move your text  to the outside, inside, or middle of the outline of your shape.   
The Flip checkmark will change the way the letters of your text are facing. 


 I would also suggest playing with The Vertical Offset and Letter Spacing. You  can also try adding spaces before or after your text to get a desired affect.


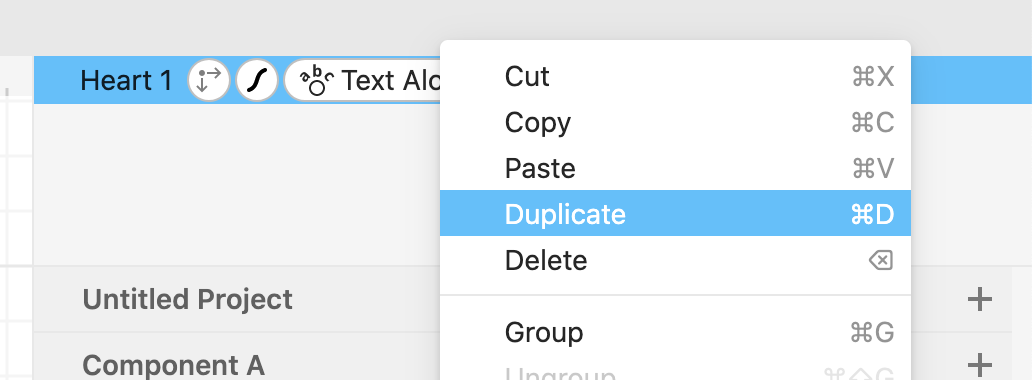
Since I wanted to add 3 different names to my heart, I simply right clicked on MY Heart in the right panel and chose duplicate 3 times.


I removed the Text Along Path Modifier from one of the Hearts to make it the part of the design that actually cuts out.


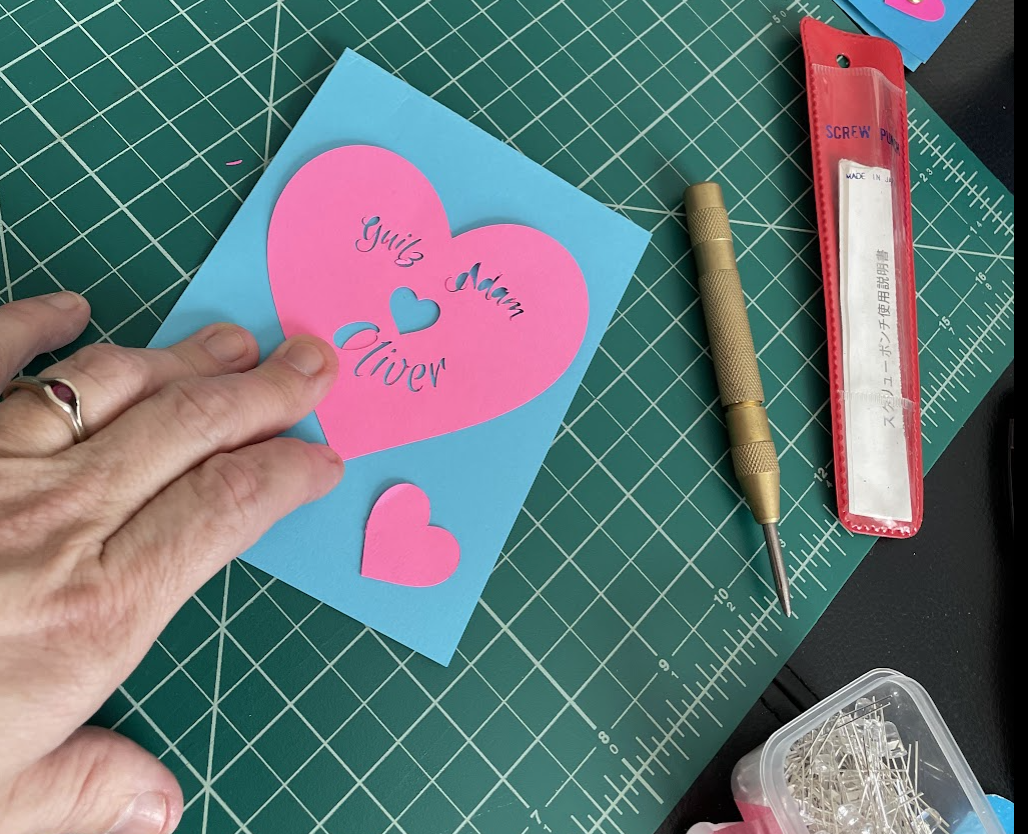
I played around with the different parameters of each of my HEARTS until I ended up with this design that included the names of my grandson and his parents.  


I also duplicated the outside heart and changed the size of it to end up with a cutout of a smaller heart inside my design.  This would make a great place for a light to shine though. 

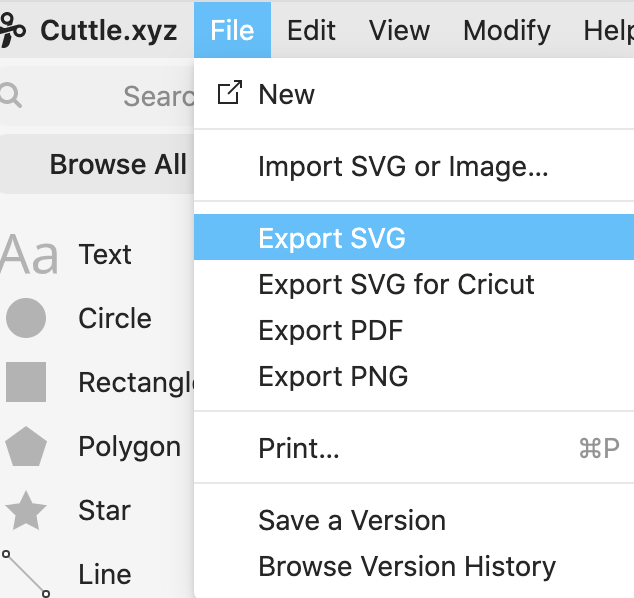
After I had the design just the way I wanted it, I exported it as an SVG. Cuttle.xyz has two different export features.  I did not experiment with the Export SVG for Cricut at this time. 


I soon found myself playing with new fonts and new designs for other family members.
There is just something about making for people you love that makes learning new skills so much fun.  


I imported the SVG files into my Cricut Design Space.  (If I had access to my laser cutter, I could have used that tool to play)


I, then cut out some fun Valentines designs for my grandchildren and their parents.


These cutouts were perfect for creating a paper circuit Valentine. 


I start by cutting a contrasting piece of card stock in half and folding each piece in half. 


Then I layout the design and with a sharp object like the a Japanese Screw punch I poked a hole where the LED light should go and where the BRAD that will serve as a Switch will poke through. 
(You can use a thumb tack, needle, or other sharp object.
 If working with younger students, you could use a golf tee) 


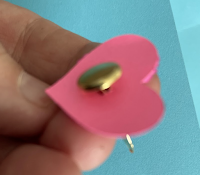
 Take the the small inner heart cutout and poke a metal brad through it. 
This will become our on/off switch. 


Insert a fun colored LED into the card where you'd like the light.
I happened to have some flickering multicolor LED's handy.
Insert the Brass Brad through the card where you'd like the switch.


Turn the card over.
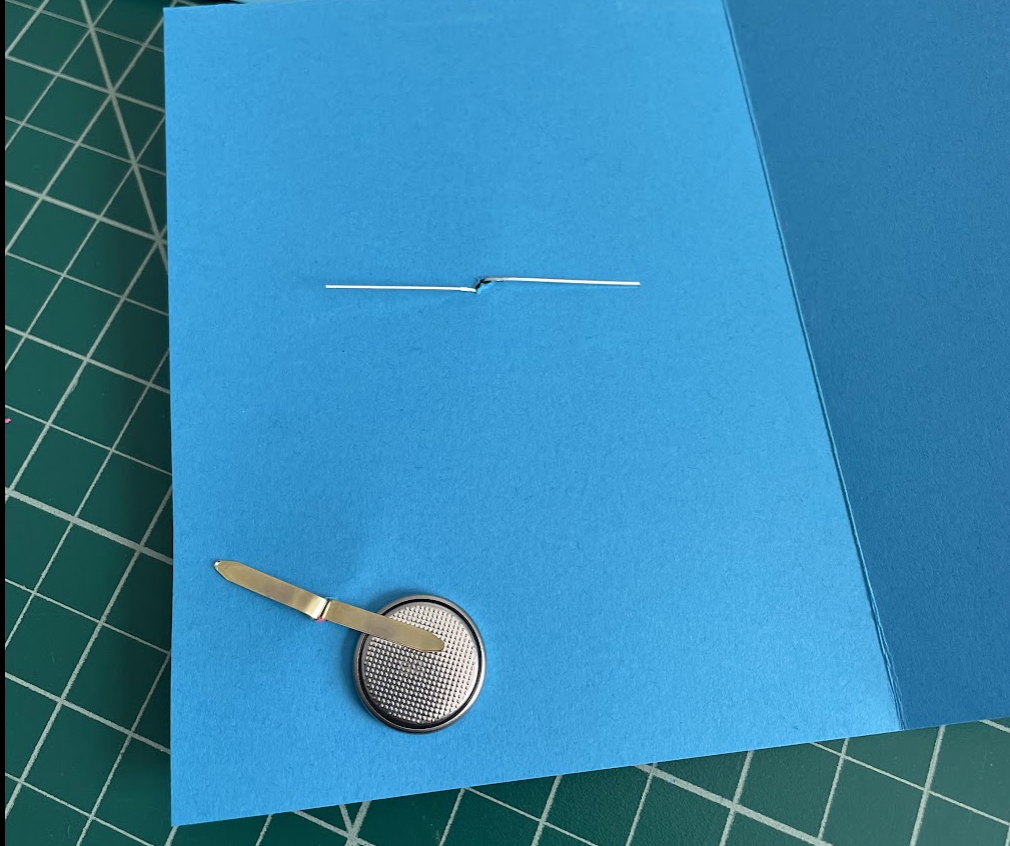
Spread the legs of the LED open.
I pointed the  Longer LED leg towards the inside of the card so I could easily keep track of which leg was positive and which was negative.

Spread the legs of the Brass Brad open.
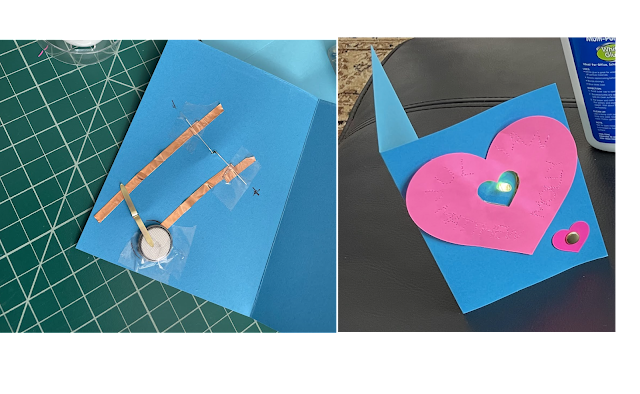
Place a coin cell battery face down under the leg of the LED towards the center of the card.

Trace around the battery.
Mark the circle with a + sign to remind yourself that the battery will be placed + side down.


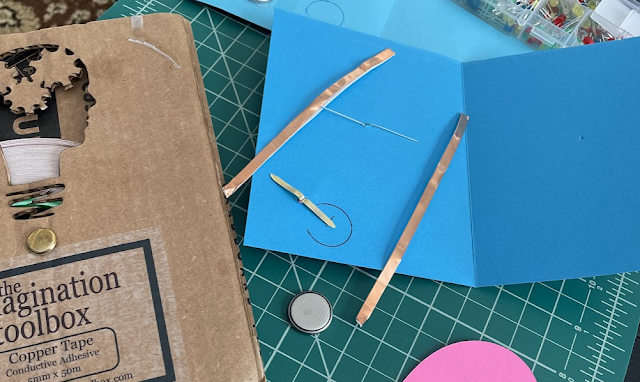
Cut two pieces of copper tape long enough to slide under the LED leg and reach under the BRAD Legs.  Leave a little extra copper tape towards the top of the card.
You will use that to double wrap the copper tape around the LED leg.

Remove the backing of the copper tape and lay down the copper tape on the cardstock.
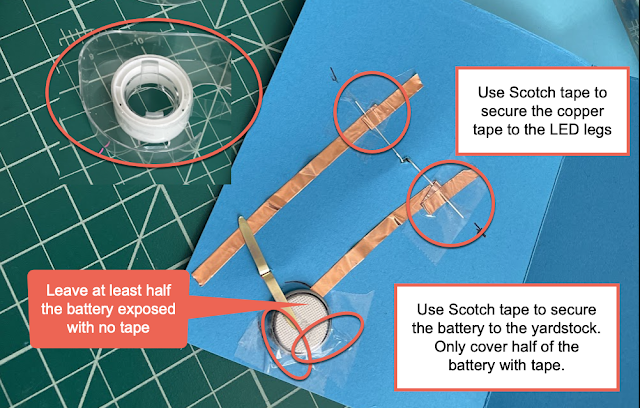
Make sure the copper tape shiny side makes as much contact with the LED legs as possible by
running it under the legs and coming back down over the leg and then back up.
This is not absolutely necessary, but it's my way to  add extra points of contact.
Paper Circuits sometimes lose their contact.


Secure the LED legs to the cardstock and copper tape with Scotch Tape.
Secure the battery with Scotch Tape, but only cover half the battery with tape.
The other half must remained exposed so the Brad legs can make contact with the battery directly. 


Voila. Your Paper Circuit is ready.


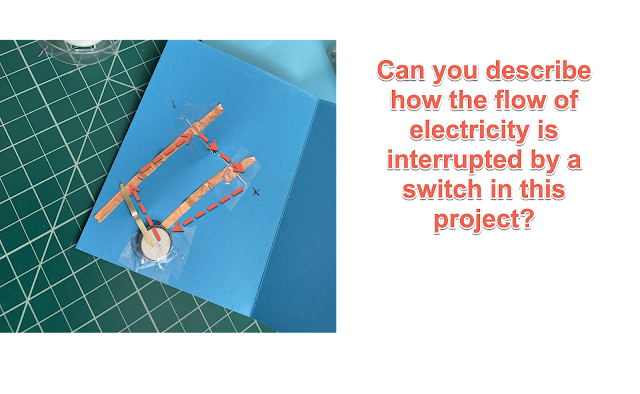
To turn off the the LED, simply turn the Little Heart with the Brass Brad slightly so that the end of the Brads lay over the TAPED part of the battery.
The Tape  acts as insulation and interrupts the circuit. . 
If the Brad falls off the battery simply manually put it back on.


What I love about this Simple Project is that it can engage students to create beautiful work and create for people they love.  Students are motivated to learn and demonstrate their understanding of circuit beyond traditional methods. Universal design for learning strategies are important in education.  Using this project we are offering multiple modes of representation, expression, and engagement for students learning about the flow of electricity.  

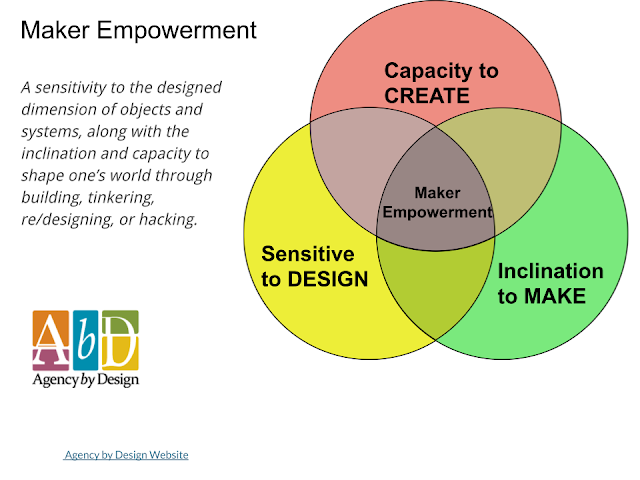
Students also leave with increased confidence in creating vector graphics which can be used in so many future endeavors.  Agency by Design offers this description of the type of  Maker Empowerment I've seen in students after completing projects like this. 


If you get inspired by this post to create and make something fun, please share them with me.
Twitter @techsavvygirl


Monday, January 30, 2023

Media Making Workshop Series


I'm super excited for my most recent collaboration with Vermont Rural Education Collaborative where we'll be offering a series of three 5-week session giving teachers the opportunity to create confidence with media-making tools as a vehicle for putting UDL and PBL into practice.


Putting UDL and PBL into Practice with Media Making

Design learning experiences that invite students to create their own special effects with videos, produce their own podcast episodes, and author their own interactive e-books. Experience the tools, process, and workflows that provide practical ways to implement elements of Universal Design for Learning (UDL) and Project Based Learning (PBL) in your instructional design.

Each session of this course will be offered online over 5 weeks with flexible asynchronous and some synchronous lab sessions via Zoom video conferencing offered on Wednesdays starting at 3:30 p.m. The first week starts with a 2-hour synchronous class session, followed by a one hour on-line module. 

  • Session 1: Producing Podcast Episodes with students 
    Feb 8, 15, 22, Mar 1, 8     (Workshop only) $300
  • Session 2 Creating Video Projects with students
    Mar 15, 22, 29, Apr 5, 12  (Workshop only) $300
  • Session 3 Authoring Interactive e-Books with students
    April 19, 26, May 3, 10, 17  (Workshop only) $300
  • Session 1, 2 & 3: Putting UDL and PBL Into Practice With Media Making
    February 8 – May 17
    $825 recertification only  ($75 savings)
    $1245 includes 3 graduate credits from St. Michaels College

More details in the syllabus.

You can also download a PDF flyer to share with friends and colleagues.


Wednesday, January 25, 2023

How I introduce Microbits?

 I was recently asked how I introduce a new technology like micro:bits to student, so I thought I might write a blog post with some of my thoughts about this.  


What is the micro:bit you ask? 


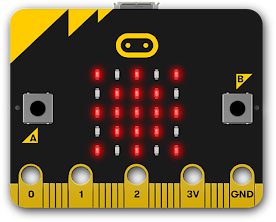
officialmicrobit image
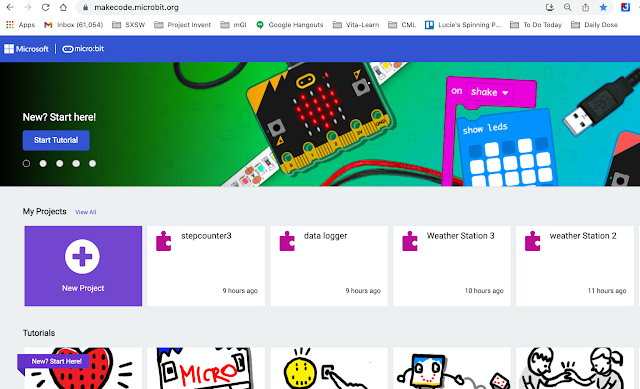
The BBC micro:bit is an inexpensive electronic circuit board designed for students to learn electronics and coding. It includes buttons and lights and sensors that lend themselves to creating amazing interactive projects. When a student connects the micro:bit to a computer with a USB cable, they can quickly program the board with new interactions using beginner-friendly code environments, such as Microsoft MakeCode.

Over the past few years, we’ve watched the popularity of micro:bit skyrocket in our educator community. The board’s rugged, yet friendly design holds up to repeated use and the curriculum developed by the Micro:bit Educational Foundation is top-notch and easy to implement.


 I've recently created this graphic to capture my pedagogical approach to learning through creating and making.  The framework has evolved from personal experience with teaching and learning and from the opportunity to learn with and from talented educators over the years. 


The INSPIRE phase is a time to explore something in a way that motivates the learner to create and make something meaningful. It is based on the belief that MOTIVATION is the foundation of all meaningful learning. There are several ways to create an activity that INSPIRES or motivates.   


One way that I introduce the micro:bit is by having students engage in a few rounds of Rock Paper Scissors.  This gets the whole class warmed up and thinking about fun.  It is a game that most learners are already familiar with so it connects to prior knowledge. 


Then I tell them that they are going to learn to create a fun wearable that can be used to play Rock Paper Scissors. 


Once a student is inspired, it is helpful to take some time to create confidence with new tools and processes.  I like to design some skill building sprints to build student confidence with a new tool or skill.


I love to introduce the micro:bit by teaching students how to create a Rock Paper Scissor bracelet.  
Not only does this activity lend itself well to learning to code and transfer data from your computer to the microbit, it also includes an opportunity for creativity in the way you design the bracelet.


I'll never forget the enthusiasm in one fifth grade students who approached me after class and said.  "That was hard.  It made my brain hurt. But I MADE A WEARABLE.  I can't wait to tell my mom." 

I especially like designing activities that lend themselves to cross-curricular integration.   I've picked up a few different books related to Rock Paper Scissors for students to dive into as well as a few web sites like this BBC News article: How to win at rock-paper-scissors

Here are just a few options for curricular integration.


During the Create Confidence phase,  I like to teach students how to learn on their own using the MAKE CODE tutorials. 


I encourage students to go through the DICE tutorial as it has so much potential for enrichment and expansion.  Once they understand how to navigate the various resources at their finger tips, they can  continue to grow their confidence on their own. 


Once students are starting to feel some creative confidence, it is time to challenge them to apply their skills and  MAKE SOMETHING MEANINGFUL. This can take on several forms.  I often refer to this list from a respected colleague, Michael Pope.


When preparing students to be successful in their meaningful project, Michael Pope, not only prepares them with skills using various technology, but he also prepares their mindset to experience the creative process and shares this graphic.


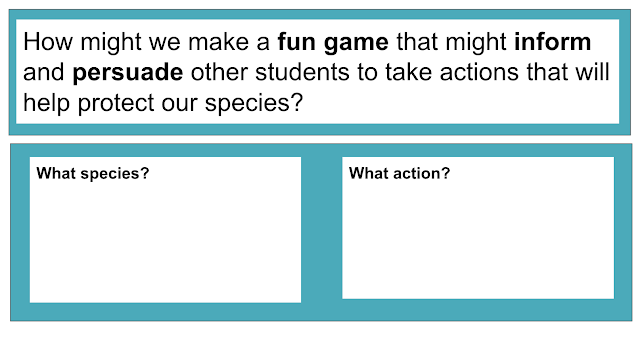
In a recent maker residency,  we offered the following prompt to  guide students into an INQUIRY LEARNING experience connected the EARTH DAY them Protect Our Species.  Students selected an endangered species and used an inquiry framework to complete research on that species. Then we challenged them to use their new micro:bit and coding skills  with the following prompt.


This provided many entry points for students to make something meaningful 
around a curricular theme.
Here are a few videos of students talking about their projects. 


One of the key components to introducing new technology is to use Design Thinking as part of your planning as an educator.  Consider the "humans" you are designing for and their needs.  What are their needs!  Ideate some possibilities!  Then prototype one of your ideas.  A maker residency is one of the ways you might prototype your design as an educator and test the prototype.  Then take the parts that work best and revise the rest. 

And for a peek into the whole design thinking residency we designed check out this video.


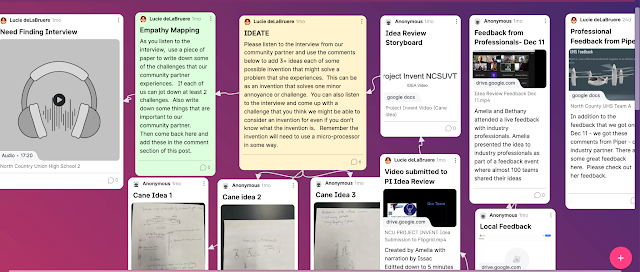
My commitment to Design Thinking lead me to Project Invent where we followed a similar approach with high school students using the micro:bit as our technology tool of choice. 


I love working with educators to design integrated thematic units and would welcome the opportunity to help your teachers think through the process (remotely or in real time) 
Contact me at ldelabruere @ gmail


Monday, January 16, 2023

WHY Create Beautiful Works with Media Making Tools


Today's world is filled with rich media --media that is being used to communicate, entertain, and persuade.  It makes sense that we would use it to teach children.  In my French speaking home, we certainly learned to speak English from the media that we watched on our television or the radio shows we listened to. 


I remember that our our high school had a full time audio visual department that rolled video cassette recorders, film strip projectors, and slide projectors with tape recorders into classrooms as instructional tools to help our teachers convey complex ideas.  


But probably the assignment that had the most impact on me in high school was the project we did creating our own multi-media slideshow in our Humanities class. I remember taking photos from books using a copy stand and having those converted to REAL slides that projected on the classroom wall in sync with the tape recorder playing the song "Bus Rider" by The Guess Who. 


Considering that this was in 1973, I would certainly describe my humanities teachers, Noel Ford and Maggie Griffith, as risk takers and  early adopters of educational technology and innovative teaching practices.  As a matter of fact, they are probably the reason I became a teacher.  And it was not because of the technology they used, but because they made me think deeply about everything.  I still refer to that class as my awakening as a learner. 

More than 50 years later, I am still a strong advocate of making media as a way to engage and empower students.  The tools we have to do this with no longer require a special AV room or special staff to roll them into our classroom. Today's tools allow us to design instruction using UDL strategies that allow students multiple modes of expression.  They allow us to provide instructional materials using multiple modes of representation, and they allow teachers to include multiple modes of engagement. 

Today's tools allow us to design instruction using UDL strategies that allow students multiple modes of expression.  They allow us to provide instructional materials using multiple modes of representation, and they allow teachers to include multiple modes of engagement. 

Using today's technology, a teacher can create multiple modes of representation by recording a podcast episode or making a movie that more clearly conveys a complex idea. They can combine the audio and video with text into an interactive e-book that students can access at school, at home, or even while riding the bus home. 

But even more exciting is that students, also, can also make media to create multiple modes of expression as they publish their own podcast, create their own movies, or author their own ebooks using tools that they carry in their pocket. 

And when you combine Universal Design for Learning with Project Based Learning design elements the possibilities for multiple modes of engagement expand even more.  


Media Making tools can provide student choice of several different public products to express their voice.  Students can create public products like Podcast, Videos, or interactive e-Books for authentic audiences.  They can collaborate as teams to dive into a sustained inquiry into a topic that interest them or a challenging problem or question.  The collaborative nature of today's media making tools like WeVideo, Canva, or Book Creator allow students to critique and revise their projects to create  what   Ron Berger calls Beautiful Works. 


But it takes more than digital tools to design powerful learning like those we see in in this Expeditionary Learning Project - Snakes Are Born This Way.  

Learn more about how this second grade classroom worked with  Ron Berger and Steve Seidel to achieve deeper learning goals and meet state standards while creating beautiful works in the form of a music video and interactive ebooks 


Berger: When I say “beautiful work,” people think aesthetically beautiful work. But I also think scientifically beautiful work, mathematically beautiful work—it can be in any field. Sometimes beautiful work is acts of courage and kindness and contribution to the world. Civic action can be beautiful work, artistic expression can be beautiful work, scientific ideas can be beautiful work.


I'm excited for my latest collaboration with Vermont Rural Education Council where educators can gain the creative confidence they need to make media by producing podcast, make movies with green screen and other special effects, and publish interactive e-books and apply their new skills to the design of instructions that uses Universal Design for Learning strategies and design elements for Project Based Learning.